Having trouble with your audio after a Windows update? Here’s how to fix it.
Preliminary Steps
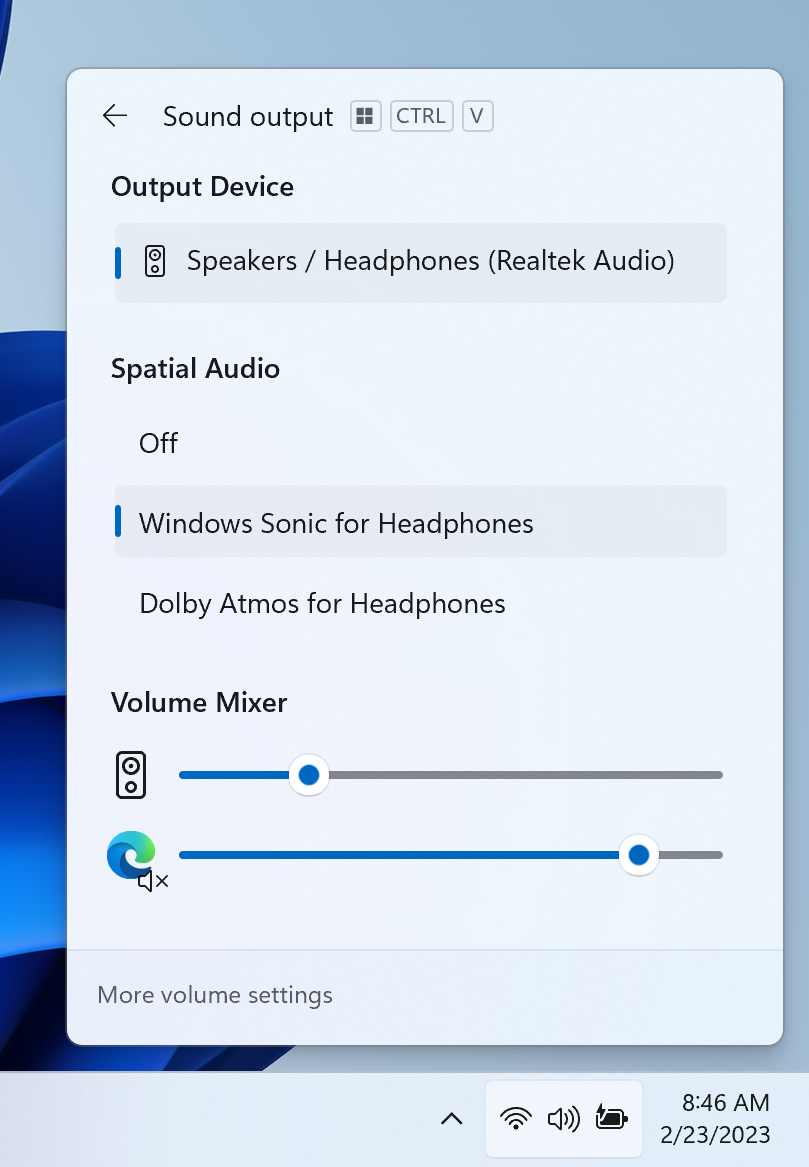
1. Check the volume settings: Make sure the volume is not muted or set too low. Right-click on the volume icon in the taskbar and select “Open Volume Mixer.” Ensure that the volume sliders for all applications are turned up.
2. Restart your computer: Sometimes, a simple restart can resolve audio issues caused by temporary glitches or conflicts. Restart your computer and check if the audio problem persists.
3. Update audio drivers: Outdated or incompatible audio drivers can cause audio problems. Open the Device Manager by pressing the Windows key + X and selecting “Device Manager.” Expand the “Sound, video, and game controllers” section, right-click on your audio device, and select “Update driver.” Follow the on-screen instructions to install the latest drivers.
4. Run the Windows Audio Troubleshooter: Windows 10 has a built-in troubleshooting tool that can automatically detect and fix common audio problems. Press the Windows key + I to open the Settings app, go to “Update & Security,” and select “Troubleshoot.” Under “Get up and running,” click on “Playing audio” and then click “Run the troubleshooter.”
5. Disable audio enhancements: Some audio enhancements or effects can interfere with the proper functioning of audio devices. Right-click on the volume icon in the taskbar and select “Sounds.” Go to the “Playback” tab, select your audio device, and click on “Properties.” In the Enhancements tab, check the box that says “Disable all enhancements” and click “Apply” to save the changes.
6. Check for conflicting applications: Certain applications or services, such as antivirus software or firewall programs, can sometimes interfere with audio playback. Temporarily disable these applications and check if the audio problem is resolved. Remember to re-enable them after troubleshooting.
7. Uninstall recent updates or plugins: If the audio problem started after a recent Windows update or the installation of a plugin, it may be causing the issue. Press the Windows key + I to open the Settings app, go to “Update & Security,” and select “Windows Update.” Click on “View update history” and then on “Uninstall updates.” Locate the recent update and uninstall it. Similarly, if you recently installed any audio-related plugins, try uninstalling them and check if the problem is resolved.
Understanding Sound Issues Post-Update

After updating Windows, you may encounter sound issues on your computer. These issues can range from no sound at all to distorted or low-quality audio. Here are some steps you can take to fix these problems:
1. Check your volume settings: Make sure that your volume is not muted or set too low. Click on the speaker icon in the taskbar and adjust the volume slider accordingly.
2. Update your audio drivers: Outdated or incompatible audio drivers can cause sound problems. To update your drivers, go to the manufacturer’s website and download the latest drivers for your audio device. Alternatively, you can use a driver update tool to automatically update your drivers.
3. Restart the Windows Audio Service: Sometimes, the Windows Audio Service may stop working after an update. To restart it, follow these steps:
– Press Windows key + R to open the Run dialog box.
– Type “services.msc” and press Enter.
– Scroll down to find “Windows Audio” in the list of services.
– Right-click on it and select “Restart.”
4. Run the audio troubleshooter: Windows has a built-in audio troubleshooter that can help identify and fix common sound issues. To run the troubleshooter, follow these steps:
– Press Windows key + I to open the Settings app.
– Click on “Update & Security” and then select “Troubleshoot” from the left menu.
– Under “Find and fix other problems,” click on “Playing Audio.”
– Click on “Run the troubleshooter” and follow the on-screen instructions.
5. Check for third-party software conflicts: Some antivirus or firewall software can interfere with your audio settings. Temporarily disable any third-party security software and check if the sound issues persist. If the problem is resolved, consider updating or replacing the software with a compatible alternative.
6. Test different audio devices: If you’re using headphones or external speakers, try connecting them to a different audio port on your computer. Additionally, test them on another device to rule out any hardware issues.
7. Roll back the audio driver: If you recently updated your audio driver and started experiencing sound problems, you can try rolling back to the previous version. To do this:
– Press Windows key + X and select “Device Manager.”
– Expand the “Sound, video and game controllers” category.
– Right-click on your audio device and select “Properties.”
– Go to the “Driver” tab and click on “Roll Back Driver” if available.
Remember to restart your computer after performing any troubleshooting steps to ensure the changes take effect.
Verifying Volume Settings
To verify volume settings on Windows after an update, follow these steps:
1. Right-click on the speaker icon in the taskbar, located in the bottom right corner of your screen.
2. From the context menu, select “Open Volume Mixer”. This will open the Volume Mixer window.
3. In the Volume Mixer, you will see various sliders for different applications and devices. Make sure that the volume sliders for the desired output devices, such as speakers or headphones, are not muted or set to a very low level. Adjust the sliders as needed by dragging them up or down.
4. Additionally, check the volume settings within the specific application or program you are using. Some applications have their own volume controls, which may be separate from the system volume.
5. If you are using external speakers or headphones, ensure that they are properly connected and powered on. Sometimes, incorrect or loose connections can result in no sound or low volume.
6. If the volume settings appear to be correct but you still have audio problems, try restarting your computer. This can help to resolve any temporary glitches or conflicts that may be affecting the sound.
7. It’s also worth checking if you have any third-party antivirus or firewall software installed. These programs can sometimes interfere with audio settings. Temporarily disabling them or adding exceptions for your audio-related applications can help troubleshoot the issue.
8. Lastly, if none of the above steps resolve the audio problem, you may consider updating or reinstalling the audio drivers on your system. To do this, right-click on the Start button and select “Device Manager”. Expand the “Sound, video and game controllers” category, right-click on your audio device, and choose “Update driver” or “Uninstall device” followed by a restart. Windows should automatically reinstall the driver, or you can download the latest driver from the manufacturer’s website.
Activating Playback Devices
To activate playback devices after a Windows update, follow these steps:
1. Press the Windows key + X on your keyboard and select “Device Manager” from the menu. This will open the Device Manager window.
2. In the Device Manager window, scroll down and locate the “Sound, video and game controllers” category. Expand it by clicking on the arrow next to it.
3. Right-click on the audio device you want to activate and select “Enable” from the context menu. If you don’t see your audio device listed, try right-clicking on any device in the list and selecting “Scan for hardware changes.” This will refresh the device list and may make your audio device appear.
4. After enabling the audio device, close the Device Manager window.
5. Right-click on the sound icon in the taskbar (usually located in the bottom right corner of the screen) and select “Open Sound settings” from the menu.
6. In the Sound settings window, scroll down to the “Output” section and click on the drop-down menu to select the desired output device. If you have multiple output devices, such as speakers or headphones, choose the appropriate one.
7. Test the audio playback by playing a sound or video. If you can hear the audio, then the playback device is successfully activated. If not, try selecting a different output device and test again.
8. If you are still experiencing audio problems, you can try updating the audio driver. To do this, go back to the Device Manager window (step 1) and right-click on the audio device. Select “Update driver” and follow the on-screen instructions to update the driver.
Remember to check if your Windows Firewall or antivirus software is blocking the audio playback. Temporarily disabling them or adding an exception for the audio application may solve the issue. Additionally, make sure that the volume slider is not muted or set too low in the sound settings.
Audio File Repair Solutions

1. Check Audio Settings: Make sure that the audio settings on your Windows device are properly configured. Go to the sound settings by clicking on the speaker icon in the taskbar and adjust the volume levels accordingly.
2. Update Audio Drivers: Outdated or incompatible audio drivers can cause audio problems. To fix this, update your audio drivers to the latest version. You can do this by visiting the manufacturer’s website and downloading the appropriate drivers for your device.
3. Run the Audio Troubleshooter: Windows 10 comes with a built-in audio troubleshooter that can automatically detect and fix common audio issues. To run the troubleshooter, go to the Settings menu, click on “Update & Security,” then select “Troubleshoot” and choose “Playing Audio.” Follow the on-screen instructions to complete the troubleshooting process.
4. Disable Enhancements: Some audio enhancements can interfere with the normal functioning of your audio device. To disable them, right-click on the speaker icon in the taskbar, select “Playback devices,” choose your audio device, click on “Properties,” and navigate to the “Enhancements” tab. Check the box that says “Disable all enhancements” and click “Apply” to save the changes.
5. Check for Windows Updates: Microsoft frequently releases updates that include bug fixes and improvements for audio-related issues. Make sure your Windows device is up to date by going to the Settings menu, selecting “Update & Security,” and clicking on “Check for updates.” Install any available updates and restart your device if necessary.
6. Reset Audio Services: Sometimes, restarting audio services can help resolve audio problems. Open the Run dialog by pressing the Windows key + R, type “services.msc,” and hit Enter. In the Services window, locate “Windows Audio” and “Windows Audio Endpoint Builder.” Right-click on each of them and select “Restart.”
Rebooting Strategy

If you are experiencing audio problems after a Windows update, rebooting your strategy can help resolve the issue. Here are some steps you can follow to fix Windows audio problems after an update:
1. Check your audio settings: Start by checking your audio settings to ensure they are properly configured. Right-click on the Volume icon in the taskbar and select “Open Sound settings.” Make sure the correct playback device is selected and adjust the volume levels if necessary.
2. Restart your audio services: Sometimes, restarting the audio services can resolve audio problems. Press the Windows key + R to open the Run dialog box, then type “services.msc” and press Enter. Look for the Windows Audio and Windows Audio Endpoint Builder services, right-click on each one, and select “Restart.”
3. Update or reinstall audio drivers: Outdated or faulty audio drivers can cause audio problems. To update your drivers, right-click on the Start menu and select “Device Manager.” Expand the “Sound, video, and game controllers” category, right-click on your audio device, and select “Update driver.” If updating doesn’t work, you can try uninstalling the driver and then restarting your computer to automatically reinstall it.
4. Run the Audio Troubleshooter: Windows includes a built-in Audio Troubleshooter that can help identify and fix common audio problems. Press the Windows key + I to open the Settings app, then go to “Update & Security” and select “Troubleshoot.” Click on “Playing Audio” and follow the instructions provided by the troubleshooter.
5. Disable audio enhancements: Some audio enhancements or effects can interfere with the proper functioning of your audio. Right-click on the Volume icon in the taskbar and select “Open Sound settings.” Scroll down to the “Related settings” section and click on “Sound Control Panel.” In the Playback tab, select your audio device and click on the “Properties” button. Go to the “Enhancements” tab and check the box next to “Disable all enhancements.” Click OK to save the changes.
6. Perform a system restore: If none of the above solutions work, you can try restoring your computer to a previous point in time when the audio was working fine. Press the Windows key + R to open the Run dialog box, then type “rstrui” and press Enter. Follow the on-screen instructions to select a restore point and restore your system.
Utilizing Windows Troubleshooting
![]()
If you are experiencing audio problems after a Windows update, you can utilize Windows Troubleshooting to help resolve the issue. Here are some steps to follow:
1. First, open the Windows Troubleshooting tool. You can do this by clicking on the Start menu and typing “Troubleshoot” in the search bar. Then, select “Troubleshoot settings” from the results.
2. In the Troubleshoot settings, scroll down and click on “Additional troubleshooters”. This will open a list of troubleshooting options.
3. Look for the “Playing Audio” troubleshooter and click on it. This troubleshooter is designed specifically to fix audio problems.
4. Click on the “Run the troubleshooter” button to start the troubleshooting process. Windows will now scan for any issues with your audio settings and attempt to fix them.
5. Follow the on-screen instructions provided by the troubleshooter. It may ask you to perform certain actions or make changes to your audio settings.
6. If the troubleshooter is unable to fix the problem, it may provide you with some suggestions or recommendations. Take note of these suggestions and try implementing them manually.
7. If all else fails, you can try reinstalling the audio driver. To do this, press the Windows key + X on your keyboard and select “Device Manager” from the menu that appears.
8. In the Device Manager window, locate the “Sound, video and game controllers” category and expand it. Right-click on your audio device and select “Uninstall device”. Make sure to check the box that says “Delete the driver software for this device” before clicking on “Uninstall”.
9. After uninstalling the audio driver, restart your computer. Windows will automatically reinstall the driver upon startup.
10. If the audio problem persists, you may need to seek further assistance from Microsoft support or consider contacting the manufacturer of your audio device.
Managing Audio Drivers
1. Check for driver updates: To fix audio problems after a Windows update, you may need to update your audio drivers. Go to the manufacturer’s website of your audio device and download the latest driver version. Install it on your computer to ensure compatibility with the updated Windows version.
2. Rollback or uninstall the audio driver: If updating the driver doesn’t resolve the issue, you can try rolling back to the previous driver version. To do this, follow these steps:
– Press the Windows key + X and select Device Manager.
– Expand the “Sound, video, and game controllers” section.
– Right-click on your audio device and select Properties.
– Go to the Driver tab and click on “Roll Back Driver” or “Uninstall Device” to remove the current driver.
3. Reinstall the audio driver: After uninstalling the driver, you can reinstall it to ensure a fresh installation. To do this, follow these steps:
– Press the Windows key + X and select Device Manager.
– Expand the “Sound, video, and game controllers” section.
– Right-click on your audio device and select Properties.
– Go to the Driver tab and click on “Update Driver” or “Scan for hardware changes” to reinstall the audio driver.
4. Use Windows Troubleshooter: Windows includes a built-in troubleshooter that can automatically detect and fix common audio problems. To use it, follow these steps:
– Press the Windows key + I to open the Settings app.
– Click on “Update & Security” and select “Troubleshoot” from the left-hand side menu.
– Under “Find and fix other problems,” click on “Playing Audio” and then click on “Run the troubleshooter.”
5. Change audio settings: Sometimes, incorrect audio settings can cause problems. To adjust your audio settings, follow these steps:
– Right-click on the speaker icon in the system tray and select “Open Sound settings.”
– Under the “Output” or “Input” section, select the correct audio device from the dropdown menu.
– Adjust the volume levels using the slider or check if the device is muted.
Remember to restart your computer after making any changes to ensure that the changes take effect.
Resetting Windows Audio Service
To reset the Windows Audio Service, follow these steps:
1. Press the Windows key + R on your keyboard to open the Run dialog box.
2. Type “services.msc” and press Enter. This will open the Services window.
3. Scroll down and locate “Windows Audio” in the list of services.
4. Right-click on “Windows Audio” and select “Properties” from the context menu.
5. In the Properties window, make sure the “General” tab is selected.
6. Click on the “Stop” button to stop the service.
7. Wait for a few seconds, then click on the “Start” button to restart the service.
8. Click “OK” to save the changes.
This will reset the Windows Audio Service and can help resolve audio problems after a Windows update.
If the issue persists, you may also try updating your audio drivers. To do this, follow these steps:
1. Press the Windows key + X on your keyboard and select “Device Manager” from the menu.
2. In the Device Manager window, expand the “Sound, video and game controllers” category.
3. Right-click on your audio device (e.g., “Realtek High Definition Audio”) and select “Update driver” from the context menu.
4. Choose the option to automatically search for updated driver software.
5. Follow the on-screen instructions to complete the driver update process.
If updating the audio drivers doesn’t resolve the issue, you can also try uninstalling and reinstalling the audio device:
1. Follow steps 1 to 3 from the previous section to open Device Manager.
2. Right-click on your audio device and select “Uninstall device” from the context menu.
3. When prompted, check the box to delete the driver software for this device.
4. Click “Uninstall” to remove the audio device.
5. Restart your computer.
6. After restarting, Windows will automatically reinstall the audio device with the default drivers.
These steps should help you reset the Windows Audio Service and troubleshoot audio problems after a Windows update.
Frequently Asked Questions
Does Windows Update affect sound?
Yes, Windows Update can affect sound on your computer.
Why did my audio stop working after updating drivers?
Your audio may have stopped working after updating drivers because the new drivers may be incompatible or not properly installed. Reinstalling the audio driver on your PC is the recommended solution.
Why is my audio not working after Windows 11 update?
Your audio may not be working after a Windows 11 update due to an outdated driver. To resolve the issue, update your device’s driver to the latest version that is compatible with your computer. Start by launching Device Manager on your PC.
How do I fix the sound after Windows Update?
To fix the sound after a Windows Update, you can try the following steps:
– Use Device Manager to update or reinstall the audio driver.
– Make sure the correct audio device is set as the default.
– Turn off Audio Enhancements.
