Are you encountering the CLR20R3 error on your Windows 7 system? Let’s explore some effective solutions to fix this issue quickly.
Update or Reinstall .NET Framework
![]()
To fix the CLR20R3 error on Windows 7, you may need to update or reinstall the .NET Framework. Follow these steps to resolve the issue:
1. Open the Control Panel by clicking on the Start button and typing “Control Panel” in the search bar. Then, click on the Control Panel app to open it.
2. In the Control Panel, click on “Programs” or “Programs and Features,” depending on your view settings.
3. Look for “Microsoft .NET Framework” in the list of installed programs. If you see multiple versions, make sure to uninstall all of them.
4. To uninstall the .NET Framework, select it from the list and click on the “Uninstall” button. Follow the on-screen instructions to complete the uninstallation process.
5. Once you have uninstalled the .NET Framework, go to the official Microsoft website and download the latest version of the .NET Framework that is compatible with your version of Windows 7.
6. After downloading the .NET Framework installer, run the setup file and follow the on-screen instructions to install it on your computer.
7. Once the installation is complete, restart your computer to apply the changes.
8. After restarting, check if the CLR20R3 error is resolved. If not, you may need to further troubleshoot the issue by checking for other possible causes, such as corrupted system files or conflicting software.
Remember to perform regular system maintenance tasks, such as running CHKDSK to scan for and fix file system errors, and cleaning up the Windows Registry using a reliable registry cleaner tool. These steps can help ensure the stability and performance of your Windows 7 system.
Run Programs in Compatibility Mode
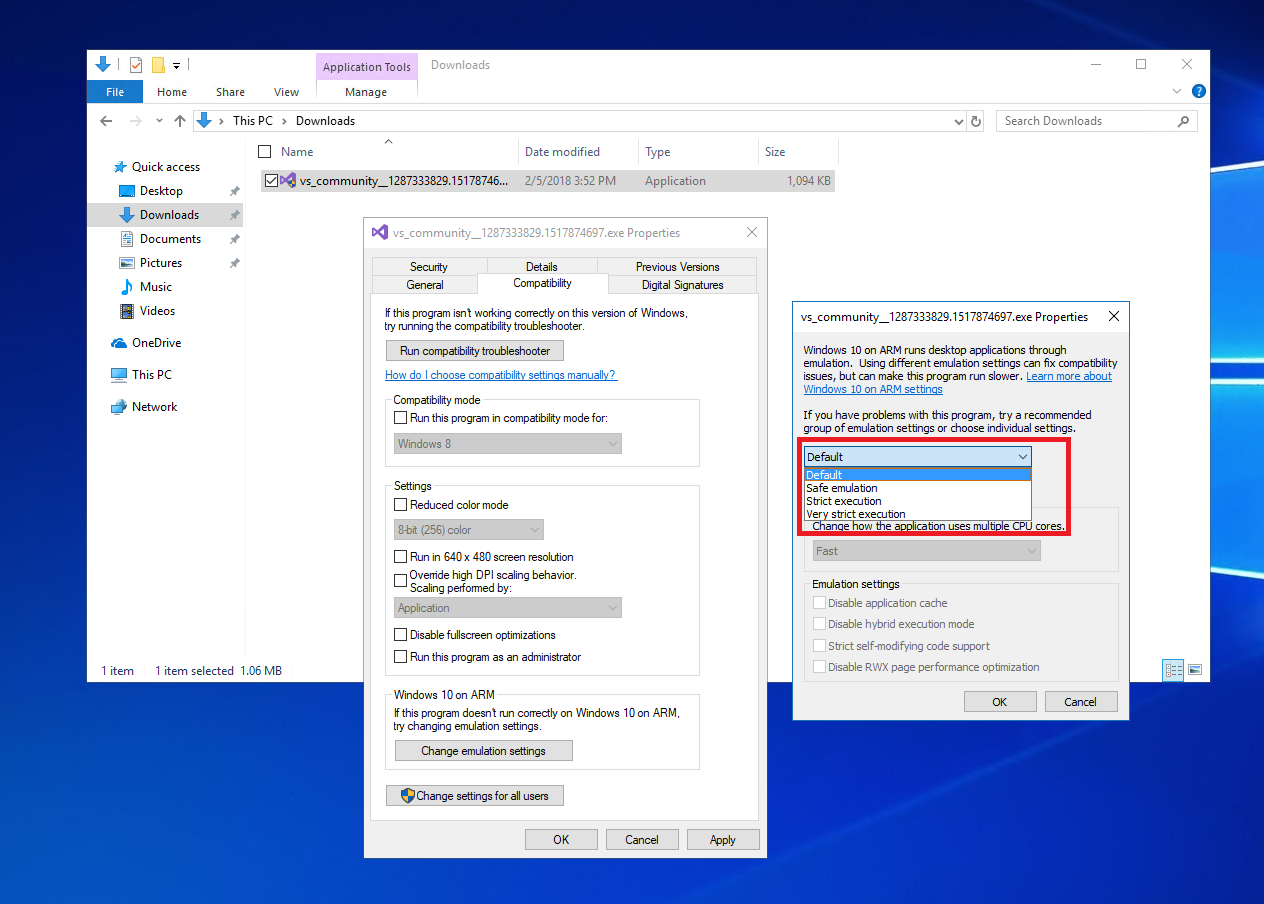
To run a program in compatibility mode, follow these steps:
1. Right-click on the program’s shortcut or executable file.
2. Select “Properties” from the context menu.
3. In the Properties window, navigate to the “Compatibility” tab.
4. Check the box that says “Run this program in compatibility mode for:”
5. From the drop-down menu, select the operating system that the program was designed for or a previous version of Windows that you know the program is compatible with.
6. Click “Apply” and then “OK” to save the changes.
Running a program in compatibility mode can help emulate the conditions of an older operating system, allowing the program to function properly on Windows 7.
It’s important to note that not all programs will have compatibility mode options, and it may not always solve the CLR20R3 error. If compatibility mode does not resolve the issue, you may need to explore other troubleshooting steps.
Some other potential solutions for the CLR20R3 error include:
– Running a CHKDSK scan to check for any errors on your hard drive.
– Checking the Windows Registry for any issues related to the program.
– Reinstalling or updating any necessary dynamic-link library (DLL) files that the program relies on.
– Using the Command-line interface to run specific commands or diagnostic tools.
– Updating your version of Microsoft Windows to the latest available version.
– Checking for any conflicting keyboard or file associations that may be causing the error.
– Using Cmd.exe to execute specific commands or scripts related to the program.
– Checking the Control Panel for any settings or options that may be affecting the program.
– Uninstalling and reinstalling the program, making sure to use a proper uninstaller if available.
Address Corrupted System Files and Media Components
- Run the System File Checker tool to scan and repair corrupted system files:
- Open the Command Prompt as an administrator by clicking on the Start button, typing cmd, right-clicking on Command Prompt, and selecting Run as administrator.
- In the Command Prompt window, type sfc /scannow and press Enter.
- The System File Checker will now scan your system for corrupted files and attempt to repair them automatically. This process may take some time, so be patient.
- Once completed, restart your computer and check if the CLR20R3 error is resolved.
- Perform a clean boot to identify and disable conflicting software:
- Press the Windows key and type msconfig.
- Click on the System Configuration program in the search results to open it.
- In the General tab, select the Selective startup option.
- Uncheck the box next to Load startup items.
- Go to the Services tab and check the box next to Hide all Microsoft services.
- Click on Disable all to disable all non-Microsoft services.
- Click Apply and then OK.
- Restart your computer and check if the CLR20R3 error still occurs. If not, gradually enable the disabled services one by one to identify the conflicting software.
- Reinstall or update media components:
- If the CLR20R3 error is related to media components, such as DirectX or .NET Framework, try reinstalling or updating them.
- Visit the official website of the respective component (e.g., Microsoft for .NET Framework) and download the latest version or update.
- Follow the installation instructions provided by the component’s website to reinstall or update it.
- Restart your computer and check if the CLR20R3 error is resolved.
Frequently Asked Questions
What is event name CLR20r3?
event name CLR20r3 is a common error that occurs in Windows when there is an issue with the .NET Framework.
