Having trouble with Microsoft DLL problems? Here’s a quick guide to fix them.
Introduction to DLL File Issues
DLL file issues can cause various problems on your computer, including error messages, crashes, and software failures. These issues can occur due to corruption, infection, or other factors. Fortunately, there are ways to fix DLL problems and restore your computer’s functionality.
One solution is to use the System File Checker tool, which is built into Windows. This tool scans your system for corrupted or missing DLL files and replaces them with a fresh copy from the Windows installation files. To use the System File Checker:
1. Press the Windows key + R to open the Run dialog box.
2. Type “sfc /scannow” (without quotes) and press Enter.
3. Wait for the scan to complete and follow any on-screen instructions.
Another option is to use a registry cleaner tool. The Windows Registry is a database that stores important settings and information for your operating system and software. Over time, the registry can become cluttered and corrupted, leading to DLL errors. A registry cleaner can scan and fix these issues automatically.
If you recently made changes to your system or installed new software, you can try using System Restore to revert your computer back to a previous state. This can help undo any changes that may have caused DLL problems.
You can also check for updates and patches for your operating system and software. Manufacturers often release updates to fix bugs and compatibility issues, including problems with DLL files. Visit the Microsoft website or the official website of the software you’re experiencing issues with to download and install these updates.
If all else fails, you may need to reinstall the software that’s giving you DLL errors. Uninstall the program, restart your computer, and then download the latest version from the official website or Microsoft Store.
Symptoms and Detection
When encountering a Microsoft DLL problem, it is important to identify the symptoms and detect the issue accurately. Here are some common signs to look out for:
1. Error Messages: Pay attention to any error messages that appear on your screen. These messages often provide valuable information about the specific DLL file causing the problem.
2. System Instability: If your computer experiences frequent crashes, freezes, or sudden system shutdowns, it could be a result of a DLL problem. These issues can disrupt your workflow and cause frustration.
3. Missing or Corrupted Files: If you notice missing or corrupted files on your computer, it may indicate a DLL problem. This can manifest as missing icons, distorted graphics, or error messages when opening certain programs.
4. Slow Performance: A DLL problem can slow down your computer’s performance significantly. If you notice a significant decrease in speed or longer loading times for programs, it could be due to DLL issues.
To detect and fix Microsoft DLL problems effectively, follow these steps:
1. Run a System Scan: Use a reliable antivirus or anti-malware program to scan your computer for any infections or malware that may be causing DLL errors. Remove any threats detected.
2. Check for Windows Updates: Ensure that your operating system is up to date with the latest patches and service packs. This can help resolve compatibility issues and improve the overall stability of your system.
3. Use System Restore: If you recently installed new software or made changes to your system settings, try using the System Restore feature to revert your computer back to a previous working state. This can help undo any changes that may have caused the DLL problem.
4. Reinstall the Problematic Program: If the DLL error is specific to a particular program, try uninstalling and reinstalling it. This process can replace any missing or corrupted DLL files associated with the program.
5. Seek Professional Help: If you are unable to fix the DLL problem on your own, consider contacting Microsoft support or seeking assistance from a professional technician. They have the knowledge and expertise to diagnose and resolve complex DLL issues.
Use Windows Update for Fixes
To fix Microsoft DLL problems, one of the easiest and most effective solutions is to use Windows Update. Windows Update is a built-in feature in Microsoft Windows that allows you to download and install important updates and fixes for your operating system.
To use Windows Update for fixing DLL problems, follow these steps:
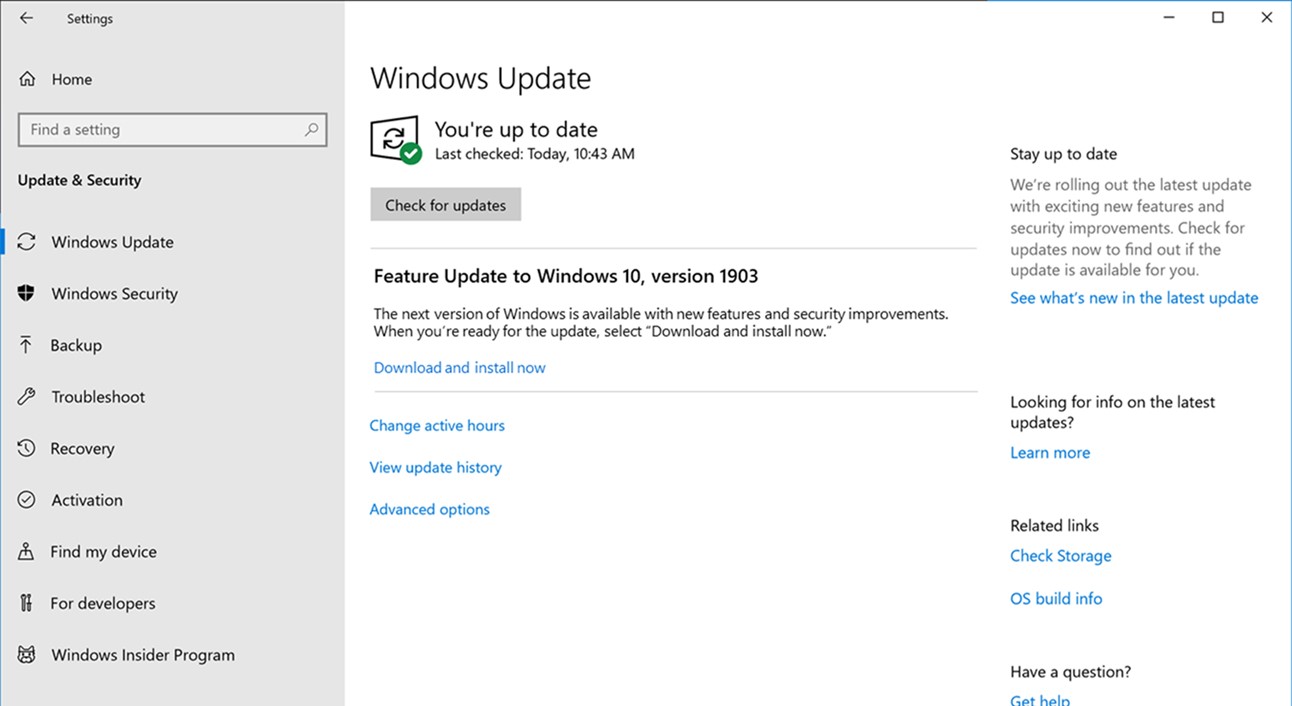
1. Open the Windows Update settings: Go to Start menu, then Settings, and click on Update & Security.
2. Check for updates: Click on the Check for updates button. Windows will now scan your system for any available updates.
3. Install updates: If there are any updates available, click on the Install now button to download and install them. Make sure to install all recommended updates as they often include important fixes for common DLL problems.
4. Restart your computer: After the updates are installed, restart your computer to apply the changes.
By using Windows Update, you can ensure that your operating system is up to date and equipped with the latest fixes and patches. This can help resolve DLL problems caused by outdated or corrupted system files.
In addition to using Windows Update, it’s also recommended to regularly perform other maintenance tasks such as cleaning out your temporary files and optimizing your computer’s performance. This can help prevent future DLL problems and keep your system running smoothly.
Remember, if you continue to experience DLL problems even after using Windows Update, it may be necessary to seek further assistance. There are various troubleshooting resources available, such as the Microsoft Knowledge Base, online forums, and support from Microsoft Store or Microsoft Office.
It’s important to address DLL problems promptly as they can affect the performance and stability of your computer. So, if you encounter any error messages or unusual behavior related to DLL files, don’t hesitate to take action and use Windows Update for a quick and effective fix.
Reinstall Affected Programs and Drivers
1. Identify the affected programs: Take note of any programs that are showing error messages related to DLL files. This could include applications like Microsoft Office, DirectX, or even video games.
2. Uninstall the affected programs: Go to the Control Panel and select “Uninstall a program” (or “Add or Remove Programs” in older versions of Windows). Locate the affected programs and uninstall them.
3. Delete leftover files: After uninstalling the programs, it’s important to remove any leftover files or folders associated with them. Use the search function to find and delete any remaining files related to the uninstalled programs.
4. Reinstall the programs: Download the latest versions of the affected programs from their official websites or installation discs. Follow the installation prompts to reinstall the programs on your computer.
5. Update drivers: Ensure that your drivers are up to date, as outdated or incompatible drivers can also cause DLL errors. Visit the manufacturer’s website for your computer or hardware components to download and install the latest drivers.
6. Restart your computer: After reinstalling the programs and updating the drivers, restart your computer to apply the changes.
7. Test the programs: Open the previously affected programs to check if the DLL error has been resolved. If the error persists, you may need to seek further assistance or consult the Microsoft Knowledge Base for troubleshooting tips specific to your issue.
Utilize System Restore in Safe Mode
To access Safe Mode, follow these steps:
1. Restart your computer.
2. As the computer is booting up, press the F8 key repeatedly until the Advanced Boot Options menu appears.
3. Use the arrow keys to select “Safe Mode” and press Enter.
Once you are in Safe Mode, you can proceed with using System Restore:
1. Press the Windows key + R to open the Run dialog box.
2. Type “rstrui” and press Enter. This will open the System Restore window.
3. Click “Next” to proceed.
4. Select a restore point that was created before the DLL problem occurred. If you are unsure, choose a restore point that is a few days or weeks prior to the issue.
5. Click “Next” and then “Finish” to start the restoration process.
Please note that System Restore will not affect your personal files, but it may uninstall recently installed programs and updates. After the restoration process is complete, your computer will restart.
Once your computer has restarted, check if the DLL problem has been resolved. If not, you may need to consider other troubleshooting steps such as reinstalling the affected program or updating your Windows operating system.
Advanced Solutions with Recovery Console
The Recovery Console is a powerful tool in Microsoft Windows that can help fix DLL problems. Here are some advanced solutions you can try using the Recovery Console:
1. Boot into the Recovery Console: Insert your Windows installation disc or a system repair disc and restart your computer. Press any key to boot from the disc when prompted, and then select your language preferences. Choose the option to repair your computer, and select the operating system you want to repair. Finally, select the option for the Recovery Console.
2. Use the Recovery Console commands: Once you’re in the Recovery Console, you can use various commands to fix DLL problems. Some useful commands include:
– dir: Lists the files and folders in the current directory.
– cd: Changes the current directory.
– copy: Copies a file from one location to another.
– ren: Renames a file.
– expand: Extracts files from a compressed file.
– chkdsk: Checks a disk for errors and attempts to fix them.
– fixboot: Writes a new boot sector onto the system partition.
– fixmbr: Repairs the master boot record.
3. Use the Recovery Console to replace corrupt DLL files: If you suspect that a specific DLL file is causing the problem, you can use the Recovery Console to replace it. First, use the dir command to locate the DLL file. Then, use the copy command to replace the file with a known good copy from the Windows installation disc or another source.
4. Perform a system restore: If you have previously created a system restore point, you can use the Recovery Console to restore your computer to a previous state. Use the cd command to navigate to the system restore folder, and then use the dir command to view the available restore points. Finally, use the cd command followed by the restore point folder name to access the desired restore point, and run the restore command to start the restoration process.
Repair with System File Checker Tool
![]()
To repair Microsoft DLL problems, you can use the System File Checker (SFC) tool. This tool scans and restores missing or corrupted system files on your computer. Here’s how to use it:
1. Open the Command Prompt with administrative privileges. You can do this by pressing the Windows key, typing “cmd,” right-clicking on “Command Prompt,” and selecting “Run as administrator.”
2. In the Command Prompt window, type “sfc /scannow” and press Enter. This will initiate the scanning process.
3. The SFC tool will start scanning your system files for errors and corruption. It may take some time to complete, so be patient.
4. If any issues are found, the SFC tool will attempt to repair them automatically. You may be prompted to restart your computer if necessary.
5. Once the scanning and repairing process is complete, check if the DLL problem has been resolved.
Note: If the SFC tool is unable to repair the DLL problem, you may need to consider other troubleshooting steps such as reinstalling the program that uses the DLL, updating your drivers, or performing a system restore.
Remember, the SFC tool is only designed to fix issues with system files. If the DLL problem is related to a specific program or application, you may need to seek further assistance from the program’s support or consult online forums for specific troubleshooting steps.
Addressing Missing DLL Files through Upgrades
| Missing DLL File | Upgrade Solution |
|---|---|
| msvcp140.dll | Upgrade Microsoft Visual C++ Redistributable Package |
| vcruntime140.dll | Upgrade Microsoft Visual C++ Redistributable Package |
| d3dx9_43.dll | Upgrade DirectX |
| xinput1_3.dll | Upgrade DirectX |
| api-ms-win-crt-runtime-l1-1-0.dll | Upgrade Microsoft Visual C++ Redistributable Package |
Manual and Recovery Tool Solutions
- Check for Updates: Open Windows Update and check for any available updates. Install any updates related to DLL files.
- Restore from Recycle Bin: If you recently deleted a DLL file, check your Recycle Bin and restore it if found.
- Reinstall the Software: Uninstall the software causing the DLL problem, then reinstall it from a trusted source.
- Run System File Checker: Open Command Prompt as administrator and run the command “sfc /scannow” to scan for and repair corrupted system files.
Recovery Tool Solutions:
- Use System Restore: Open System Restore and select a restore point before the DLL problem occurred. Follow the prompts to restore your system.
- Use a DLL Repair Tool: Download and install a reputable DLL repair tool. Run the tool and follow the on-screen instructions to scan for and fix DLL errors.
- Perform a Clean Install: Backup your important files, create a Windows installation media, and perform a clean install of Windows. This will replace all system files, including any corrupted DLL files.
More Information on DLL File Management
If you are experiencing issues with DLL files on your Microsoft system, there are several steps you can take to fix the problem.
1. Run a System File Checker scan:
– Open the Command Prompt as an administrator.
– Type “sfc /scannow” and press Enter.
– The scan will check for any corrupted or missing system files and attempt to repair them.
2. Use the Windows Registry:
– Open the Registry Editor by typing “regedit” in the Run dialog box.
– Navigate to the following key: HKEY_LOCAL_MACHINE\SOFTWARE\Microsoft\Windows\CurrentVersion.
– Look for any entries related to the DLL file causing the issue and delete them.
– Restart your computer for the changes to take effect.
3. Reinstall the program:
– If the DLL file is associated with a specific program, uninstall and reinstall that program.
– This will ensure that you have the latest version of the DLL file and any necessary dependencies.
4. Check for Windows updates:
– Install any available updates for your Windows operating system.
– These updates often include patches and fixes for known DLL issues.
5. Use a reputable DLL repair tool:
– There are various third-party tools available that can automatically scan for and repair DLL errors.
– Make sure to choose a reputable tool from a trusted source.
Remember to always be cautious when downloading and installing DLL files from the internet, as they can potentially contain malware or other harmful elements. It’s recommended to only obtain DLL files from official sources or trusted websites.
F.A.Q.
What causes DLL files to corrupt?
DLL files can become corrupted due to various reasons, including faulty applications, malicious software, damaged Windows registry, and corrupt system files.
How do I fix Windows Storage DLL error?
To fix the Windows Storage DLL error, you can try reinstalling the windows.storage.dll file to the Windows system folder or placing it in the installation folder of the specific program or game that requires it.
What causes a DLL error?
A DLL error is typically caused by a problem within the software realm, such as file deletion or a virus infection.
How do I get rid of DLL errors?
To get rid of DLL errors, you can try cleaning registry keys, re-registering the contaminated DLL file, using system restore, running SFC to fix damaged system files, checking hard drive errors with CHKDSK utility, installing DirectX, and reinstalling Visual C++ redistribution.
