Facing the MSVCR110.dll missing error? Here’s how to fix it.
Understanding the Msvcr110.dll File and Its Importance
The MSVCR110.dll file is an essential component of the Microsoft Visual C++ Redistributable package. It is responsible for providing various functions and features to the applications that rely on it. Understanding the importance of this file is crucial, especially when encountering the “MSVCR110.dll missing error.” This error commonly occurs when the MSVCR110.dll file is either corrupted, missing, or incompatible with the application being used.
To fix the “MSVCR110.dll missing error,” follow these steps:
1. Identify the cause: Before proceeding with any fixes, it’s important to determine the root cause of the error. This can be done by checking the error message or running a system scan to identify any missing or corrupted files.
2. Reinstall the Microsoft Visual C++ Redistributable package: One of the most effective ways to resolve the “MSVCR110.dll missing error” is by reinstalling the Microsoft Visual C++ Redistributable package. This package contains the necessary files, including the MSVCR110.dll file, to ensure proper functionality of applications.
3. Update the application: If the error occurs with a specific application, it’s recommended to check for any available updates. Developers often release updates to address compatibility issues and fix known bugs, including those related to missing or corrupted DLL files.
4. Check for Windows updates: Keeping your operating system up-to-date is essential for maintaining system stability and resolving various errors. Check for Windows updates and install any available updates to ensure that your system has the latest bug fixes and security patches.
5. Scan for malware: Malware infections can cause various issues on your system, including DLL errors. Run a thorough scan with a reliable antivirus program to detect and remove any malicious software that may be causing the “MSVCR110.dll missing error.”
6. Copy the DLL file manually: If the above steps don’t resolve the error, you can try manually copying the MSVCR110.dll file to the application’s directory. To do this, locate a working copy of the DLL file (e.g., from a trusted source or another computer with the same operating system), copy it, and paste it into the application’s installation directory.
7. Seek professional help: If you’re still unable to fix the “MSVCR110.dll missing error” after following the above steps, it’s recommended to seek assistance from a professional technician or consult relevant online forums such as Reddit. They can provide more specific guidance based on your system configuration and the specific error you’re encountering.
Remember to exercise caution when downloading DLL files from the internet, as they may be infected with malware or not compatible with your system. It’s always best to obtain DLL files from trusted sources.
Common Causes and Solutions for the Missing File Error
-
Reinstall the Microsoft Visual C++ Redistributable Package:
- Download the latest version of the Microsoft Visual C++ Redistributable Package from the official Microsoft website.
- Run the downloaded file and follow the on-screen instructions to install it on your computer.
- Restart your computer after the installation process is complete.
-
Check for Windows Updates:
- Open the Start menu and type Windows Update in the search bar.
- Click on the Windows Update option from the search results.
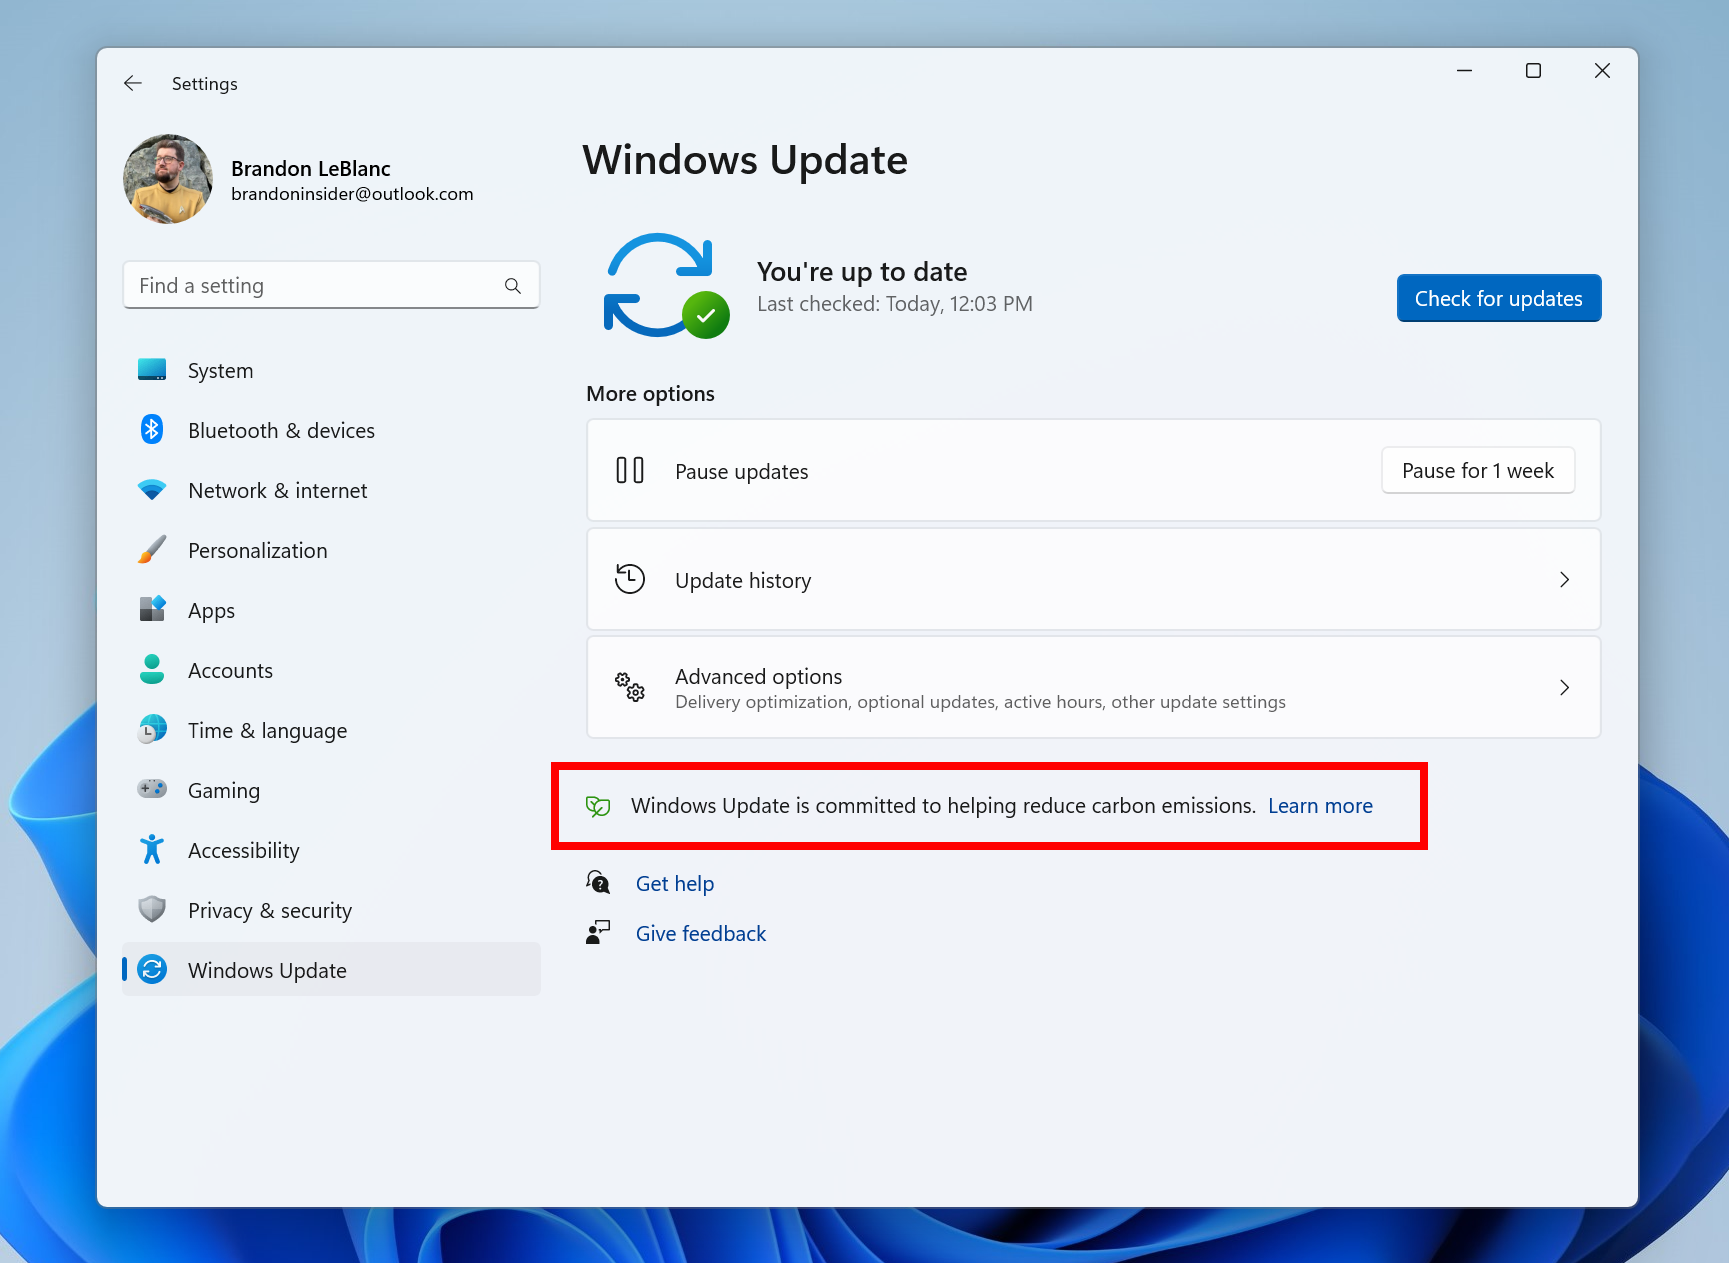
- Click on the Check for updates button and wait for Windows to search for available updates.
- If any updates are found, click on the Install updates button to download and install them.
- Restart your computer after the updates are installed.
-
Run System File Checker:
- Open the Start menu and type Command Prompt in the search bar.
- Right-click on the Command Prompt application and select Run as administrator.
- In the Command Prompt window, type sfc /scannow and press Enter.
- Wait for the System File Checker to scan and repair any corrupted system files.
- Once the process is complete, restart your computer.
-
Update or Reinstall the Problematic Program:
- Identify the program that is showing the missing file error.
- Visit the official website of the program and check for any available updates or patches.
- If updates are available, download and install them following the provided instructions.
- If no updates are available or the error persists after updating, try uninstalling the program completely.
- Download the latest version of the program from the official website and install it on your computer.
- Restart your computer after the installation process is complete.
-
Perform a System Restore:
- Open the Start menu and type System Restore in the search bar.
- Click on the System Restore option from the search results.
- Follow the on-screen instructions to choose a restore point and restore your computer to a previous state where the missing file error was not occurring.
- Wait for the system restore process to complete, and then restart your computer.
Recommended Methods to Recover or Replace the Missing Msvcr110.dll
1. Download the missing DLL file:
– Visit a trusted website that offers DLL files for download.
– Search for “msvcr110.dll” on the website and download the file.
– Make sure to choose the correct version that matches your operating system (32-bit or 64-bit).
2. Restore the DLL file from the Recycle Bin:
– Check your Recycle Bin to see if the msvcr110.dll file was accidentally deleted.
– If it is present, right-click on the file and select “Restore” to bring it back to its original location.
3. Reinstall the program that is showing the error:
– Uninstall the program that is displaying the MSVCR110.dll missing error.
– Go to the official website of the program and download the latest version.
– Install the program again and check if the error is resolved.
4. Run a system file checker scan:
– Press the Windows key + X and select “Command Prompt (Admin)”.
– Type “sfc /scannow” and press Enter to initiate the system file checker scan.
– Wait for the scan to complete and follow any on-screen instructions to fix any corrupted system files, including the missing DLL file.
5. Update Microsoft Visual C++ Redistributable:
– Visit the Microsoft Download Center and search for “Microsoft Visual C++ Redistributable”.
– Download and install the latest version of Microsoft Visual C++ Redistributable for your system.
6. Perform a system restore:
– Press the Windows key + R and type “rstrui.exe” to open the System Restore window.
– Follow the on-screen instructions to choose a restore point where the MSVCR110.dll file was present.
– Confirm the system restore and wait for the process to complete.
Remember to restart your computer after performing any of these methods to ensure that the changes take effect.
Advanced Troubleshooting Techniques for Persistent Issues
If you are still encountering the MSVCR110.dll missing error after attempting the basic troubleshooting steps, you may need to employ more advanced techniques. These methods can help you identify and resolve the underlying issues causing the error. Here are some advanced troubleshooting techniques to consider:
1. Update or reinstall the Microsoft Visual C++ Redistributable Package:
1. Go to the official Microsoft website and download the latest version of the Microsoft Visual C++ Redistributable Package that is compatible with your operating system.
2. Double-click the downloaded file and follow the on-screen instructions to install or update the package.
3. Restart your computer and check if the MSVCR110.dll missing error is resolved.
2. Perform a system file check:
1. Open the Command Prompt as an administrator by typing “cmd” in the Windows search bar, right-clicking on “Command Prompt,” and selecting “Run as administrator.”
2. In the Command Prompt window, type “sfc /scannow” and press Enter.
3. Wait for the scan to complete and follow any prompts or instructions provided.
4. Restart your computer and check if the MSVCR110.dll missing error persists.
3. Check for malware infections:
1. Install and run a reputable antivirus or anti-malware software on your computer.
2. Perform a full system scan to detect and remove any malicious programs that may be causing the MSVCR110.dll missing error.
3. Restart your computer and check if the error is resolved.
4. Update your device drivers:
1. Open the Device Manager by pressing the Windows key + X and selecting “Device Manager” from the menu.
2. Expand the categories and locate any devices with a yellow exclamation mark indicating a driver issue.
3. Right-click on the device and select “Update driver.”
4. Choose the option to automatically search for updated driver software.
5. Follow the on-screen instructions to complete the driver update process.
6. Restart your computer and check if the MSVCR110.dll missing error is resolved.
By implementing these advanced troubleshooting techniques, you can increase your chances of fixing the persistent MSVCR110.dll missing error.
Frequently Asked Questions
What to do if MSVCP100 dll is missing?
If MSVCP100.dll is missing, there are several steps you can take to resolve the issue.
What is Msvcr110d dll?
Msvcr110d.dll is a dynamic link library file associated with the Microsoft C Runtime Library in the Microsoft Visual Studio software development environment.
How to install Msvcr dll?
To install the Msvcr dll, you can copy the msvcr100.dll file from the System32 folder and paste it into the SysWOW64 folder. This is helpful if you encounter issues with 64-bit programs accessing the DLL file. The complete paths for these folders are C:\Windows\System32 and C:\Windows\SysWOW64.
How do I fix a missing dll file?
To fix a missing DLL file, you can follow these steps:
1. Identify the missing DLL file: Note down the name of the specific DLL file that is missing from your system.
2. Search for the DLL file online: Use a search engine to find a reliable source where you can download the missing DLL file.
3. Download the DLL file: Make sure to download the correct version of the DLL file that matches your operating system and architecture.
4. Place the DLL file in the correct location: Copy the downloaded DLL file to the appropriate folder, which is usually the System32 folder for 32-bit DLL files or the SysWOW64 folder for 64-bit DLL files.
5. Register the DLL file: Open the Command Prompt as an administrator, then use the “regsvr32” command followed by the path of the DLL file to register it.
6. Restart your computer: After completing the above steps, restart your computer to allow the changes to take effect.
Remember to always be cautious when downloading DLL files from the internet, as they can potentially contain malware.
