Encountering error 0x800F0950 during the installation of .NET Framework 3.5 in Windows 11 can be frustrating. Let’s explore the steps to resolve this issue efficiently.
Enable .NET Framework Using DISM Command
![]()
To enable .NET Framework using the DISM command and fix the installation error 0x800F0950 in Windows 11, follow these steps:
1. Open the Command Prompt as an administrator by right-clicking on the Start menu and selecting “Command Prompt (Admin).”
2. In the Command Prompt window, type the following command and press Enter: dism /online /enable-feature /featurename:NetFx3 /all /source:<path to Windows 11 installation media> /LimitAccess
3. Replace “<path to Windows 11 installation media>” with the actual path to your Windows 11 installation media. This could be a DVD, USB drive, or ISO file.
4. The DISM command will start enabling the .NET Framework feature. Wait for it to complete.
5. Once the process is finished, you should see a message indicating that the operation was completed successfully.
6. Close the Command Prompt and restart your computer.
7. After the restart, try installing or running the program that was giving you the .NET Framework 3.5 installation error. The error should now be resolved.
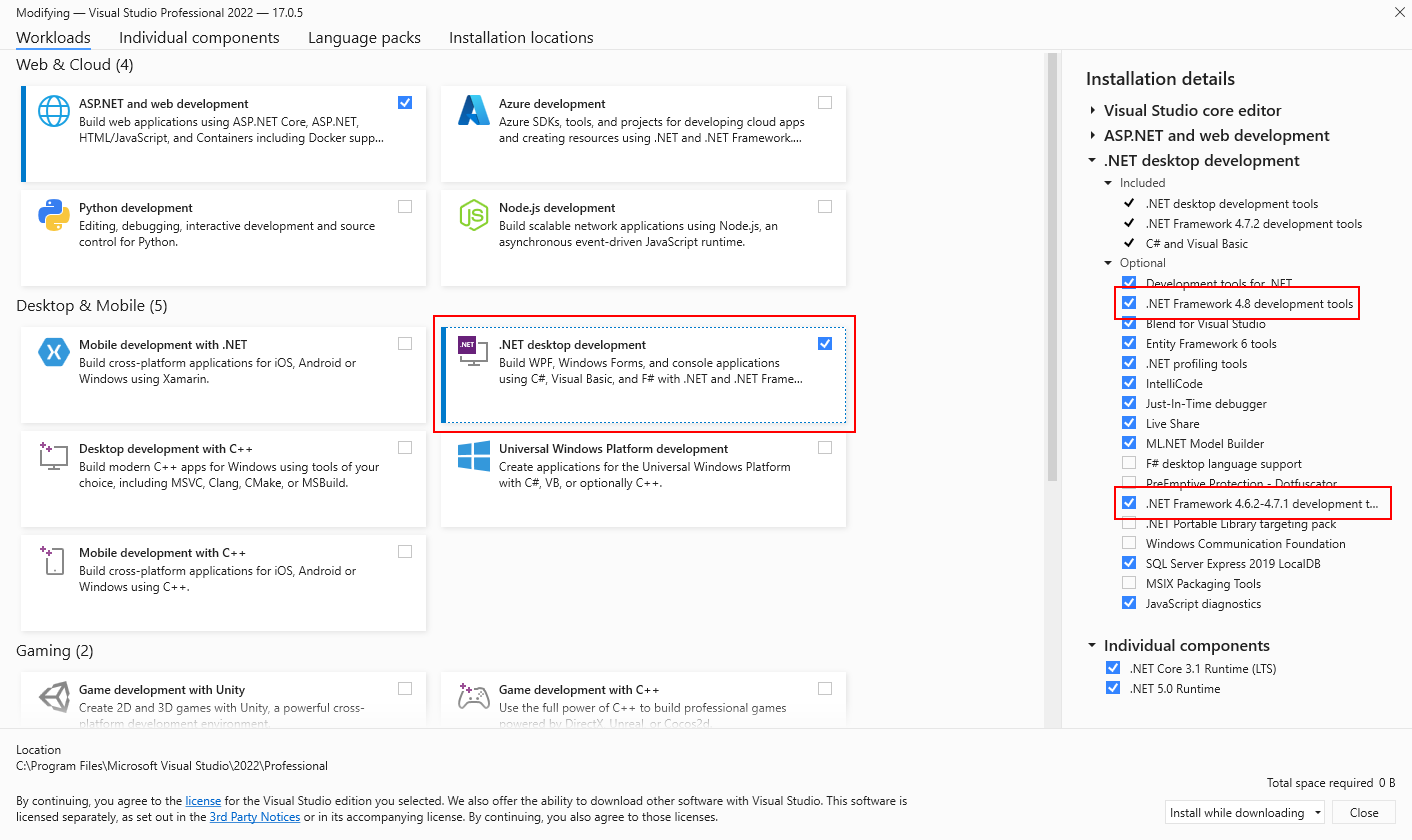
Install .NET Framework via Windows Features
1. Press the Windows key + R to open the Run dialog box.
2. Type “appwiz.cpl” and press Enter to open the Control Panel’s Programs and Features page.
3. In the left panel, click on “Turn Windows features on or off”.
4. In the Windows Features dialog box, scroll down and locate “.NET Framework 3.5 (includes .NET 2.0 and 3.0)”.
5. Check the box next to “.NET Framework 3.5” and click OK.
6. If prompted for confirmation or to provide the installation media, follow the on-screen instructions.
7. Windows will now download and install the necessary files to enable .NET Framework 3.5.
8. Once the installation is complete, restart your computer.
Run the .NET Framework Repair Tool
![]()
To fix the installation error 0x800F0950 for .NET Framework 3.5 in Windows 11, you can use the .NET Framework Repair Tool. Follow these steps:
1. Download the .NET Framework Repair Tool from the official Microsoft website.
2. Double-click the downloaded executable file to run the tool.
3. The tool will automatically detect and attempt to repair any issues with the .NET Framework installation.
4. Follow the on-screen prompts and instructions provided by the tool.
5. If prompted by User Account Control, click “Yes” to grant permission to make changes to your system.
6. The repair tool may require an internet connection to download necessary files or updates.
7. Once the repair process is complete, restart your computer.
8. After the restart, try installing .NET Framework 3.5 again to check if the error has been resolved.
By running the .NET Framework Repair Tool, you can easily fix installation errors related to .NET Framework 3.5 in Windows 11.
Install Pending Windows Update
![]()
1. Open the Windows Update settings by clicking on the Start button and typing “Windows Update” in the search bar. Press Enter.
2. In the Windows Update settings, click on the “Check for updates” button to search for any pending updates.
3. If there are pending updates, click on the “Install now” button to start the installation process. This will download and install the updates on your computer.
4. During the installation, you may be prompted to provide administrator permission. Click “Yes” or enter the administrator password if prompted.
5. Once the installation is complete, restart your computer to apply the updates.
6. After the restart, check if the .NET Framework 3.5 installation error 0x800F0950 is resolved. If not, try reinstalling the .NET Framework using the steps provided in the previous section.
Use Installation Media for .NET Framework
To fix the .NET Framework 3.5 Installation Error 0x800F0950 in Windows 11, you can use the Installation Media for .NET Framework. Here’s how:
1. Insert the Installation Media for .NET Framework into your computer’s CD/DVD drive or USB port.
2. Open File Explorer and navigate to the drive where the Installation Media is located.
3. Find the setup executable file, usually named “setup.exe” or “dotnetfx35.exe”.
4. Right-click on the setup executable file and select “Run as administrator” from the context menu.
5. If prompted by User Account Control, click “Yes” to allow the program to make changes to your computer.
6. Follow the on-screen instructions to complete the installation process. Make sure to select the option to install .NET Framework 3.5.
7. Once the installation is complete, restart your computer to apply the changes.
Using the Installation Media for .NET Framework can help resolve the installation error by providing the necessary files and components for the installation process. It bypasses any issues with the online installation method and ensures a successful installation of .NET Framework 3.5 on Windows 11.
Create a Custom Installation Script
1. Open Notepad or any text editor.
2. Copy and paste the following code into the editor:
“`bash
@echo off
echo Installing .NET Framework 3.5…
echo.
DISM /Online /Enable-Feature /FeatureName:NetFx3 /All /LimitAccess /Source:
echo.
echo Installation complete. Restarting the computer…
echo.
shutdown /r /t 0
“`
3. Replace `
4. Save the file with a .bat extension (e.g., install_dotnet.bat).
5. Right-click the .bat file and select “Run as administrator”.
6. Wait for the script to complete the installation process.
7. Once the installation is done, your computer will automatically restart.
By using this custom installation script, you can bypass the error and successfully install .NET Framework 3.5 on your Windows 11 machine.
Perform a Repair Install of Windows

Performing a Repair Install of Windows can help fix the .NET Framework 3.5 Installation Error 0x800F0950 in Windows 11. Here’s how to do it:
1. Press the Windows key + X on your keyboard and select “Windows PowerShell (Admin)” from the menu.
2. In the PowerShell window, type “DISM.exe /Online /Cleanup-image /Restorehealth” and press Enter. This will scan your system for any corrupt files and attempt to repair them.
3. Once the repair process is complete, restart your computer.
4. After the restart, press the Windows key + I to open the Settings app.
5. Go to “Apps” and then click on “Apps & features” in the left-hand menu.
6. In the search bar, type “.NET Framework 3.5” and click on it when it appears in the list.
7. Click on the “Advanced options” link.
8. Scroll down and click on the “Repair” button.
9. Follow the on-screen instructions to complete the repair process.
10. Once the repair is finished, restart your computer again.
This should resolve the .NET Framework 3.5 Installation Error 0x800F0950 in Windows 11. If you’re still experiencing issues, it may be helpful to seek further assistance from Microsoft support or a knowledgeable IT professional.
F.A.Q.
How do I fix Microsoft NET Framework 3.5 error?
To fix Microsoft NET Framework 3.5 error, you can try opening an administrative Command Prompt and running the lodctr /R command. After that, execute the winmgmt.exe /RESYNCPERF command. Then, attempt to reinstall .NET Framework 3.5.
How do you fix .NET Framework 3.5 includes net 2.0 and 3.0 couldn’t be installed?
To fix the issue of .NET Framework 3.5 including net 2.0 and 3.0 not being installed, you can follow these steps:
Open the start menu.
Type in “Windows Features” and press Enter.
Select the “.NET Framework 3.5” check box.
Select Ok.
Follow any prompts during installation.
Restart your computer.
How do I fix .NET Framework 3.5 error code 0x800f0950?
To fix .NET Framework 3.5 error code 0x800f0950, ensure that your computer’s date and time settings are accurate. Go to Start > Settings > Time & Language > Date & time and allow Windows to automatically set up the date and time.
