Are you experiencing slow performance on your SSD in Windows 10/11? Boosting its speed and optimizing it can make a significant difference.
Identifying Slow SSD Performance
If you are experiencing slow SSD performance on Windows 10/11, there are a few steps you can take to increase speed and optimize your system.
First, check if your SSD is properly connected and recognized by the system. Open the Device Manager and expand the “Disk drives” section to see if your SSD is listed. If not, check the connection and ensure the drivers are up to date.
Next, verify if your SSD is running in AHCI mode. This mode provides better performance for SSDs compared to IDE or RAID modes. To check and change the mode, go to the BIOS settings and look for the SATA configuration.
Enable the TRIM command to optimize the performance and lifespan of your SSD. TRIM helps to prevent performance degradation over time by allowing the SSD to efficiently manage deleted data. To enable TRIM, open the Command Prompt as an administrator and enter the command “fsutil behavior set DisableDeleteNotify 0”.
Consider updating your SSD firmware. Manufacturers often release firmware updates to address performance issues and improve compatibility. Visit the manufacturer’s website to download and install the latest firmware for your SSD.
Check for any background tasks or applications that might be causing high disk usage. Open the Task Manager and go to the “Processes” tab to identify any resource-intensive processes or applications. Close or disable unnecessary ones to free up system resources.
Optimize your SSD using Windows built-in tools. Open the Control Panel and navigate to “System and Security” > “Administrative Tools” > “Defragment and Optimize Drives”. Select your SSD and click “Optimize” to run the built-in optimization tool.
Lastly, make sure your system is free from malware and unwanted programs. Use a reliable antivirus software to scan your computer and remove any threats. Uninstall any unnecessary programs or applications that may be running in the background.
Optimize and Speed Up Your SSD
1. Enable TRIM command: TRIM helps maintain SSD performance by clearing unused data blocks. Open the Command Prompt and type “fsutil behavior set DisableDeleteNotify 0” to enable TRIM.
2. Update SSD firmware: Check the manufacturer’s website for firmware updates. These updates can improve performance and fix any bugs.
3. Disable indexing: Right-click on your SSD drive in File Explorer, select “Properties,” and uncheck “Allow files on this drive to have contents indexed.” This can improve performance by reducing unnecessary disk activity.
4. Disable hibernation: Open the Command Prompt and type “powercfg /h off” to disable hibernation. This will free up disk space and prevent unnecessary write operations.
5. Disable Superfetch and Prefetch: Open the Command Prompt and type “services.msc” to open the Services console. Locate “Superfetch” and “Prefetch,” right-click on each and select “Properties.” Set their startup type to “Disabled” and click “Apply.”
6. Optimize your SSD: Open the Optimize Drives tool by searching for it in the Start menu. Select your SSD drive and click “Optimize.” This will consolidate free space and improve performance.
7. Check for background processes: Open Task Manager (Ctrl + Shift + Esc) and go to the “Processes” tab. Look for any resource-intensive processes that might be affecting SSD performance and close them if necessary.
Ensuring TRIM Command is Enabled
To ensure that the TRIM command is enabled on your Windows 10/11 SSD, follow these steps:
1. Open the Start menu and type “Device Manager” to search for it. Click on the top result to open the Device Manager.
2. Expand the “Disk drives” category to view all your storage devices.
3. Right-click on your SSD and select “Properties” from the context menu.
4. In the Properties window, go to the “Policies” tab.
5. Make sure the “Enable write caching on the device” option is checked.
6. Check the box that says “Turn off Windows write-cache buffer flushing on the device.”
7. Click “OK” to save the changes.
Enabling the TRIM command helps maintain the performance and lifespan of your SSD by allowing the operating system to communicate with the drive and optimize its performance.
Switching to AHCI Mode for Better Performance
Switching to AHCI Mode can significantly improve the performance of your solid-state drive (SSD) on Windows 10/11. By enabling AHCI Mode, you can optimize the way your computer data storage interacts with the SSD, resulting in faster read and write speeds.
To switch to AHCI Mode, follow these steps:
1. Restart your computer and enter the BIOS settings by pressing the appropriate key during startup (usually Del or F2).
2. Navigate to the SATA or Storage Configuration section in the BIOS.
3. Locate the option to change the SATA mode and switch it from IDE or RAID to AHCI.
4. Save the changes and exit the BIOS.
5. Windows will now boot in AHCI Mode, but you may need to install AHCI drivers if prompted.
Enabling AHCI Mode is particularly beneficial for SSDs, as it allows for features like Trim, which helps maintain optimal performance over time. However, it’s important to note that switching to AHCI Mode may cause your operating system to become unbootable if not done correctly. Therefore, it’s crucial to backup your important data before making any changes.
Updating SSD Firmware and Drivers
To update the firmware and drivers of your SSD on Windows 10/11, follow these steps:
1. Identify your SSD model and manufacturer. Visit the manufacturer’s website to download the latest firmware and driver updates.
2. Before updating, back up your important data to prevent any loss or corruption.
3. Close all running applications and disable any antivirus software temporarily.
4. Install the firmware update software provided by the manufacturer.
5. Connect your SSD to your computer using the appropriate interface (e.g., SATA, PCIe).
6. Launch the firmware update software and follow the on-screen instructions to update the firmware.
7. After the firmware update, restart your computer.
8. To update the SSD drivers, open the Device Manager (Windows key + X, then select Device Manager).
9. Expand the “Disk drives” category, right-click on your SSD, and select “Update driver.”
10. Choose the option to search for drivers automatically and let Windows install the latest drivers.
11. Restart your computer once the driver update is complete.
Updating the firmware and drivers of your SSD can help improve its performance and compatibility with your operating system.
Disabling Onboard VGA to Improve Speed
To improve the speed of your SSD on Windows 10/11, you can disable the onboard VGA. This will help optimize performance and increase speed. Here’s how you can do it:
1. Open the Control Panel on your Windows computer.
2. Go to the Device Manager.
3. Expand the “Display adapters” section.
4. Right-click on the onboard VGA driver and select “Disable” from the context menu.
5. Confirm the action when prompted.
Disabling the onboard VGA will free up system resources and allow your SSD to perform more efficiently. This can help speed up booting, data storage, and overall system performance.
Selecting High-Performance Power Mode
To fix slow SSD performance on Windows 10/11 and increase speed, you can select the high-performance power mode. This will optimize your SSD and improve its overall performance.
To do this, follow these steps:
1. Open the Control Panel by searching for it in the Windows search bar.
2. Click on “Power Options” and then select the “High Performance” power plan.
3. If you don’t see the High Performance plan, click on “Show additional plans” to reveal it.
4. Once you’ve selected the High Performance plan, your SSD will be optimized for maximum speed.
By selecting the High Performance power mode, you can ensure that your SSD is running at its full potential. This will help to eliminate any slowdowns or performance issues you may be experiencing.
Freeing Up SSD Space for Optimal Operation
To free up SSD space for optimal operation, follow these steps:
1. Clear temporary files: Open the “Run” dialog by pressing Windows Key + R, type “%temp%” and press Enter. Delete all files in the folder that opens.
2. Remove unnecessary applications: Open the Control Panel, go to “Programs” or “Programs and Features,” and uninstall any applications you no longer need.
3. Disable hibernation: Open Command Prompt as an administrator, type “powercfg -h off“, and press Enter. This will disable hibernation and free up disk space.
4. Clean up system files: In the Control Panel, go to “System and Security” and click on “Free up disk space.” Check all the options and click “OK” to remove unnecessary files.
5. Enable TRIM: Verify that TRIM is enabled on your SSD. Open the Command Prompt as an administrator, type “fsutil behavior query DisableDeleteNotify“, and press Enter. If the result is “0,” TRIM is enabled. If not, type “fsutil behavior set DisableDeleteNotify 0” to enable it.
Verifying SATA Port and Cable Integrity
| Verifying SATA Port and Cable Integrity | |
|---|---|
| Step | Description |
| 1 | Power off your computer and unplug it from the power source. |
| 2 | Open your computer case to access the internal components. |
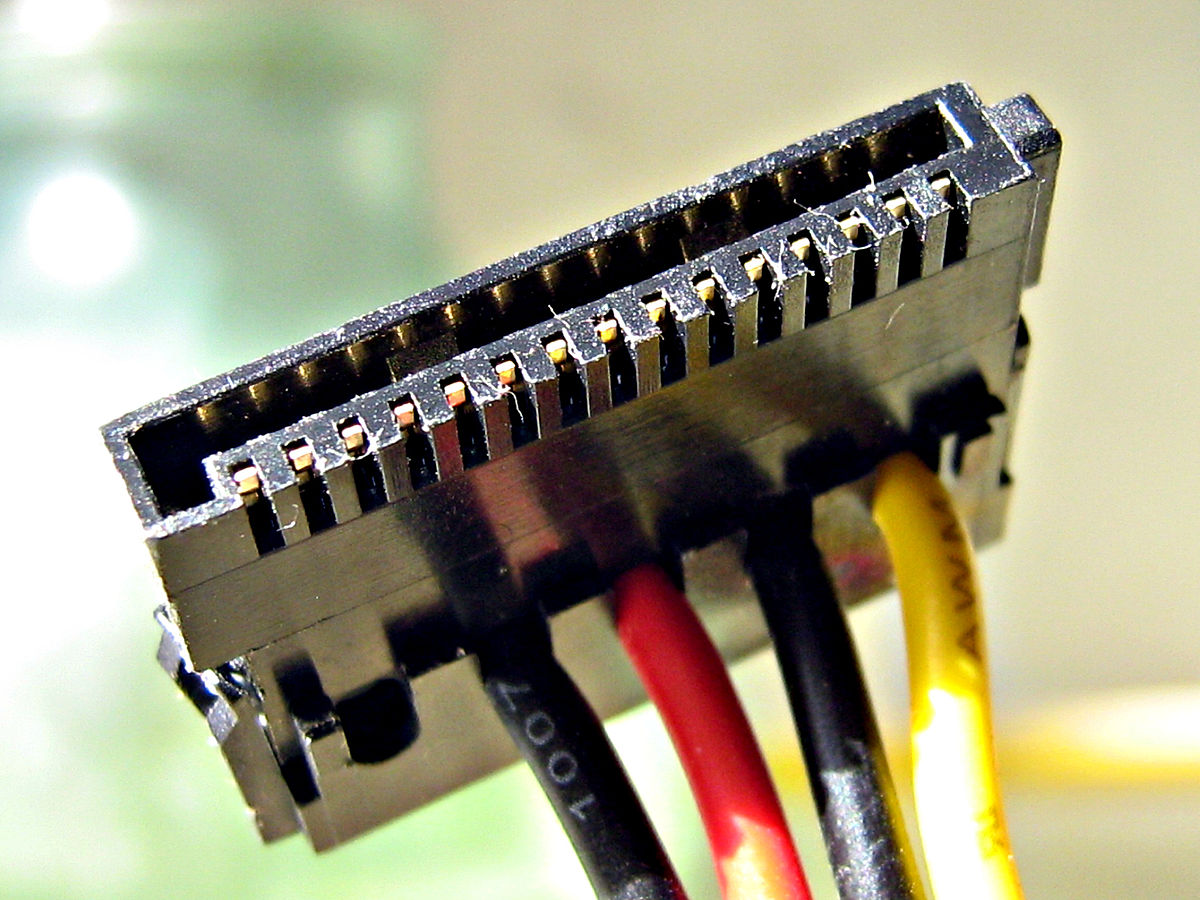
| 3 | Locate the SATA cable connected to your SSD. It will be connected to a SATA port on your motherboard. |
| 4 | Inspect the SATA cable for any visible signs of damage, such as frayed or loose connectors. |
| 5 | If the cable appears to be damaged, replace it with a new SATA cable. |
| 6 | Ensure that the SATA cable is securely connected to both the SSD and the SATA port on the motherboard. |
| 7 | If the cable is securely connected and undamaged, try using a different SATA port on the motherboard to rule out any issues with the specific port. |
| 8 | Once you have verified the SATA cable and port integrity, close your computer case and plug it back into the power source. |
| 9 | Power on your computer and check if the slow SSD performance issue has been resolved. |
Aligning SSD with 4K for Enhanced Speed
To enhance the speed of your SSD on Windows 10/11, align it with 4K. Follow these steps to increase speed and optimize performance:
1. Open the Control Panel (Windows) and navigate to Device Manager.
2. Expand the “Disk drives” category and find your SSD.
3. Right-click on the SSD and select “Properties.”
4. In the “Policies” tab, select the “Better performance” option.
5. Enable write caching by checking the box that says “Enable write caching on the device.”
6. Click “OK” to save the changes.
Note: Enabling write caching can improve SSD performance, but it also carries a risk of data loss if there is a power outage. Make sure to regularly backup your important data.
By aligning your SSD with 4K and enabling write caching, you can significantly boost the speed and optimize the performance of your solid-state drive.
F.A.Qs
Why is my computer slow when my SSD is full?
The computer may be slow when the SSD is full because solid-state drives can only write and store data on empty blocks. When the blocks are not open, the SSD needs to delete the marked deleted data and then fill it with new data. This process can cause the drive to slow down.
Why am I not getting full speed on my SSD?
You may not be getting full speed on your SSD due to several factors. First, ensure that your SSD has enough free space. Additionally, check if the TRIM command is enabled on your computer. Ensure that the SATA connection and cable are functioning properly. Lastly, consider downloading the latest firmware or drivers for your PC and SSD.
Why Windows 10 is slow on SSD?
Windows 10 may be slow on an SSD due to low RAM levels, which decrease the cache size and cause the SSD to slow down. Additionally, improper PC settings or the computer not being optimized for SSD usage can also contribute to slow performance.
How do I fix a slow SSD?
To fix a slow SSD, you can optimize it by freeing up storage space, enabling AHCI mode, updating the SSD driver, disabling onboard VGA, choosing high-performance mode, and checking the SATA port and cable. Additionally, make sure to check the TRIM command for optimal performance.
