Having trouble with TeamViewer due to a lack of internet connection? Let’s explore some potential fixes for this issue.
Address Internet Connectivity and Access Settings
If you’re experiencing the “TeamViewer not ready, no internet connection” error, there are a few steps you can take to address the issue.
First, check your internet connectivity. Ensure that your device is connected to a stable internet connection and that other websites or applications are working properly. If you’re using a personal computer, make sure the ethernet cable or Wi-Fi connection is securely connected.
If you’re connected to a computer network, verify with your network administrator that there are no restrictions or settings that could be blocking TeamViewer’s internet access. This includes checking for any proxy server settings that may be interfering with the connection.
Next, disable any firewalls or security software temporarily. These can sometimes interfere with TeamViewer’s network access. You can usually do this by accessing your computer’s settings or control panel.
If you’re still experiencing issues, try troubleshooting the TeamViewer application itself. Update the software to the latest version, as newer versions often include bug fixes and improvements. Restarting your computer can also help resolve any temporary glitches.
Adjust Windows and Firewall Settings
1. Disable any proxy server settings that may be interfering with your internet connection. Open the Windows Settings by pressing the Windows key + I, then click on “Network & Internet.” Select “Proxy” from the left menu and make sure the “Use a proxy server” toggle is turned off.
2. Troubleshoot your internet access to identify and resolve any underlying issues. Right-click on the network icon in the taskbar, select “Troubleshoot problems,” and follow the on-screen instructions. This will help identify and fix common network problems.
3. Check your computer network settings to ensure they are properly configured. Open the Windows Settings again, go to “Network & Internet,” and click on “Status.” From there, click on “Network Troubleshooter” to automatically detect and fix any network-related issues.
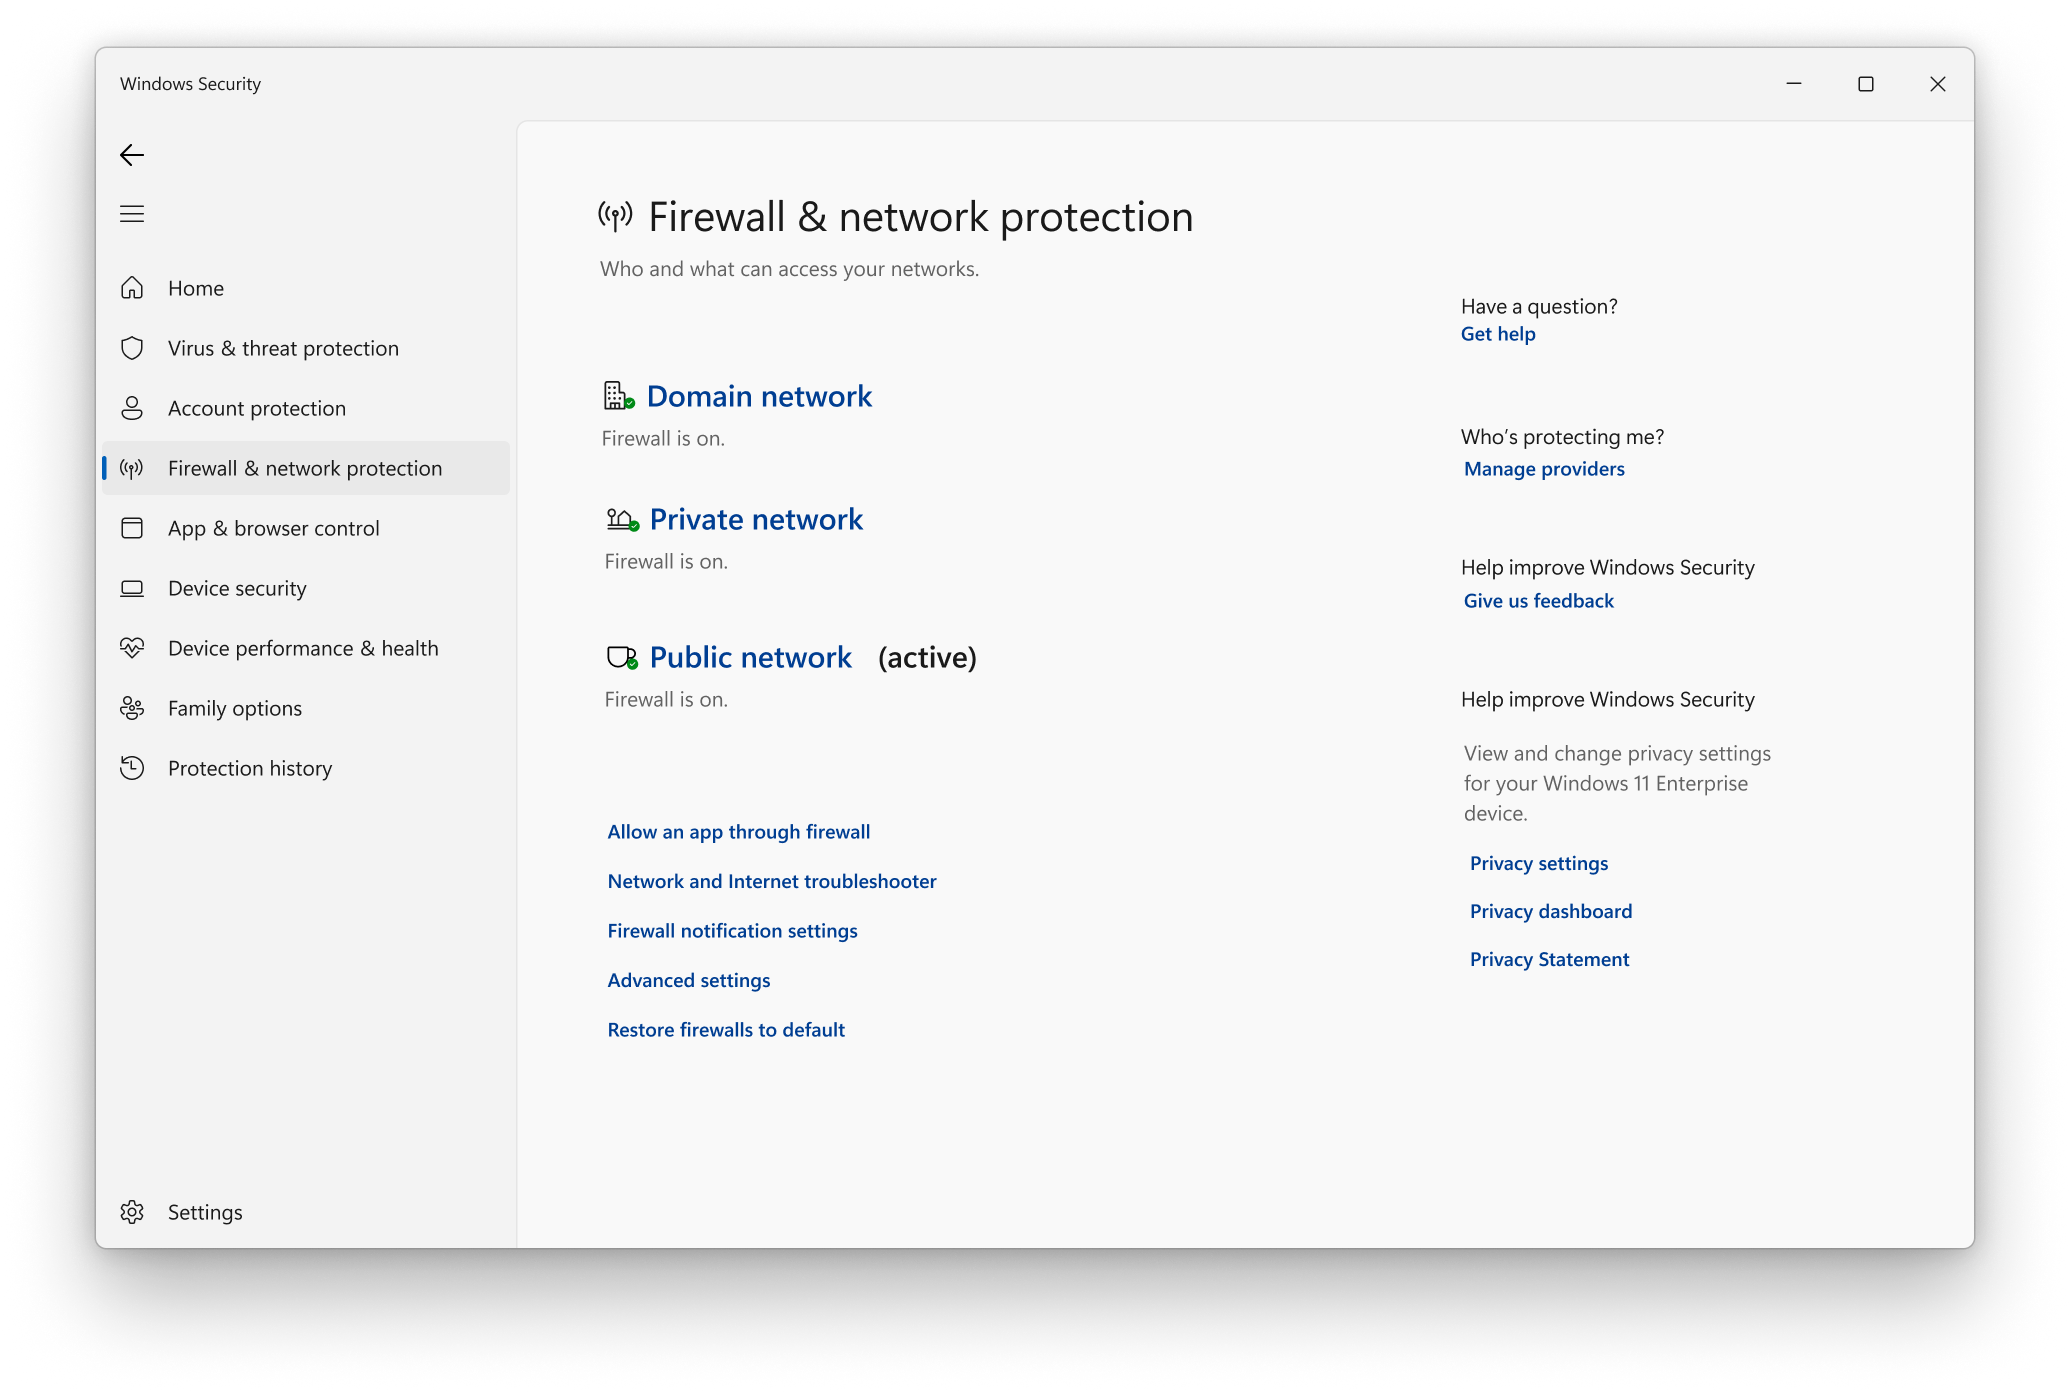
4. Make sure your firewall is not blocking TeamViewer’s access to the internet. Open the Windows Settings, click on “Update & Security,” and select “Windows Security.” Select “Firewall & network protection” and click on “Allow an app through firewall.” Look for TeamViewer in the list and make sure both private and public network access is enabled.
Update Software and Modify DNS Configuration
To update TeamViewer software and modify the DNS configuration for fixing the “TeamViewer Not Ready No Internet Connection” issue, follow these steps:
1. Update TeamViewer Software:
– Launch TeamViewer on your personal computer.
– Click on the “Help” menu and select “Check for new version”.
– If a new version is available, click on “Update” to download and install it.
– Restart TeamViewer after the update completes.
2. Modify DNS Configuration:
– Press the Windows key + R to open the Run dialog box.
– Type “ncpa.cpl” and hit Enter to open the Network Connections window.
– Right-click on your active network connection and select “Properties”.
– Scroll down and double-click on “Internet Protocol Version 4 (TCP/IPv4)”.
– Select “Use the following DNS server addresses” and enter the preferred DNS server addresses provided by your internet service provider or Google DNS (8.8.8.8 and 8.8.4.4).
– Click “OK” to save the changes and close the windows.
3. Troubleshooting:
– If the issue persists, check if your firewall is blocking TeamViewer. Temporarily disable your firewall and try connecting again.
– Ensure that your internet connection is stable and working properly.
– Restart your computer and try running TeamViewer again.
Reinstall and Reset Connection Tools
| Tool Name | Description |
|---|---|
| Reinstall TeamViewer | If you are experiencing connectivity issues with TeamViewer due to a software glitch or corrupted installation, reinstalling the TeamViewer application can often resolve the problem. Uninstall the existing version of TeamViewer from your computer and then download the latest version from the official TeamViewer website. Follow the installation instructions to reinstall TeamViewer on your system. |
| Reset Network Connection | If you are facing a “No Internet Connection” error in TeamViewer, resetting your network connection can help in some cases. This involves restarting your router/modem, clearing any network configuration issues, and refreshing your network settings. Power off your router/modem, wait for a few seconds, and then power it back on. Additionally, make sure there are no physical cable connection issues and try connecting to a different network if available. |
FAQs
Why does the TeamViewer keep saying no Internet connection?
The TeamViewer may keep saying no Internet connection due to various reasons, such as outdated routers and receivers, antivirus or firewall issues, and incorrect settings in the host file.
Why is my TeamViewer not connecting?
Your TeamViewer may not be connecting due to outdated software versions. Make sure to check for the latest release on TeamViewer’s menu page and download and install any updates that are available.
Why is TeamViewer saying offline?
TeamViewer may be saying offline due to misconfigured settings or a system bug.
Why does TeamViewer say no connection to partner?
TeamViewer may say “no connection to partner” due to an outdated TeamViewer client. To resolve this, ensure you have the latest release by visiting TeamViewer’s menu page and download any available updates.
