As an IT professional, troubleshooting the issue of a missing Microsoft Exchange Information Service can be a daunting task.
Outlook Login Issues
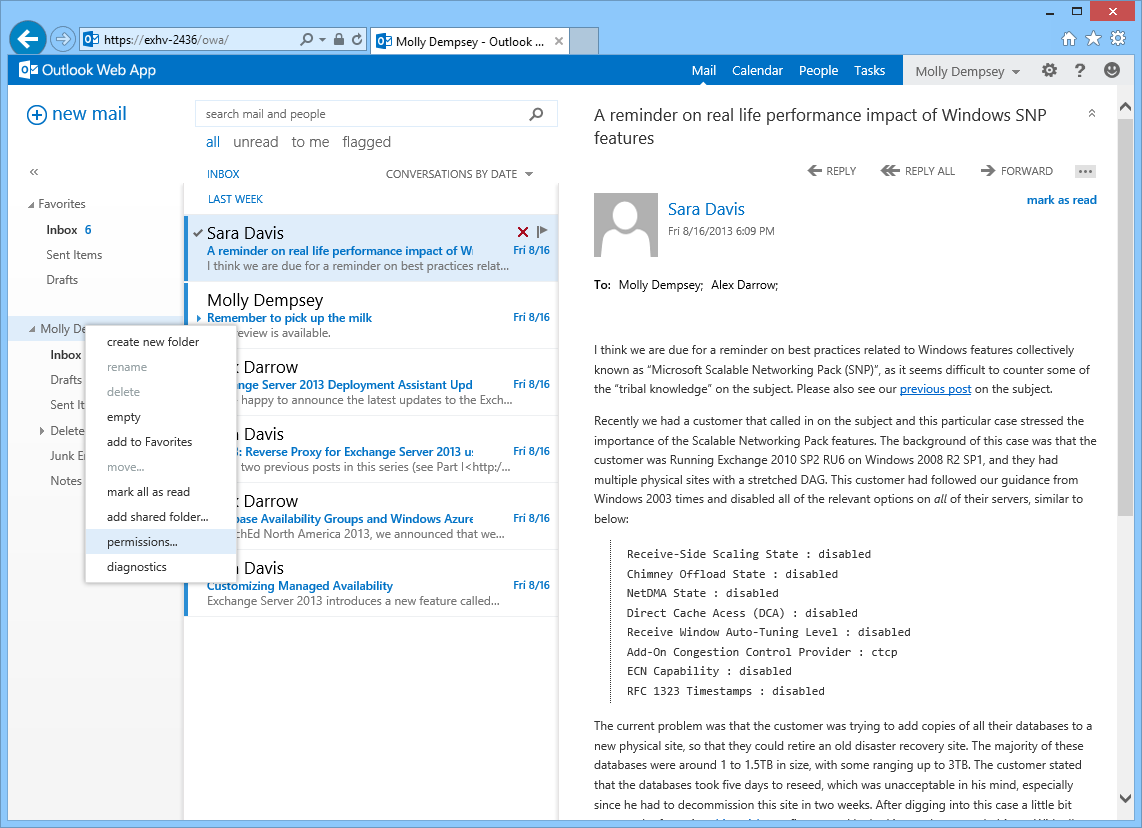
1. Open the Control Panel (Windows) on your computer.
2. Go to the “Mail (Windows)” or “Mail” option.
3. Click on “Email Accounts” or “Account Settings” depending on your version of Outlook.
4. Select your email account from the list and click on “Change” or “Repair”.
5. Check if the Microsoft Exchange Information Service is missing from the account settings.
6. If it is missing, click on “Add” or “New” to add the missing service.
7. Choose “Microsoft Exchange” from the available options.
8. Enter your email address and password and click on “Next”.
9. Outlook will try to automatically detect the server settings. If it fails, you may need to manually enter the server information provided by your email provider.
10. Once the server settings are entered correctly, click on “Next” and then “Finish”.
11. Restart Outlook and try logging in again.
If you continue to experience login issues, it is recommended to contact your email provider for further assistance.
Note: This solution is specific to Microsoft Outlook on Windows. If you are using a different email client or operating system, the steps may vary.
Email Account Removal
If you are looking to remove your email account from Microsoft Exchange Information Service, follow these simple steps:
1. Open the Control Panel in Windows.
2. Click on “Mail (Windows)” or “Mail (32-bit)” option.
3. In the Mail Setup – Outlook window, click on “Email Accounts” button.
4. Select the email account you want to remove and click on “Remove” button.
5. Confirm the removal by clicking “Yes” when prompted.
6. The email account will be removed from Microsoft Exchange Information Service.
Please note that removing the email account will delete all associated data, including emails, contacts, and calendar events. Make sure to backup any important information before proceeding with the removal.
For a visual guide, you can refer to YouTube tutorials or screenshots available online. You can also consult Microsoft Outlook’s official support documentation for further assistance.
Remember to restart your computer after the removal process to ensure all changes take effect.
If you encounter any issues or error messages during the removal, you may need to check your computer’s environment variables, file directories, or contact your system administrator for further guidance.
Clearing Outlook Files
To clear Outlook files and resolve issues with missing Microsoft Exchange Information Service, follow these steps:
1. Close Microsoft Outlook and any other related programs.
2. Open the Control Panel in Windows by clicking the Start menu, searching for “Control Panel,” and selecting it from the search results.
3. In the Control Panel, navigate to the “Mail (Windows)” or “Mail (32-bit)” option. Click on it to open the Mail Setup dialogue box.
4. In the Mail Setup dialogue box, click on the “Data Files” button. This will open the Account Settings window.
5. In the Account Settings window, select the “Data Files” tab.
6. Select the data file associated with the Microsoft Exchange Information Service that is missing. Click on the “Open File Location” button to locate the file on your computer.
7. Close the Account Settings window and the Mail Setup dialogue box.
8. Navigate to the location of the data file on your computer. Right-click on the file and select “Delete” from the context menu. Confirm the deletion if prompted.
9. Restart Microsoft Outlook and recreate the Microsoft Exchange Information Service by following the appropriate instructions for your version of Outlook.
Registry Editor Adjustments

1. Press the Windows key + R to open the Run dialog box.
2. Type “regedit” (without the quotes) and press Enter to open the Registry Editor.
3. In the Registry Editor, navigate to the following location:
HKEY_LOCAL_MACHINE\SYSTEM\CurrentControlSet\Services\MSExchangeIS
4. Right-click on the MSExchangeIS folder and select Export. Save the exported file to a safe location as a backup.
5. Now, delete the MSExchangeIS folder by right-clicking on it and selecting Delete.
6. Close the Registry Editor and restart your computer.
After the restart, Windows will automatically recreate the MSExchangeIS folder with the default settings. This should resolve the issue with the missing Microsoft Exchange Information Service.
Note: Modifying the registry can be risky, so it’s important to create a backup and proceed with caution. If you’re not comfortable with editing the registry, it’s recommended to seek assistance from a qualified technician.
If you need further assistance, you can find helpful tutorials on platforms like YouTube or consult Microsoft’s support documentation.
Modifying Registry Values
To modify registry values for the Missing Microsoft Exchange Information Service, follow these steps:
1. Press the Windows key + R to open the Run dialog box.
2. Type “regedit” and press Enter to open the Registry Editor.
3. Navigate to the following key: HKEY_LOCAL_MACHINE\SYSTEM\CurrentControlSet\Services\MSExchangeIS\ParametersSystem\
4. In the right pane, locate the “MaxObjsPerMapiSession” value.
5. Double-click on “MaxObjsPerMapiSession” to modify its value.
6. Select the “Decimal” base and enter a new value. This value determines the maximum number of objects that can be opened in a MAPI session.
7. Click OK to save the changes.
8. Close the Registry Editor.
Note: Modifying registry values can have serious consequences if done incorrectly. It is recommended to back up your registry before making any changes.
If you continue to experience issues with the Microsoft Exchange Information Service, you may consider seeking further assistance from Microsoft support or your IT department.
Deleting Registry Keys
To delete registry keys related to the Missing Microsoft Exchange Information Service, follow these steps:
1. Open the Registry Editor by pressing the Windows key + R, typing “regedit” in the Run dialog box, and pressing Enter.
2. In the Registry Editor window, navigate to the following path: HKEY_LOCAL_MACHINE\SYSTEM\CurrentControlSet\Services\MSExchangeIS.
3. Right-click on the “MSExchangeIS” key and select “Delete” from the context menu.
4. Confirm the deletion by clicking “Yes” in the confirmation dialog.
5. Close the Registry Editor.
Deleting the “MSExchangeIS” registry key removes all associated settings and configurations for the Microsoft Exchange Information Service. This can help resolve issues related to the service’s absence or malfunction.
Note: Modifying or deleting registry keys should be done with caution, as it can have unintended consequences on the system. It is recommended to back up the registry before making any changes.
If you encounter any error messages or issues while deleting the registry key, it is advisable to seek further assistance or consult Microsoft support documentation for specific troubleshooting steps related to your system configuration.
Utilizing the /resetnavpane Command
If you are experiencing issues with the Microsoft Exchange Information Service, you may be able to resolve them by utilizing the /resetnavpane command. This command can help fix any problems related to the navigation pane in Microsoft Outlook.
To use the /resetnavpane command, follow these steps:
1. Close Microsoft Outlook completely.
2. Press the Windows key + R on your keyboard to open the Run dialog box.
3. Type “outlook.exe /resetnavpane” (without the quotation marks) in the Run dialog box and press Enter.
4. Wait for Microsoft Outlook to open with the navigation pane reset to its default settings.
After performing these steps, check if the Microsoft Exchange Information Service is now functioning properly. If the issue persists, you may need to explore other troubleshooting methods or seek further assistance.
Impact of CPU on Performance
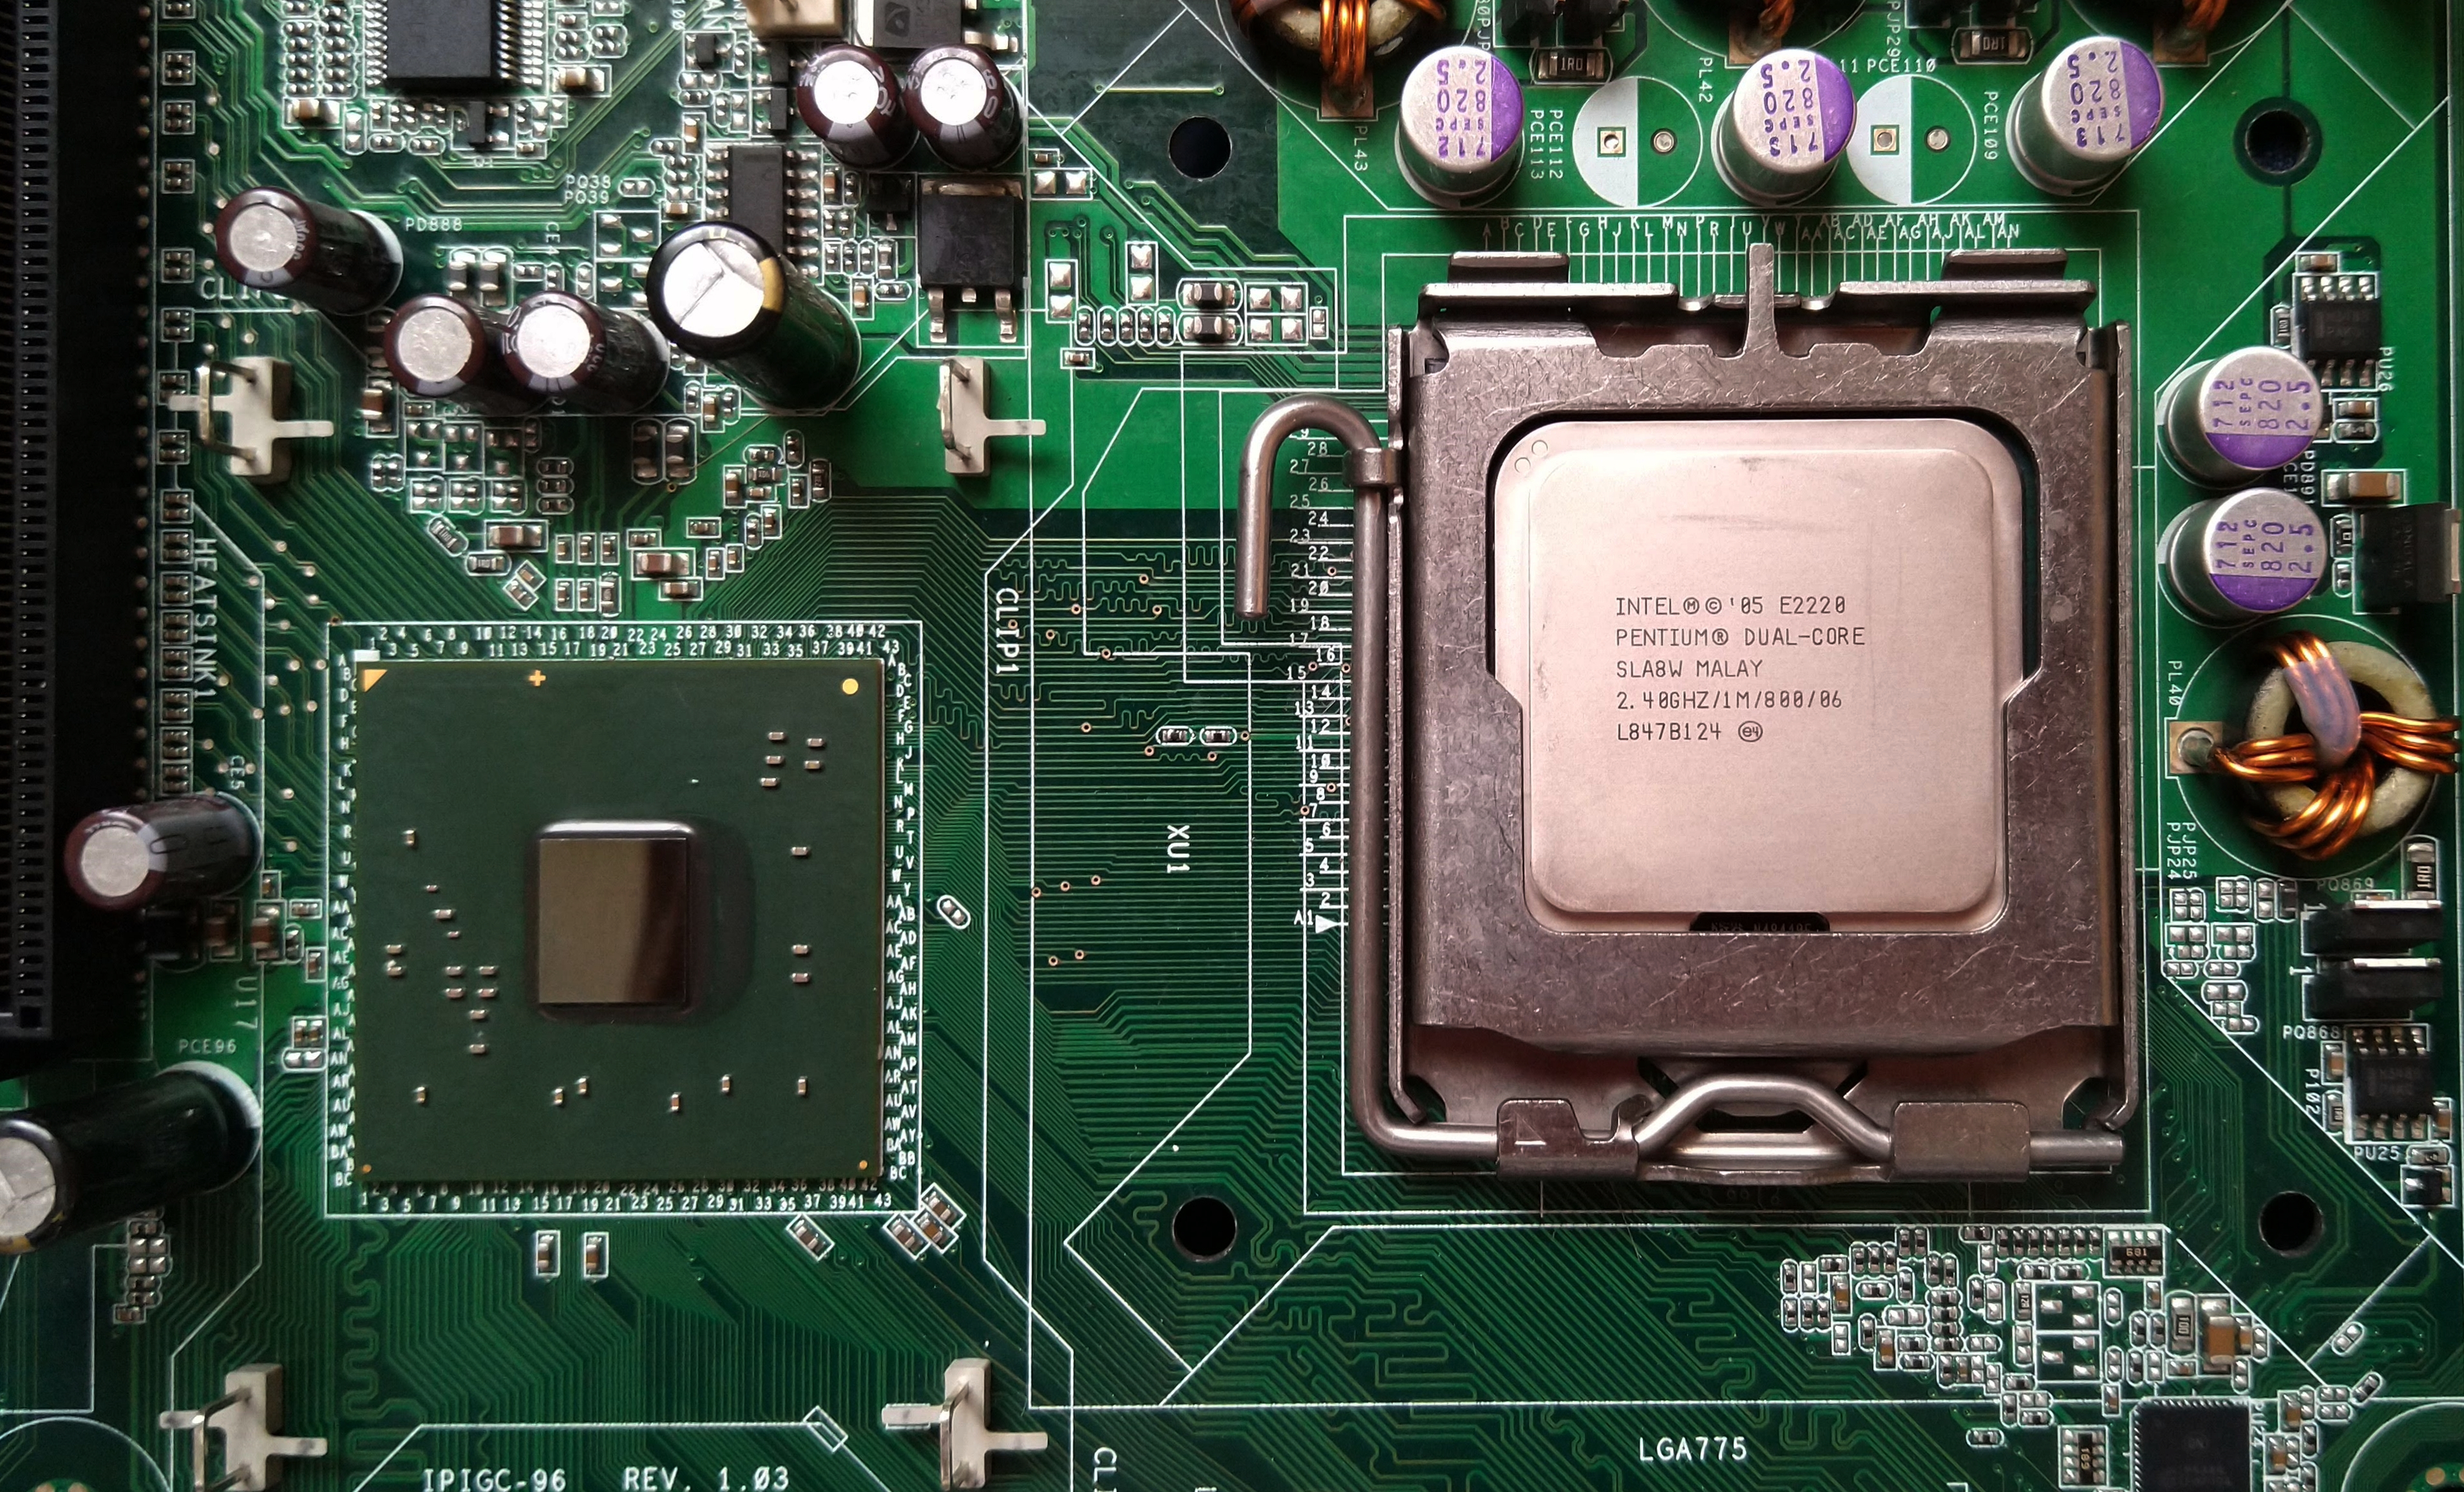
- CPU plays a crucial role in determining the overall performance of a system.
- The speed and efficiency of the CPU directly impact the processing and execution of tasks.
- A powerful CPU can enhance the responsiveness and speed of applications and software.
- The number of CPU cores influences the multitasking capability and parallel processing abilities.
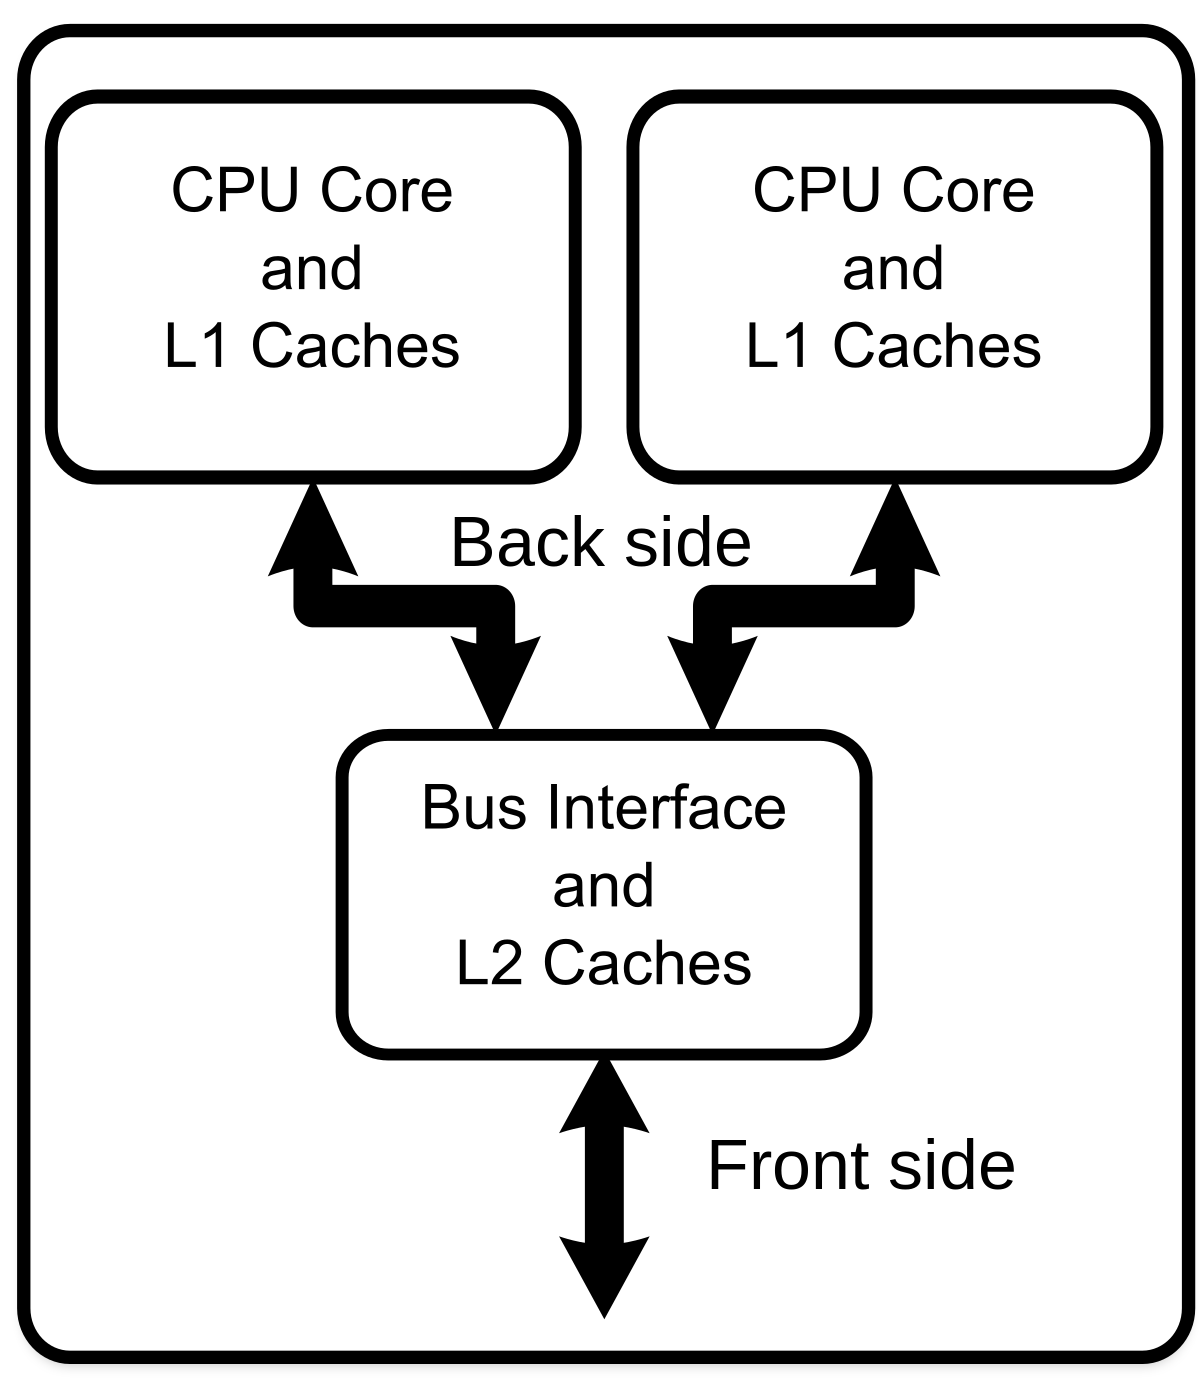
- Cache memory within the CPU can significantly improve the access and retrieval of frequently used data.
- Modern CPUs often incorporate advanced instruction sets and architectures to enhance execution efficiency.
- A well-optimized CPU can minimize latency and reduce the waiting time for tasks to be completed.
- The compatibility between the CPU and other system components is crucial for efficient data transfers.

- Upgrading to a more powerful CPU can significantly boost system performance and productivity.
- A well-maintained CPU with proper cooling and overclocking can unlock its full potential.
Enhancing Overwatch FPS and Ping
- Optimize your internet connection: Ensure you have a stable and high-speed internet connection to minimize lag and reduce ping.
- Close bandwidth-consuming applications: Shut down any unnecessary programs or downloads that may be using up your network bandwidth.
- Update your graphics drivers: Keep your graphics drivers up to date to ensure optimal performance and stability in Overwatch.
- Lower your in-game graphics settings: Adjusting your graphics settings to a lower level can help increase your FPS and reduce lag.
- Disable unnecessary background processes: Close any background applications or processes that may be hogging system resources and affecting your game performance.
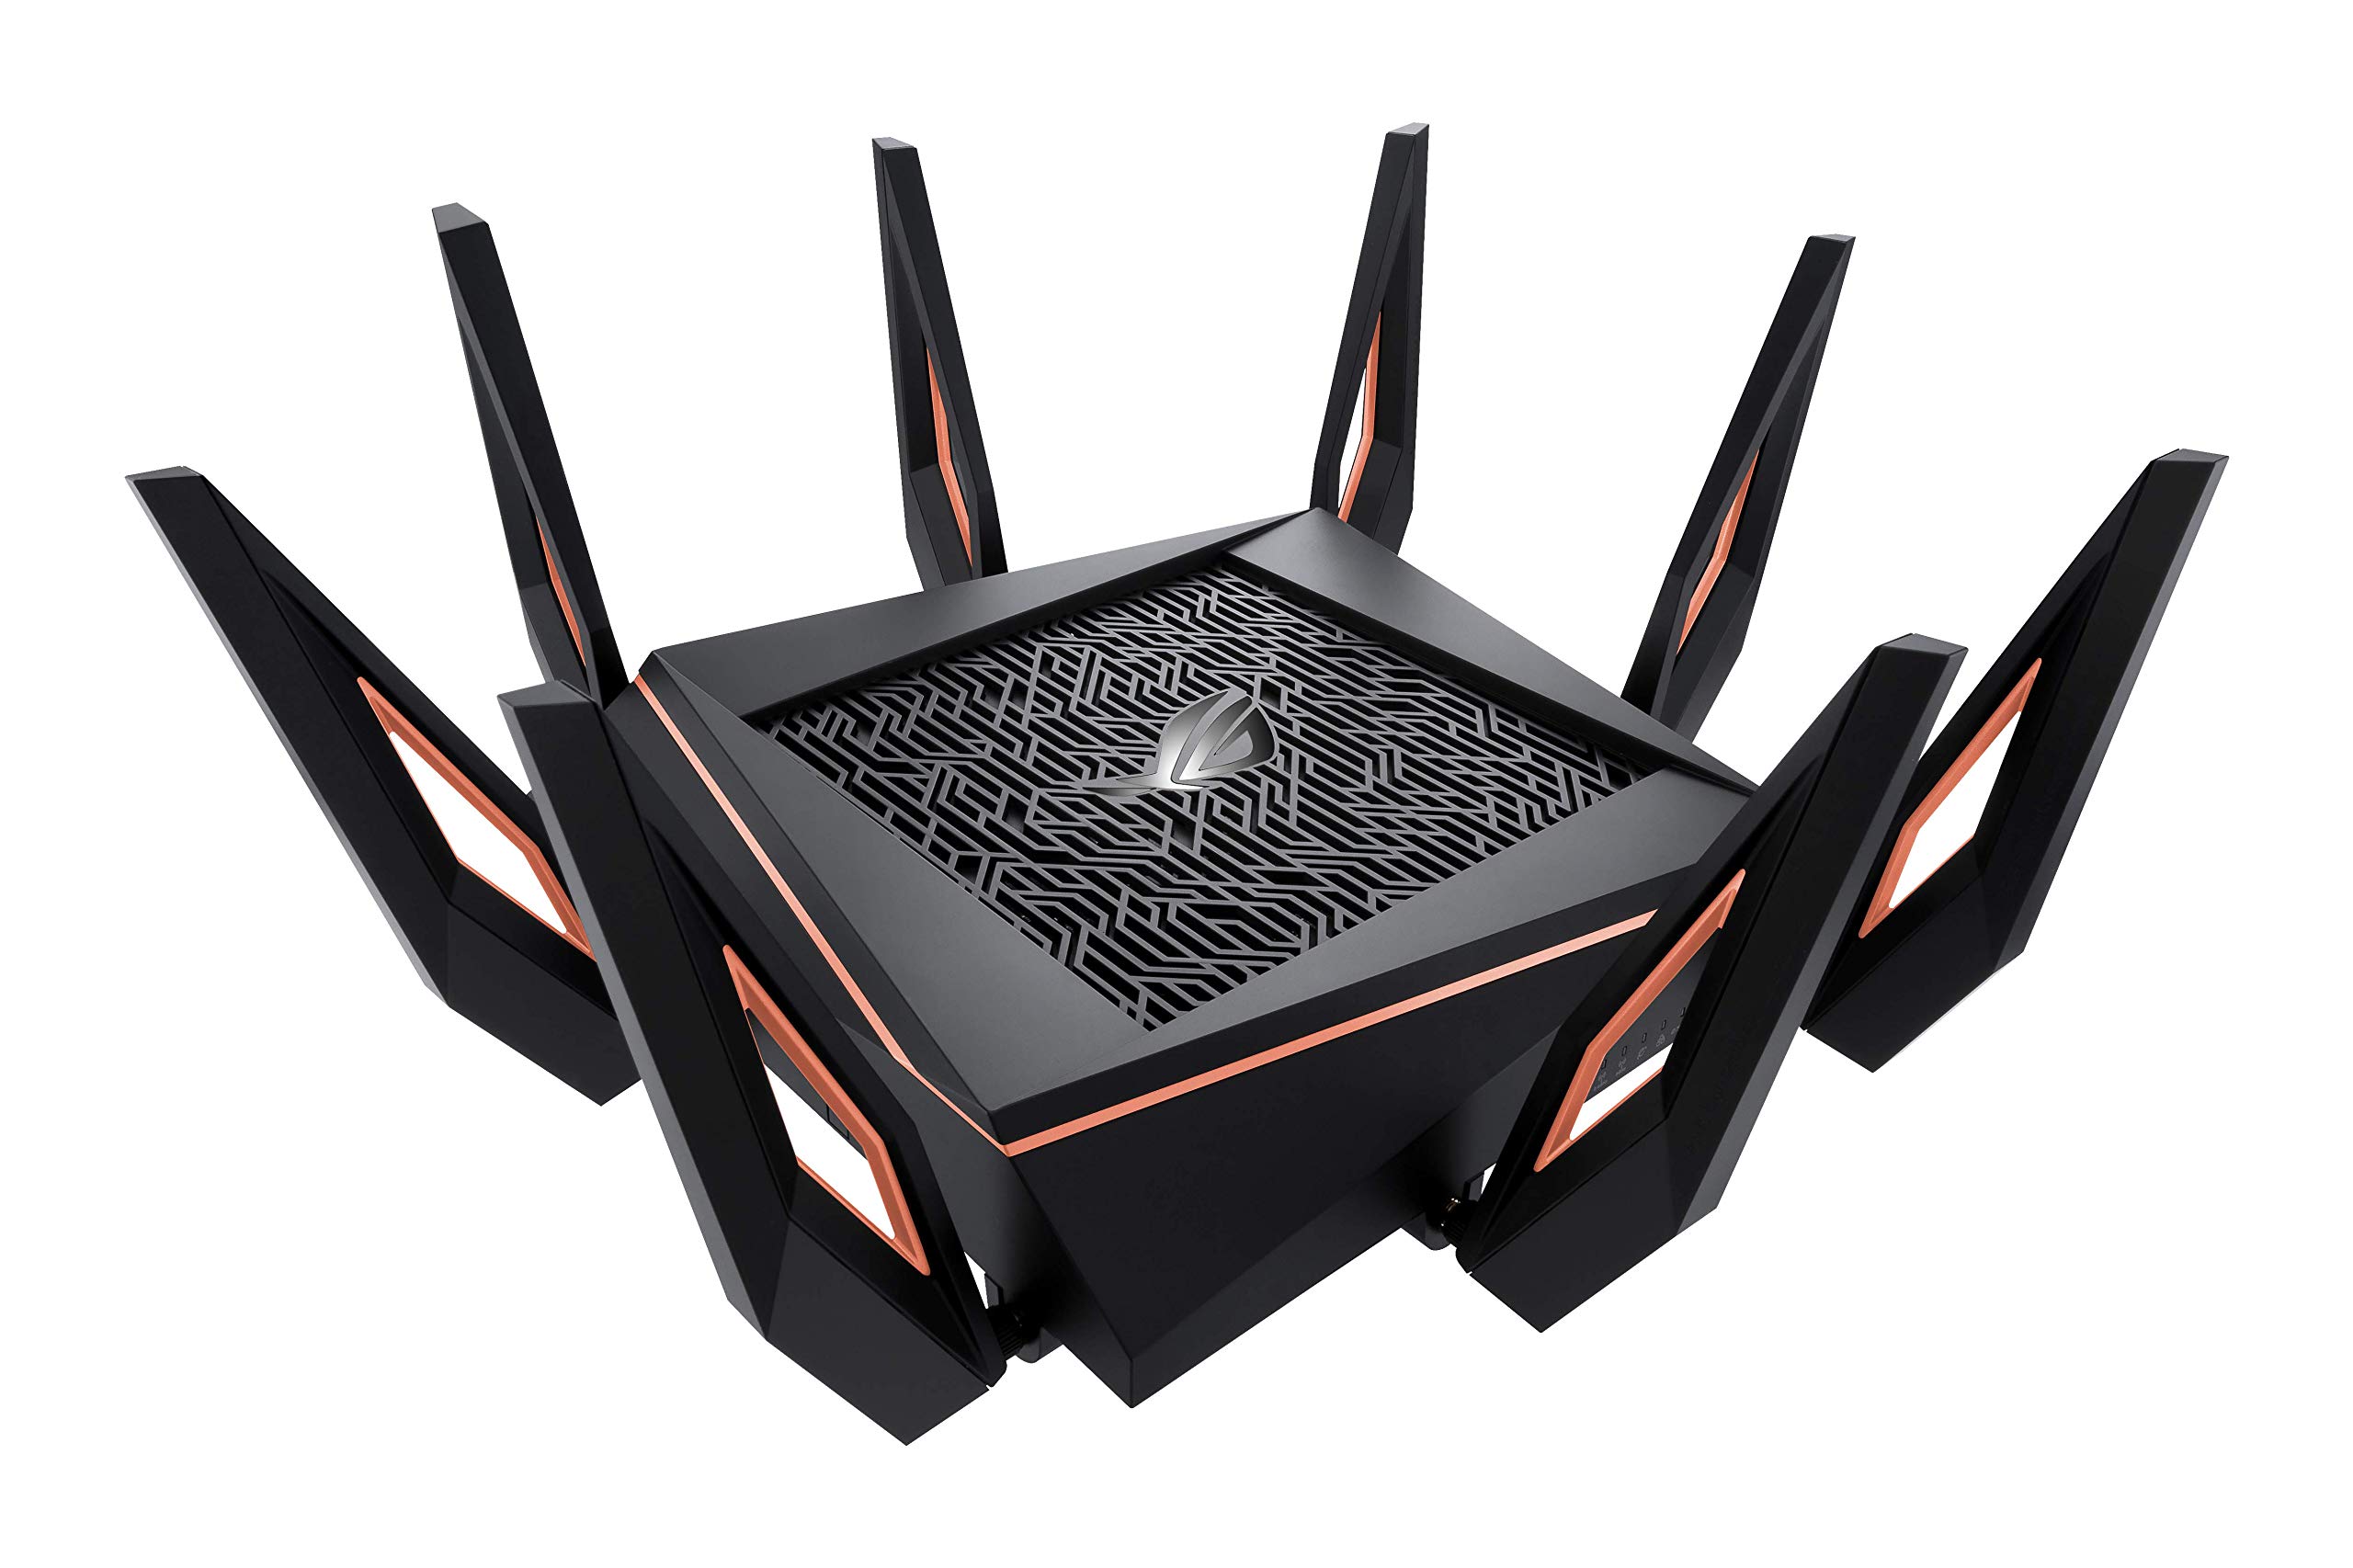
- Use a wired connection: Whenever possible, connect your computer directly to the router using an Ethernet cable for a more stable and faster internet connection.
- Choose the right server: Select the Overwatch server with the lowest ping to ensure a smoother gaming experience.
- Enable game mode on your router: Some routers have a built-in game mode feature that prioritizes network traffic for gaming, reducing latency and improving overall performance.
- Disable Windows Game Bar: The Windows Game Bar can consume system resources and impact game performance. Disable it to potentially boost your FPS and reduce ping.
- Close unnecessary background applications: Shut down any applications running in the background that are not required for Overwatch, freeing up system resources.
