Have you ever been frustrated by your computer automatically restarting without your permission? Find out how to disable Windows auto restart and regain control over your device.
Reasons Behind Automatic Reboots

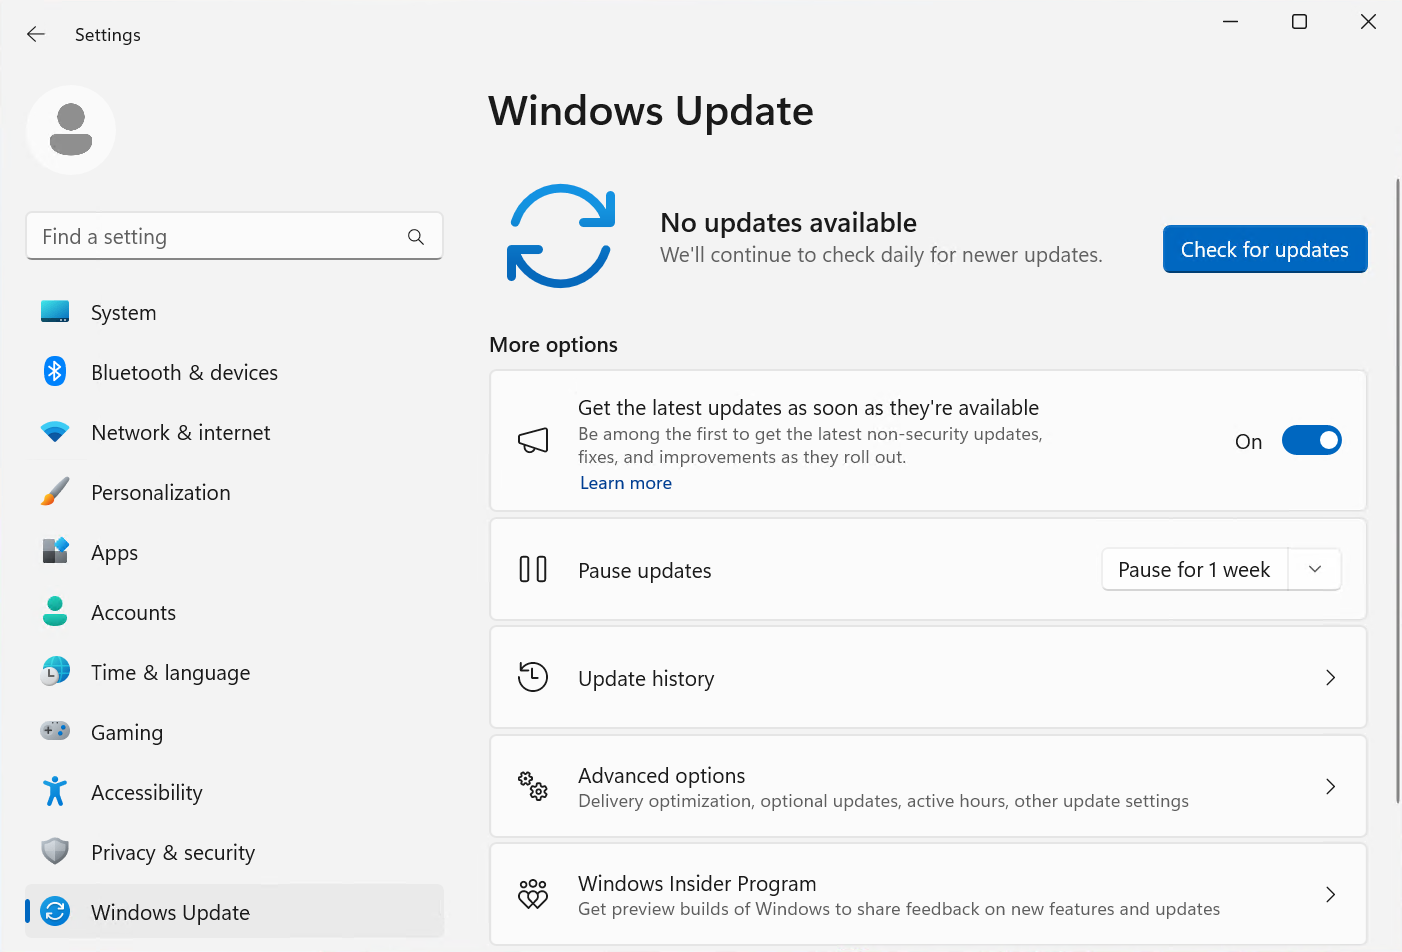
The most common reason for automatic reboots is Windows Update. Windows automatically installs updates to ensure the security and stability of your system. These updates often require a reboot to complete the installation process. To turn off automatic reboots caused by Windows Update, follow these steps:
1. Open the Windows Update settings by clicking on the Start menu and typing “Windows Update” in the search bar.
2. Click on “Windows Update settings” from the search results.
3. In the Windows Update settings window, click on “Advanced options.”
4. Under the “Pause updates” section, toggle the switch to turn on “Pause until a specific date.”
5. Choose a date far enough in the future to prevent automatic reboots.
Another common cause of automatic reboots is system errors or crashes. When Windows encounters a critical error, it may automatically restart to prevent further damage. To disable automatic reboots caused by system errors, follow these steps:
1. Press the Windows key + R to open the Run dialog box.
2. Type “sysdm.cpl” and press Enter to open the System Properties window.
3. Go to the “Advanced” tab and click on “Settings” under the “Startup and Recovery” section.
4. In the Startup and Recovery window, uncheck the box next to “Automatically restart” under the “System failure” section.
5. Click “OK” to save the changes.
Using Group Policy and Registry Editor
To disable auto restart using Group Policy, follow these steps:
1. Press the Windows key + R to open the Run dialog box.
2. Type “gpedit.msc” and hit Enter to open the Group Policy Editor.
3. In the editor, navigate to Computer Configuration -> Administrative Templates -> Windows Components -> Windows Update.
4. Double-click on “No auto-restart with logged on users for scheduled automatic updates installations” policy.
5. Select the “Enabled” option and click Apply, then OK.
To disable auto restart using Registry Editor, follow these steps:
1. Press the Windows key + R to open the Run dialog box.
2. Type “regedit” and hit Enter to open the Registry Editor.
3. Navigate to the following key: HKEY_LOCAL_MACHINE\SOFTWARE\Policies\Microsoft\Windows\WindowsUpdate\AU
4. Right-click on the right pane and select New -> DWORD (32-bit) Value.
5. Name the new value “NoAutoRebootWithLoggedOnUsers” and set its value data to 1.
Once you have made these changes, your Windows computer will no longer automatically restart.
Preventing Reboots After Updates
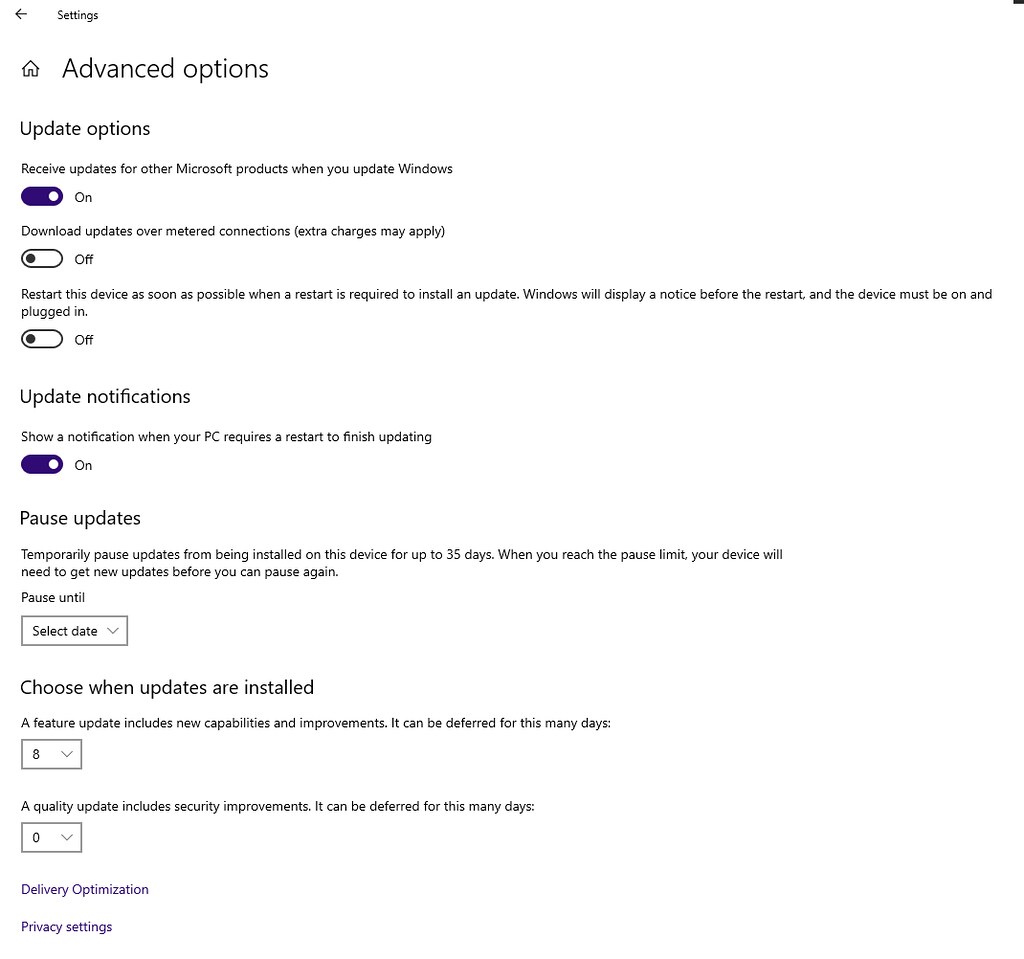
- Open the Start menu and click on Settings.
- In the Settings window, select Update & Security.
- Click on Windows Update in the left sidebar.
- Choose Advanced options.
- Under the “Update options” section, click on Restart this device as soon as possible when a restart is required to install an update to disable it.
- Close the Settings window.
Method 2: Modify Group Policy Settings
- Open the Run dialog by pressing Win + R on your keyboard.
- Type gpedit.msc and press Enter to open the Group Policy Editor.
- In the Group Policy Editor window, navigate to Computer Configuration > Administrative Templates > Windows Components > Windows Update.
- Double-click on No auto-restart with logged-on users for scheduled automatic updates installations.
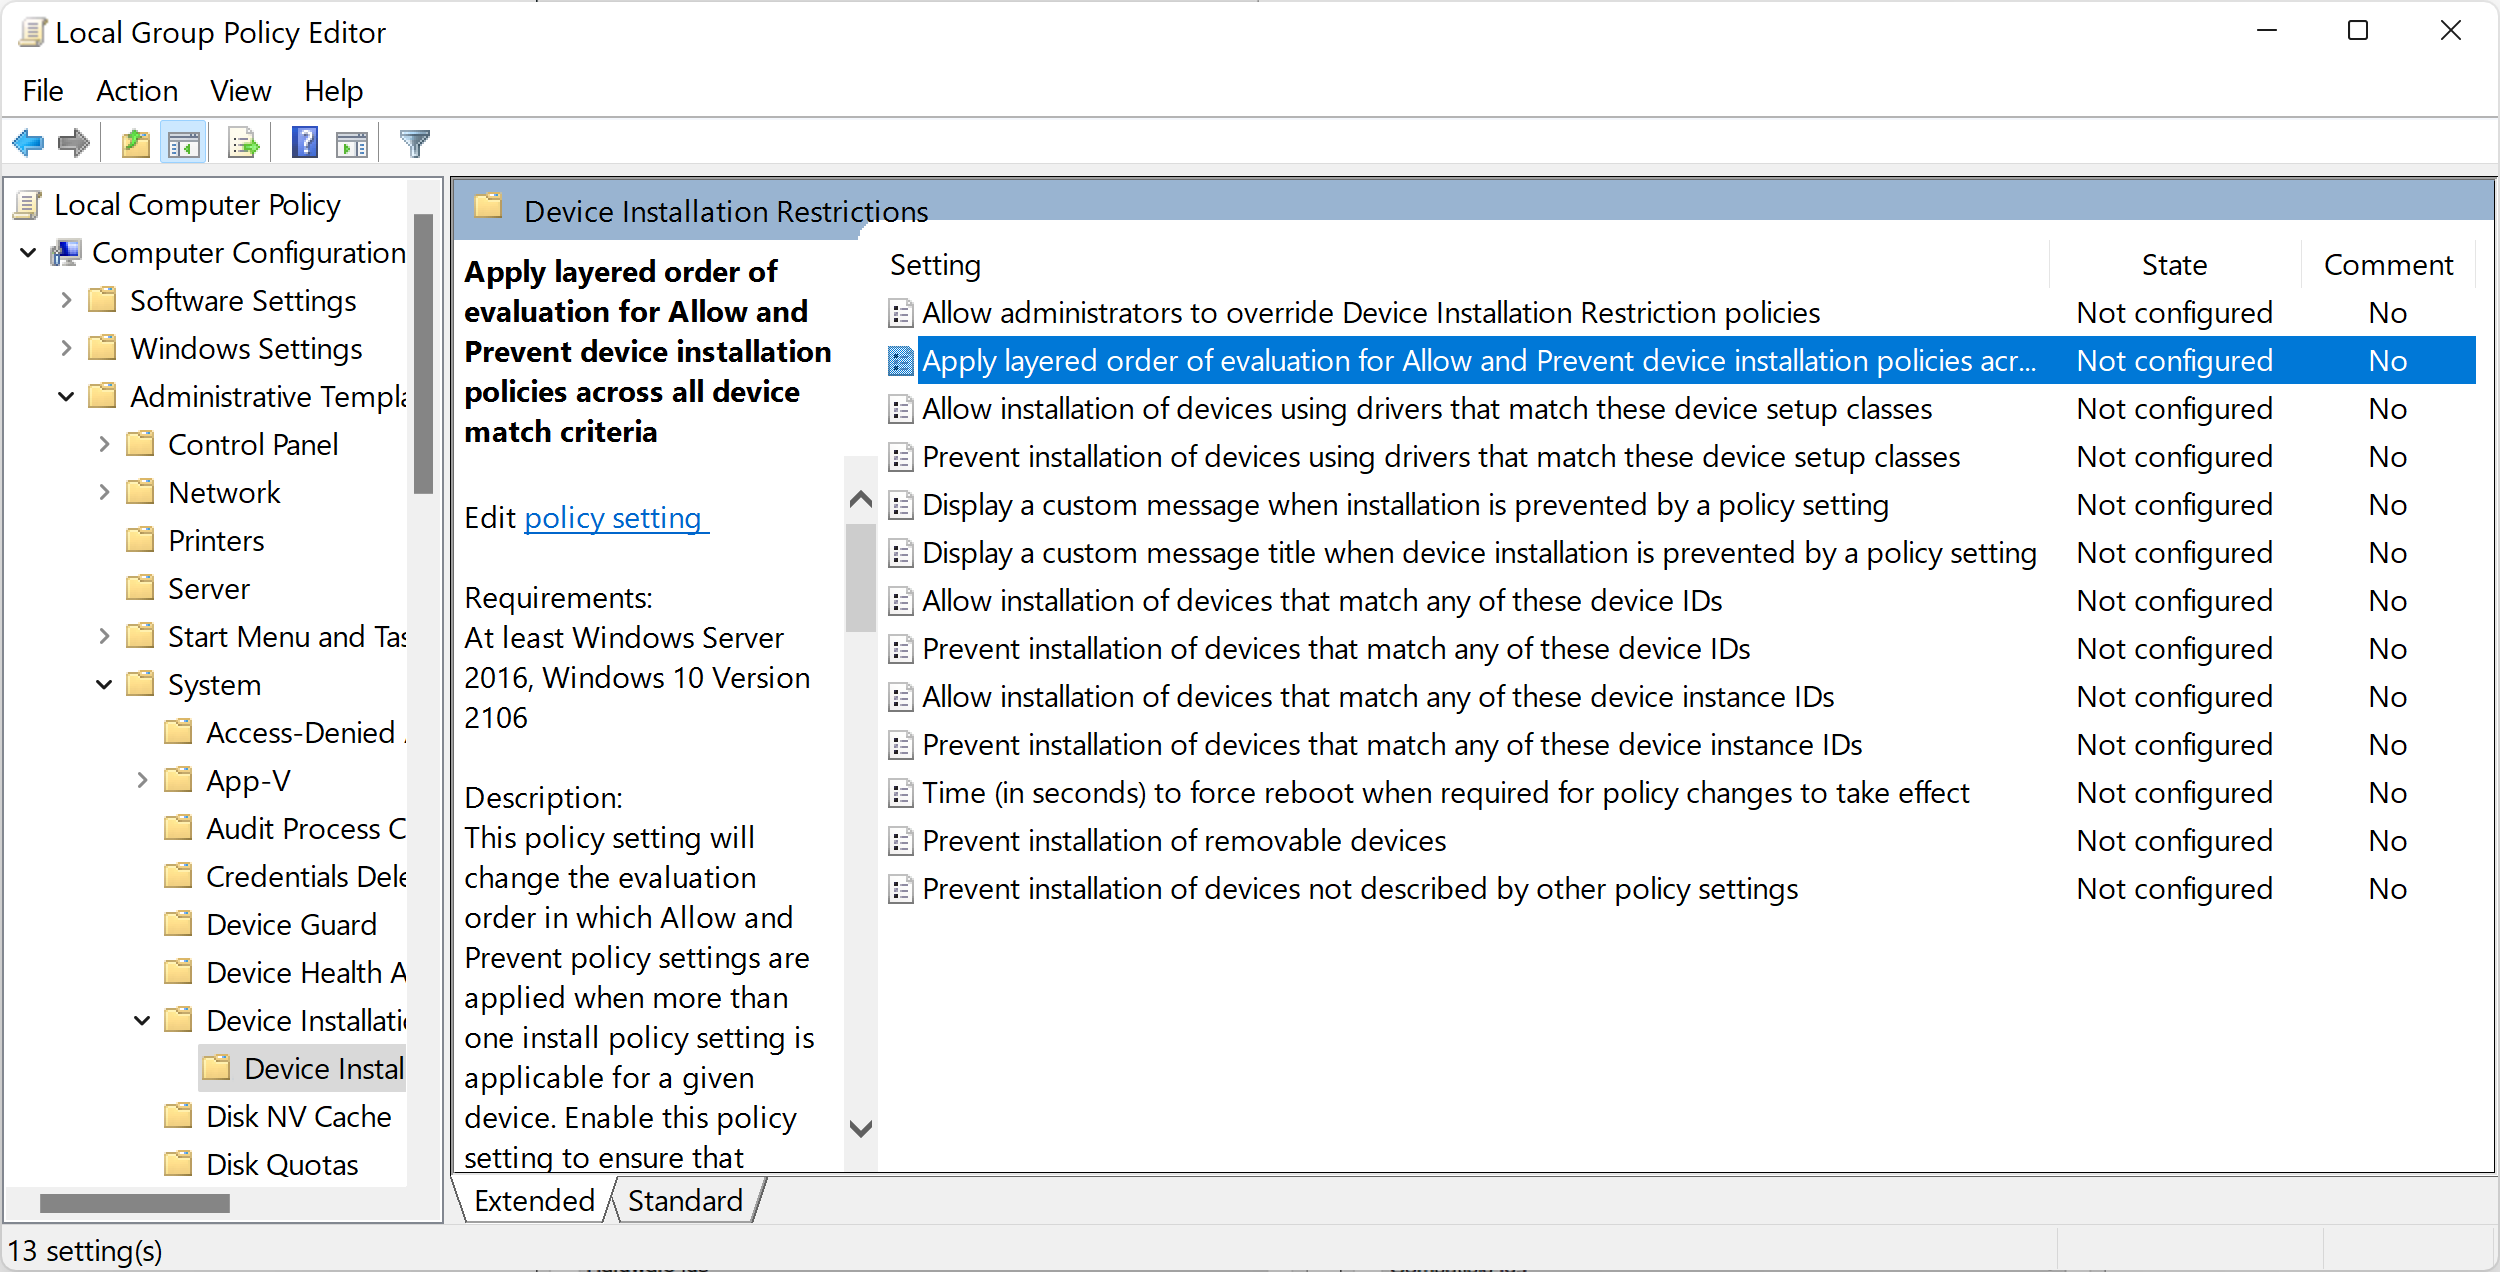
- Select the Enabled option.
- Click on Apply and then OK.

- Close the Group Policy Editor.
Method 3: Use Registry Editor to Disable Auto Restart
- Open the Run dialog by pressing Win + R on your keyboard.
- Type regedit and press Enter to open the Registry Editor.
- In the Registry Editor window, navigate to HKEY_LOCAL_MACHINE\SOFTWARE\Policies\Microsoft\Windows\WindowsUpdate\AU (create the keys if they don’t exist).
- Right-click on an empty space in the right pane and select New > DWORD (32-bit) Value.
- Name the new value NoAutoRebootWithLoggedOnUsers.
- Double-click on the newly created value and set its Value data to 1.
- Click on OK.
- Close the Registry Editor.
Troubleshooting Unresolved Issues
– Windows operating system
– Auto restart feature
– Troubleshooting unresolved issues
Content:
To turn off the auto restart feature in Windows, follow these steps:
1. Press the Windows key + R to open the Run dialog box.
2. Type “sysdm.cpl” and press Enter to open the System Properties window.
3. In the System Properties window, click on the “Advanced” tab.
4. Under the “Startup and Recovery” section, click on the “Settings” button.
5. In the Startup and Recovery window, uncheck the box next to “Automatically restart” under the “System failure” section.
6. Click “OK” to save the changes and close the windows.
By disabling the auto restart feature, you can troubleshoot unresolved issues without the computer automatically restarting, allowing you to view error messages or take necessary actions. This can be especially helpful when dealing with blue screen errors or other system crashes.
F.A.Q.
How do I turn off automatic restart?
To turn off automatic restart, go to Control Panel and select System and Security > System > Advanced system settings. In the Startup and Recovery section, choose Settings and uncheck the box next to Automatically restart.
How do I stop a scheduled restart in Windows 10?
To stop a scheduled restart in Windows 10, go to the Advanced tab in the System Properties. Click on the Settings button under the Startup and Recovery section. Look for the Automatically Restart option under System Failure and uncheck it.
How do I stop Windows Update from auto restarting?
To stop Windows Update from auto restarting, you can access the Group Policy Editor and make the following changes:
1. Open the Group Policy Editor (gpedit.msc).
2. Navigate to Administrative Templates > Windows Components > Windows Update.
3. Double-click on “No auto-restart with logged on users for scheduled automatic updates installations”.
4. Enable the setting and click OK.
How do I stop my computer from restarting itself?
To stop your computer from restarting itself, you can disable the Automatic Restart feature, adjust Advanced Power Settings, reinstall/update the graphics driver, check for RAM errors, ensure your computer is not overheating, check the power supply, and update the BIOS.
