Having trouble with Steam’s “Not Enough Disk Space” error? Here’s how I fixed it.
Restart PC and Run Steam as Administrator
To fix Steam’s “Not Enough Disk Space” error, one of the first steps you can take is to restart your PC and run Steam as an administrator. This can help resolve any temporary issues or conflicts that may be causing the error.
To restart your PC, simply click on the “Start” menu in the bottom left corner of your screen, then click on the power icon and select “Restart”. Once your PC has restarted, locate the Steam application on your desktop or in your Start menu.
To run Steam as an administrator, right-click on the Steam icon and select “Run as administrator” from the context menu. This will give Steam the necessary permissions to access and modify files on your computer.
By running Steam as an administrator, you may be able to bypass any restrictions or limitations that were preventing it from properly accessing your disk space. This can be especially helpful if you’re encountering the “Not Enough Disk Space” error despite having enough free space on your hard drive.
Verify and Repair Game Files
If you’re encountering the “Not Enough Disk Space” error on Steam, you can try verifying and repairing your game files to resolve the issue. This process will ensure that any corrupted or missing files are fixed or replaced. Here’s how you can do it:
1. Open Steam and go to your game library.
2. Right-click on the game that is giving you the error and select “Properties” from the context menu.
3. In the Properties window, go to the “Local Files” tab.
4. Click on the “Verify Integrity of Game Files” button.
This will initiate the verification process for your game files. Steam will compare the files on your computer with the files it has stored in its database. If any discrepancies are found, Steam will automatically replace or repair the affected files.
5. Wait for the process to complete. This may take some time depending on the size of the game and your internet connection.
Once the verification and repair process is done, you can try launching the game again to see if the “Not Enough Disk Space” error has been resolved. If the issue persists, you may need to free up some disk space on your computer or try other troubleshooting steps specific to the error you’re encountering.
Clear Download Cache and Extend Partition
- Open the Steam client.
- Click on the “Steam” menu located at the top left corner of the client.
- Select “Settings” from the dropdown menu.
- In the Settings window, choose the “Downloads” tab.
- Click on the “CLEAR DOWNLOAD CACHE” button.
- A confirmation dialog will appear, click “OK” to proceed.
- Wait for the cache to be cleared. This may take a few moments.
- Restart the Steam client.
Extend Partition
- Open the Start menu and type “Disk Management.”
- Click on “Create and format hard disk partitions” from the search results.
- Locate the partition you wish to extend.
- Right-click on the partition and select “Extend Volume.”
- Follow the on-screen instructions in the Extend Volume Wizard.
- Select the amount of space to add to the partition.
- Click “Next” and then click “Finish” to complete the process.
- Restart your computer for the changes to take effect.
Check for Hard Drive Errors and Run Disk Cleanup
First, check for hard drive errors by following these steps:
1. Press the Windows key + R to open the Run dialog box.
2. Type “cmd” and press Enter to open the command prompt.
3. In the command prompt, type “chkdsk C: /f” and press Enter. Replace “C” with the appropriate drive letter if needed.
4. Wait for the scan to complete and follow any instructions provided.
Next, run the disk cleanup utility to remove unnecessary files:
1. Open File Explorer by pressing the Windows key + E.
2. Right-click on the drive where Steam is installed and select “Properties.”
3. In the General tab, click on the “Disk Cleanup” button.
4. Select the file types you want to delete and click “OK.”
5. Confirm the deletion and wait for the process to finish.
After completing these steps, restart your computer and try running Steam again. This should resolve the “Not Enough Disk Space” error.
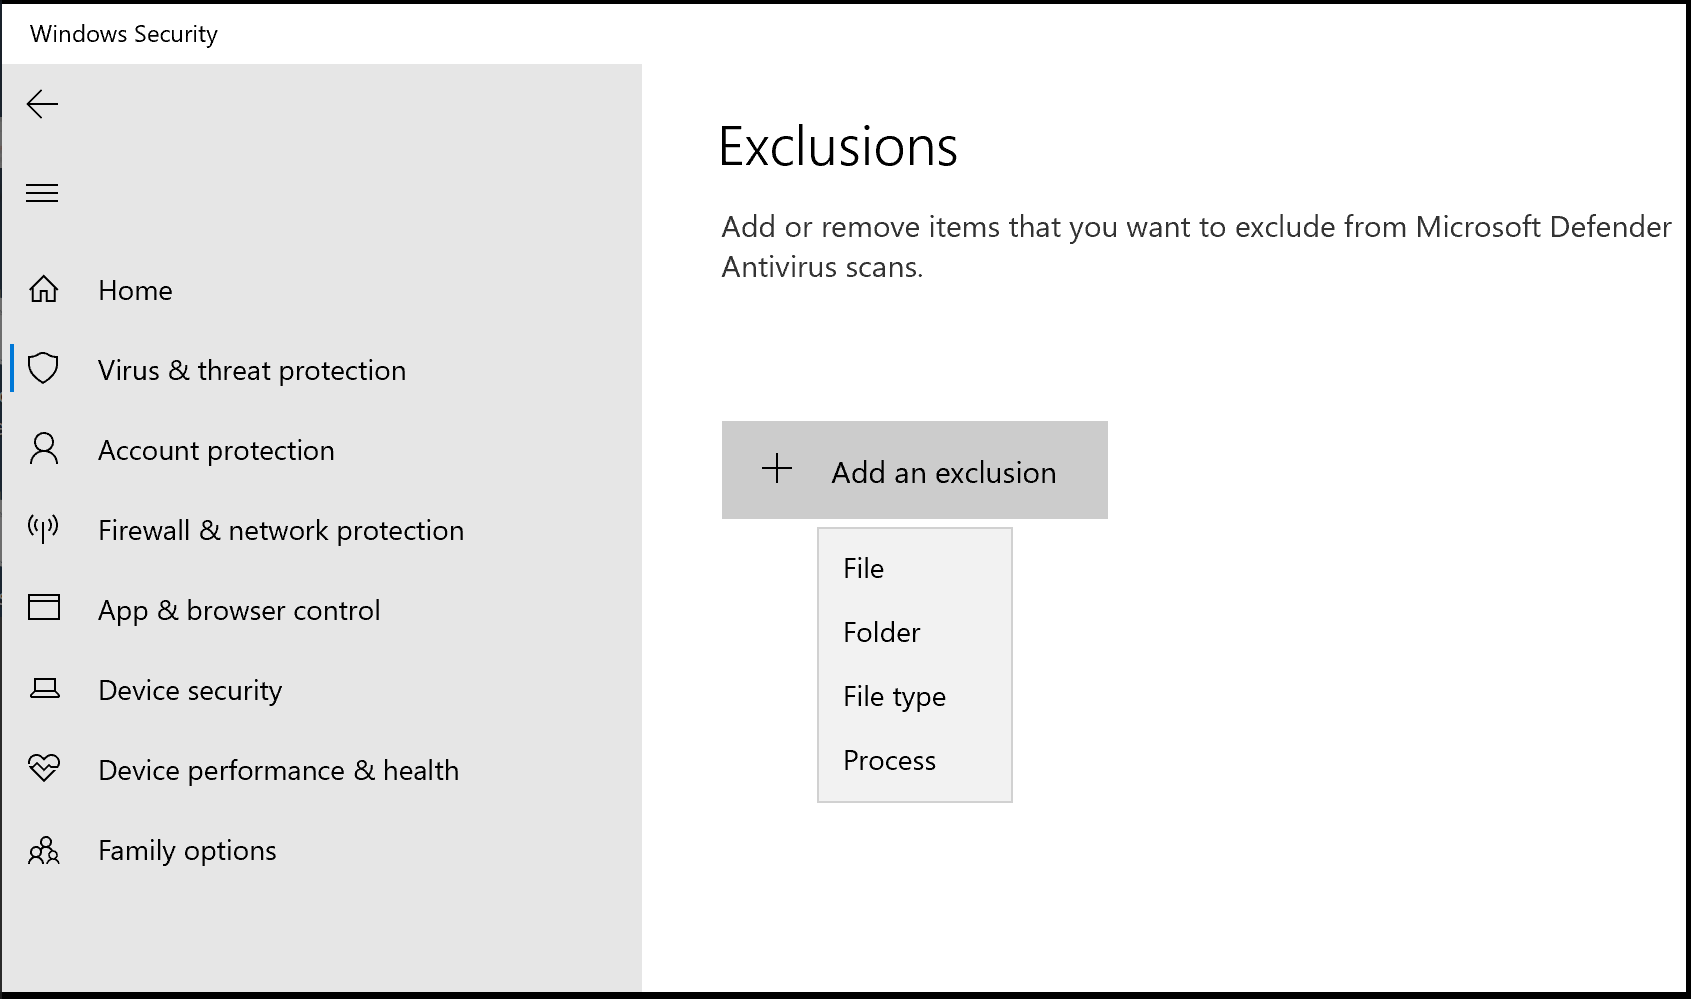
Manage Antivirus Exceptions and Free Up Disk Space
| Article Title | Fix Steam’s Not Enough Disk Space Error |
|---|---|
| Section 1 | Manage Antivirus Exceptions |
|
|
| Section 2 | Free Up Disk Space |
|
Frequently Asked Questions
How do I free up disk space on steam deck?
To free up disk space on Steam Deck, you can clear the shader cache by executing the Deck Cleaner file and selecting “Yes” when prompted.
How do I fix insufficient disk space?
To fix insufficient disk space, you can use the Disk Cleanup tool. Simply search for “disk cleanup” in the taskbar search box and select it from the results. Choose the drive you want to clean up files for and click OK. Check the box next to the types of files you want to delete and proceed with the cleanup.
Why is my disk not working on Steam?
Your disk may not be working on Steam due to various reasons. This could be because the drive or Steam folder is write-protected, there are defects in the hard drive, your antivirus or firewall is blocking Steam from downloading and saving data, or there are corrupt or outdated files in the Steam directory.
Why does it say I have no disk space when I do?
It is possible for your computer to display a “no disk space” error message even when you have sufficient disk space available. This issue may occur due to hidden or virtual memory files that are occupying space on your system. Deleting these files from the virtual partition can help resolve the problem. Additionally, it is worth considering whether there might be a disk format limitation causing this issue.
