Having trouble with your USB ports in Windows 10? Let’s troubleshoot and fix these issues efficiently.
Identifying Symptoms
When troubleshooting USB port issues in Windows 10, it is important to first identify the symptoms you are experiencing. This will help you narrow down the possible causes and find an appropriate solution. Here are some common symptoms to look out for:
1. USB devices not recognized: If your USB devices are not being recognized by your computer, it could indicate a problem with the USB port. This can include devices such as USB drives, mice, keyboards, or printers.
2. USB devices disconnecting randomly: If your USB devices keep disconnecting and reconnecting without any apparent reason, it may be a sign of a faulty USB port or an issue with the device driver.
3. Slow transfer speeds: If you notice that file transfers to and from your USB device are unusually slow, there could be an issue with the USB port or the USB hardware itself.
4. Error messages: Pay attention to any error messages you receive when connecting or using USB devices. These messages can provide valuable clues about the specific issue you are facing.
To identify the symptoms accurately, follow these steps:
1. Connect various USB devices: Plug in different USB devices to your computer and check if they are recognized properly. If some devices work while others don’t, it could indicate a problem with specific USB ports.
2. Test USB ports: Try connecting the same USB device to different USB ports on your computer. If the device works in some ports but not others, it may be a sign of a faulty port.
3. Check Device Manager: Open Device Manager by right-clicking on the Start menu, selecting “Device Manager” from the context menu. Look for any yellow exclamation marks or red crosses next to the USB controllers or devices. This indicates a problem with the device driver or hardware.
4. Review error messages: If you encounter any error messages when using USB devices, note down the exact text of the message. This information can be helpful when searching for a solution online or contacting technical support.
By accurately identifying the symptoms, you can better troubleshoot and fix USB port issues in Windows 10.
Checking Prerequisites
Before troubleshooting USB port issues in Windows 10, it is important to check a few prerequisites. These checks will ensure that you are able to effectively troubleshoot and fix any USB port issues you may be experiencing.
Firstly, make sure that you have the necessary hardware and software requirements. Ensure that you have a personal computer running Microsoft Windows 10. Additionally, check that your USB hardware is compatible with Windows 10. Some older USB devices may not be supported, so it is important to verify compatibility.
Next, check that your USB ports are functioning properly. Start by navigating to the Device Manager in Windows 10. You can do this by pressing the Windows key + X and selecting “Device Manager” from the context menu. In the Device Manager, expand the “Universal Serial Bus controllers” category to view all the USB ports on your computer.
If you see any yellow exclamation marks or red crosses next to any of the USB ports, it indicates a problem with that particular port. Right-click on the problematic USB port and select “Uninstall device” from the menu. This will remove the USB port driver from your system. Restart your computer and Windows 10 will automatically reinstall the USB port driver.
Another important check is to ensure that your USB ports are not disabled. Right-click on the Start menu and select “Device Manager” from the context menu. In the Device Manager, expand the “Universal Serial Bus controllers” category. Check for any entries labeled “Unknown USB Device” or “Disabled”. If you find any, right-click on them and select “Enable device” from the menu.
Furthermore, it is recommended to update your USB drivers to the latest version. You can do this by visiting the manufacturer’s website and downloading the latest drivers for your USB hardware. Alternatively, you can use a driver update software to automatically scan and update your USB drivers.
In some cases, a simple workaround can resolve USB port issues. Try connecting your USB device to a different port on your computer. This can help determine if the issue is specific to a particular USB port or if it is a more widespread problem. Additionally, try connecting your USB device to a different computer to see if the issue persists.
By checking these prerequisites, you can ensure that you have the necessary hardware and software requirements, and that your USB ports are functioning properly. This will help you effectively troubleshoot and fix any USB port issues you may encounter in Windows 10.
Scanning for Hardware Changes
To scan for hardware changes, follow these steps:
1. Press the Windows key + X on your keyboard to open the power user menu.
2. From the menu, select “Device Manager.”
3. In the Device Manager window, locate and expand the “Universal Serial Bus controllers” category.
4. Right-click on each USB device listed under the “Universal Serial Bus controllers” category and select “Uninstall device.” Make sure to uninstall all USB devices listed here, including USB-C devices.
5. After uninstalling all USB devices, click on the “Action” menu at the top of the Device Manager window and select “Scan for hardware changes.” This will prompt Windows to scan for any new or changed hardware.
6. Wait for the scan to complete. Windows will automatically reinstall the USB devices you uninstalled earlier.
7. Once the USB devices have been reinstalled, restart your computer to apply any changes.
Scanning for hardware changes can often help resolve USB port issues by refreshing the device drivers and reestablishing proper communication between the USB ports and connected devices. If the issue persists after scanning for hardware changes, you may need to try other troubleshooting methods or seek assistance from a system administrator.
Restarting the Computer
To restart your computer and troubleshoot USB port issues in Windows 10, follow these steps:
1. Save any unsaved work and close all open programs.
2. Click on the Start menu in the bottom left corner of your screen.
3. Select Restart from the menu options.
4. Wait for your computer to shut down and restart.
5. After the computer has restarted, login to your Windows 10 account.
6. Check if the USB port issue has been resolved. If not, try connecting a different USB device to see if it works.
7. If the issue persists, you can try a few additional troubleshooting steps.
8. First, try connecting the USB device to a different USB port on your computer. Sometimes, certain ports may have issues while others work fine.
9. If that doesn’t work, you can try uninstalling the USB driver and then reinstalling it. To do this, follow these steps:
a. Press the Windows key + X on your keyboard and select Device Manager from the menu that appears.
b. In the Device Manager window, expand the Universal Serial Bus controllers category.
c. Right-click on the USB device that is causing the issue and select Uninstall device.
d. Confirm the uninstallation by clicking Uninstall in the pop-up window.
e. Once the driver is uninstalled, restart your computer. Windows will automatically reinstall the driver.
10. If none of the above steps resolve the issue, you can try a workaround by using a USB-C to USB dongle. This can help if your computer has a USB-C port but the device you’re trying to connect uses a traditional USB port.
Managing USB Controllers
| Managing USB Controllers | |
|---|---|
| Issue | Solution |
| USB Port Not Recognizing Devices | 1. Restart your computer and reconnect the USB device. 2. Update the USB controller driver. 3. Check if the USB port is enabled in BIOS/UEFI settings. 4. Disable and re-enable the USB port. 5. Try connecting the device to a different USB port. 6. Test the USB device on another computer to verify if it’s the device or the port causing the issue. 7. Contact manufacturer support for further assistance. |
| USB Port Not Providing Power | 1. Check the USB cable for any damage or loose connections. 2. Connect the device to a different USB port to see if the issue persists. 3. Test the USB device with a different computer to determine if it’s a device or a port problem. 4. Update the USB controller driver. 5. Contact manufacturer support for further assistance. |
| USB Devices Disconnecting Randomly | 1. Ensure the USB device is securely connected. 2. Check the power settings to make sure USB selective suspend is disabled. 3. Update the USB controller driver. 4. Disable power saving options for USB devices. 5. Disable USB selective suspend. 6. Test the USB device on another computer to determine if it’s a device or port issue. 7. Contact manufacturer support for further assistance. |
| USB Port Not Working After Windows Update | 1. Restart your computer and reconnect the USB device. 2. Update the USB controller driver. 3. Roll back the Windows update that caused the issue. 4. Uninstall and reinstall the USB controller driver. 5. Disable USB selective suspend. 6. Contact Microsoft support for further assistance. |
| USB Device Not Recognized Error | 1. Disconnect and reconnect the USB device. 2. Update the USB controller driver. 3. Disable and re-enable the USB device. 4. Check if the USB device works on another computer. 5. Use USB troubleshooter in Windows to diagnose and fix the issue. 6. Contact manufacturer support for further assistance. |
Disabling and Re-enabling USB Controllers
To troubleshoot USB port issues in Windows 10, you may need to disable and re-enable USB controllers. This can help resolve problems such as unrecognized devices or malfunctioning ports. Here’s how to do it:
1. Press the Windows key + X on your keyboard and select “Device Manager” from the menu that appears.
2. In the Device Manager window, expand the “Universal Serial Bus controllers” category.
3. Right-click on each USB controller listed and select “Disable device” from the context menu. This will temporarily disable the controller.
4. After disabling all the USB controllers, wait for a few seconds and then right-click on each disabled controller again. Select “Enable device” to re-enable them.
5. Restart your computer to apply the changes.
By disabling and re-enabling the USB controllers, you are essentially resetting the connection between the USB ports and the operating system. This can help resolve any software or driver conflicts that may be causing the USB port issues.
If the problem persists, you may consider updating the USB drivers or checking for any hardware issues. You can do this by visiting the manufacturer’s website for your computer or contacting the system administrator for assistance.
Remember to test your USB ports with different devices to ensure they are functioning properly. Additionally, make sure to check for any physical damage or loose connections that may be affecting the ports.
Addressing Windows Power Management
![]()
To troubleshoot and fix USB port issues in Windows 10, it’s important to address the power management settings. These settings can sometimes cause problems with USB devices not being recognized or functioning properly. Here’s how you can resolve these issues:
1. Open the Device Manager by pressing the Windows key + X and selecting “Device Manager” from the menu that appears.
2. Expand the “Universal Serial Bus controllers” category to see a list of all the USB devices connected to your computer.
3. Right-click on each USB device and select “Properties” from the context menu.
4. In the Properties window, navigate to the “Power Management” tab.
5. Uncheck the option that says “Allow the computer to turn off this device to save power.”
6. Click “OK” to save the changes.
7. Repeat steps 3-6 for all the USB devices listed in the Device Manager.
8. Restart your computer.
By disabling the power management settings for USB devices, you can prevent Windows 10 from turning off the USB ports to save power. This should resolve any issues with USB devices not working properly.
If the problem persists, you can also try updating the drivers for your USB devices. To do this, follow these steps:
1. Go back to the Device Manager and locate the USB device that is causing the problem.
2. Right-click on the device and select “Update driver” from the context menu.
3. Choose the option to automatically search for updated driver software.
4. If Windows finds a newer driver version, follow the on-screen instructions to install it.
5. Restart your computer and check if the USB device is now functioning correctly.
If updating the drivers doesn’t solve the issue, you can also try uninstalling and reinstalling the USB device. Here’s how:
1. Open the Device Manager and locate the problematic USB device.
2. Right-click on the device and select “Uninstall device” from the context menu.
3. Follow the on-screen instructions to complete the uninstallation.
4. Disconnect the USB device from your computer.
5. Restart your computer.
6. After the restart, reconnect the USB device to your computer.
Windows 10 will automatically reinstall the drivers for the USB device. This may fix any compatibility issues or corrupted drivers that were causing the problem.
In some cases, USB port issues can also be caused by a problem with the root hubs. To troubleshoot this, you can try resetting the USB root hubs:
1. Open the Device Manager and expand the “Universal Serial Bus controllers” category.
2. Right-click on each “USB Root Hub” entry and select “Properties.”
3. Go to the “Power Management” tab and uncheck the option to allow the computer to turn off the device to save power.
4. Click “OK” to save the changes and repeat the process for all the USB Root Hubs.
5. Restart your computer.
These steps should help you troubleshoot and fix USB port issues in Windows 10. By addressing power management settings, updating drivers, and resetting USB root hubs, you can ensure that your USB devices work properly on your Windows 10 PC.
Narrowing Down the Issue
To troubleshoot and fix USB port issues in Windows 10, follow these steps:
1. Restart your computer. Sometimes, a simple restart can resolve USB port issues.
2. Check the physical connections. Ensure that the USB cable is securely plugged into both the computer and the device you are trying to connect. Additionally, try using a different USB port to rule out any hardware problems.
3. Update your drivers. Outdated or incompatible drivers can cause USB port problems. To update your drivers, follow these steps:
– Press the Windows key + X and select Device Manager.
– Expand the Universal Serial Bus controllers category.
– Right-click on each USB Root Hub and select Update driver.
– Choose the option to automatically search for updated driver software.
– Restart your computer after the drivers have been updated.
4. Reset the USB selective suspend setting. This setting can sometimes interfere with USB devices. To reset it, do the following:
– Press the Windows key + X and select Power Options.
– Click on Change plan settings next to your selected power plan.
– Click on Change advanced power settings.
– Expand USB settings and USB selective suspend setting.
– Set both the On battery and Plugged in options to Disabled.
– Click Apply and OK.
5. Remove conflicting software. Certain programs or drivers can conflict with USB ports. Uninstall any recently installed software or drivers that may be causing the issue. To do this, follow these steps:
– Press the Windows key + X and select Apps and Features.
– Locate the software or driver you want to uninstall and click on it.
– Click Uninstall and follow the on-screen instructions to remove the software or driver.
6. Run the Windows Hardware and Devices troubleshooter. This built-in tool can automatically detect and fix common hardware issues, including USB port problems. To run the troubleshooter, follow these steps:
– Press the Windows key + I to open the Settings app.
– Click on Update & Security.
– Select Troubleshoot from the left-hand menu.
– Click on Additional troubleshooters.
– Scroll down and click on Hardware and Devices.
– Click on Run the troubleshooter and follow the on-screen instructions.
Ensuring Correct Port Usage
To ensure correct port usage in Windows 10, follow these steps:
1. Check the physical connection: Ensure that the USB device is securely connected to the correct port on your computer. If you have multiple USB ports, try connecting the device to a different port to rule out any hardware issues.
2. Update USB drivers: Outdated or incompatible USB drivers can cause port issues. To update your USB drivers, follow these steps:
a. Press the Windows key + X and select “Device Manager” from the menu.
b. Expand the “Universal Serial Bus controllers” category.
c. Right-click on each USB device and select “Update driver.”
d. Choose the option to automatically search for updated drivers.
3. Check for USB power management settings: Sometimes, USB ports may be disabled or not supplying enough power to the connected device. To check and adjust USB power management settings, do the following:
a. Press the Windows key + X and select “Device Manager.”
b. Expand the “Universal Serial Bus controllers” category.
c. Right-click on each USB device and select “Properties.”
d. Go to the “Power Management” tab and uncheck the box that says “Allow the computer to turn off this device to save power.”
4. Scan for hardware changes: If your USB port is still not working, you can try scanning for hardware changes. This will prompt the system to detect and reinstall any connected USB devices. To scan for hardware changes, follow these steps:
a. Press the Windows key + X and select “Device Manager.”
b. Click on “Action” in the top menu and select “Scan for hardware changes.”
5. Disable USB selective suspend: USB selective suspend is a power-saving feature that can sometimes interfere with USB port functionality. To disable USB selective suspend, do the following:
a. Press the Windows key + X and select “Power Options.”
b. Click on “Change plan settings” next to your selected power plan.
c. Click on “Change advanced power settings.”
d. Expand the “USB settings” category and disable the “USB selective suspend setting.”
Cleaning USB Ports
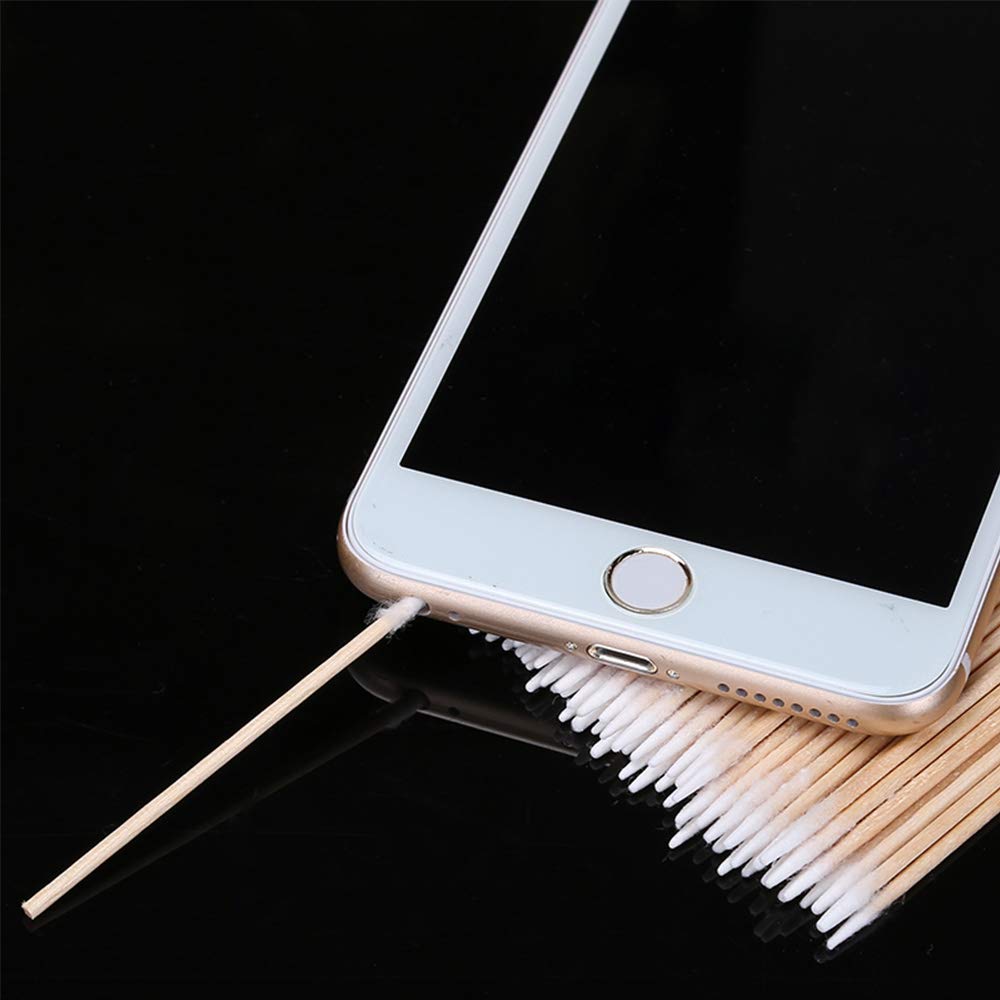
To clean USB ports in Windows 10, follow these steps:
1. First, turn off your computer to avoid any potential damage.
2. Take a can of compressed air and use it to blow out any dust or debris that may be stuck in the USB ports. Hold the can upright and use short bursts of air to clean the ports thoroughly.
3. If you notice any visible dirt or grime, gently wipe the USB ports with a soft, lint-free cloth. Be careful not to use any liquid or cleaning agents as they can damage the ports.
4. Inspect the USB ports for any bent or damaged pins. If you find any, use a small tool like a toothpick or a needle to carefully straighten them out. Take extra care not to break or damage the pins further.
5. Once you’ve cleaned and inspected the USB ports, you can now restart your computer and check if the issues with the USB ports have been resolved.
Updating and Restarting
1. Update your computer: Ensure that your computer’s operating system, drivers, and firmware are up to date. This can help fix any compatibility issues causing USB port problems.
2. To update Windows 10, follow these steps:
a. Click on the Start menu and select “Settings.”
b. In the Settings window, click on “Update & Security.”
c. Click on “Windows Update” in the left-hand menu.
d. Click on “Check for updates” and let Windows download and install any available updates.
3. Restart your computer: After updating, it’s important to restart your computer to apply the changes. Restarting can help refresh the system and clear any temporary glitches.
4. To restart your computer:
a. Click on the Start menu and select the power icon.
b. Choose “Restart” from the options.
c. Wait for your computer to shut down and restart.
5. After the restart, check if the USB port issue has been resolved. Connect your USB device and see if it’s recognized properly. If the problem persists, try the next troubleshooting steps.
Frequently Asked Questions
Why USB is not working in Windows 10?
USB may not be working in Windows 10 due to various reasons. To troubleshoot the issue, start by disconnecting and reconnecting the USB device. Ensure that the plug is inserted correctly and the cable is not damaged. If the problem persists, try connecting the USB device to a different USB port on your computer to determine if the previous port is defective.
Why is my PC not detecting USB?
Your PC may not be detecting USB due to various reasons such as an unstable or corrupt USB driver, conflicts with updates or missing important updates, and potential hardware or software issues.
Why is my external USB not recognized Windows 10?
Your external USB may not be recognized in Windows 10 due to a faulty connection. To troubleshoot this issue, try using a different cable and USB port. Additionally, check if there is a light on the external drive to determine if the connection is working and power is being supplied.
Why are my USB ports on my computer not working?
Your USB ports on your computer may not be working due to various reasons such as incompatible devices, outdated or corrupt drivers, damaged USB ports or cables, or a faulty USB port.
