Having trouble with your M.2 drive not showing up? Let’s dive into some troubleshooting steps to resolve this issue.
Common Causes of Detection Issues
To troubleshoot, first check the BIOS settings and make sure the M.2 slot is enabled. If it’s disabled, enable it and restart the computer.
Next, verify that the M.2 drive is properly connected to the motherboard. Double-check the physical connection and ensure that the drive is securely inserted into the slot.
If the drive is still not showing up, try formatting it using the Disk Management tool in Windows. Right-click on the drive, select “Format,” and follow the prompts to format the drive.
If none of these steps work, there may be an issue with the drive itself. Try connecting the M.2 drive to a different computer or using a different M.2 slot on the motherboard to see if it is recognized.
In some cases, outdated or missing device drivers can also cause detection issues. Update the drivers for the M.2 drive or try reinstalling them.
If all else fails, it may be necessary to seek professional help or consider using data recovery software, such as EaseUS Data Recovery Wizard, to recover any important data from the drive.
Ensuring Proper Installation and Configuration

- Check physical connection
- Shut down the computer and disconnect the power cord.
- Open the computer case and locate the M.2 drive.
- Ensure that the M.2 drive is properly seated in its slot.
- Make sure the screws securing the drive are tightened.
- Close the computer case and reconnect the power cord.
- Check BIOS/UEFI settings
- Restart the computer and enter the BIOS/UEFI setup.
- Navigate to the “Storage” or “Boot” section.
- Ensure that the M.2 drive is recognized and enabled.
- If not, enable the M.2 drive and save the changes.
- Exit the BIOS/UEFI setup and restart the computer.
- Update motherboard drivers and BIOS/UEFI firmware
- Visit the manufacturer’s website for your motherboard.
- Search for the latest drivers and BIOS/UEFI firmware for your specific model.
- Download and install the updated drivers and firmware.
- Restart the computer after the installation is complete.
- Check for conflicts with other devices
- Open Device Manager by pressing Windows Key + X and selecting Device Manager.
- Expand the Storage controllers or Other devices section.
- Look for any devices with a yellow exclamation mark or a red “X” symbol.
- If found, right-click on the device and select Update driver.
- Follow the on-screen instructions to update the driver.
BIOS Settings and M.2 SSD Recognition
If you’re troubleshooting an M.2 drive that is not showing up, there are a few BIOS settings you can check. First, make sure that the M.2 slot is enabled in the BIOS. Access the BIOS menu by restarting your computer and pressing the designated key (usually Del or F2) during bootup. Look for the “Storage” or “Peripheral Configuration” section and ensure that the M.2 slot is not disabled.
Next, check if the M.2 drive is being recognized by the BIOS. Navigate to the “Storage” or “Boot” section and look for the list of drives. If the M.2 drive is not listed, it may be a compatibility issue or a problem with the drive itself. Try reseating the M.2 drive or testing it in another computer to confirm if it is functioning properly.
If the M.2 drive is recognized in the BIOS but not showing up in Windows, it may need to be formatted. Open the Disk Management tool by right-clicking the Start menu and selecting “Disk Management” from the context menu. Locate the M.2 drive in the list of disks and right-click on it. Select “Initialize Disk” and choose the appropriate disk partition style (MBR or GPT). Then, right-click on the unallocated space and select “New Simple Volume” to format the drive.
In some cases, you may need to update the BIOS or install a specific device driver for the M.2 drive to be recognized. Check the manufacturer’s website for the latest BIOS updates and drivers for your motherboard. Download and install any available updates, following the instructions provided.
Remember to backup your important data before making any changes to the BIOS or formatting the drive. If you encounter any difficulties or uncertainties, consult the manufacturer’s support documentation or seek assistance from online forums or communities like Reddit or Tom’s Hardware.
Update BIOS and SSD Drivers
To troubleshoot a M.2 drive not showing up, it is important to update the BIOS and SSD drivers. These updates can help resolve compatibility issues and ensure that the drive is recognized by the system. Here are the steps to follow:
1. Identify your computer’s manufacturer and model.
2. Visit the manufacturer’s website and navigate to the support or downloads section.
3. Look for the latest BIOS update for your specific computer model. Download the update file.
4. Connect a USB flash drive to your computer and format it to FAT32 or NTFS.
5. Copy the BIOS update file to the USB flash drive.
6. Restart your computer and access the BIOS settings. This can usually be done by pressing a specific key during the boot process, such as F2 or Delete.
7. In the BIOS settings, navigate to the “Advanced” or “Tools” section and find the option to update the BIOS. Select the USB flash drive as the source for the update file.
8. Follow the on-screen instructions to update the BIOS. Be sure to read and understand any warnings or prompts before proceeding.
9. Once the BIOS update is complete, restart your computer and check if the M.2 drive is now recognized.
Additionally, you may also need to update the SSD drivers. Here’s how:
1. Open the Device Manager by right-clicking on the Start menu and selecting “Device Manager” from the context menu.
2. Expand the “Disk drives” category.
3. Right-click on the SSD drive and select “Update driver” from the context menu.
4. Choose the option to search for updated drivers automatically. Windows will search online for the latest drivers and install them if found.
5. Restart your computer and check if the M.2 drive is now showing up.
Updating the BIOS and SSD drivers can often resolve issues with M.2 drives not being recognized. If the problem persists, you may need to seek further assistance from the manufacturer or consult online forums such as Reddit or Tom’s Hardware for additional troubleshooting steps.
Assigning a Drive Letter
If your M.2 drive is not showing up on your computer, one possible solution is to assign a drive letter to it. Follow these steps to assign a drive letter:
1. Press the Windows key + R to open the Run dialog box.
2. Type “diskmgmt.msc” and press Enter to open the Disk Management utility.
3. Locate your M.2 drive in the list of disks. It may appear as unallocated or without a drive letter.
4. Right-click on the M.2 drive and select “Change Drive Letter and Paths”.
5. Click on “Add” and choose a drive letter from the drop-down menu.
6. Click “OK” to assign the drive letter to your M.2 drive.
7. Close the Disk Management utility and check if your M.2 drive is now showing up in File Explorer.
If your M.2 drive still doesn’t appear, make sure it is properly connected and powered on. You may also need to check for any device driver updates or firmware updates for your M.2 drive. If all else fails, consider seeking professional assistance or using data recovery software like EaseUS Data Recovery Wizard to retrieve any important data from the drive.
Utilizing Hardware and Devices Troubleshooter
To troubleshoot a M.2 drive that is not showing up, you can utilize the Hardware and Devices Troubleshooter on Windows 10. This tool can help identify and resolve any issues related to the drive not being recognized by the computer.
First, press the Windows key + R on your keyboard to open the Run dialog box. Type “control” and press Enter to open the Control Panel.
In the Control Panel, click on “Troubleshooting” and then select “View all” from the left-hand side menu. Scroll down and locate “Hardware and Devices” from the list of troubleshooters.
Click on “Hardware and Devices” and then click on “Next” to start the troubleshooting process. The troubleshooter will scan your computer for any hardware issues and attempt to fix them automatically.
If the troubleshooter is unable to resolve the issue, you can try some additional steps manually. Start by checking the physical connections of the M.2 drive. Make sure it is properly inserted into the M.2 slot and secured with a screw if necessary.
If the drive is properly connected but still not showing up, you can try updating the drivers for the M.2 drive. Right-click on the Start button and select “Device Manager” from the menu. Expand the “Disk drives” category and locate the M.2 drive. Right-click on it and select “Update driver” from the context menu. Follow the on-screen instructions to update the driver.
If updating the driver doesn’t work, you can also try reseating the M.2 drive. Turn off your computer and unplug the power supply. Open the case and locate the M.2 slot. Carefully remove the M.2 drive and then reinsert it firmly. Close the case, plug in the power supply, and turn on the computer to see if the drive is now recognized.
If none of the above steps resolve the issue, it’s possible that the M.2 drive is faulty and may need to be replaced. Contact the manufacturer for further assistance or consider seeking professional help.
Initializing and Creating New Partitions
To troubleshoot an M.2 drive not showing up, you may need to initialize and create new partitions. Follow these steps:
1. Open the Disk Management utility in Windows 10.
2. Locate the M.2 drive in the list of available disks. It may appear as unallocated or with a different status.
3. Right-click on the M.2 drive and select “Initialize Disk”. Choose the appropriate partition style (MBR or GPT).
4. Right-click again on the unallocated space of the M.2 drive and select “New Simple Volume”.
5. Follow the on-screen instructions to set the desired size, assign a drive letter, and format the partition.
6. Once the partition is created and formatted, the M.2 drive should appear in File Explorer.
If the M.2 drive still doesn’t show up, ensure that your computer hardware supports M.2 drives and that the drive is properly connected. You may need to check the power supply unit, connections, or use an adapter if necessary.
Note: This troubleshooting process assumes that the M.2 drive is physically installed correctly and recognized by the system. If you’re uncertain about any step or encounter any issues, refer to the manufacturer’s documentation or seek professional assistance.
Setting M.2 SSD as Boot Drive
To troubleshoot an M.2 drive not showing up, you can try setting it as the boot drive. Here are the steps to do so:
1. Start by shutting down your computer and opening the case.
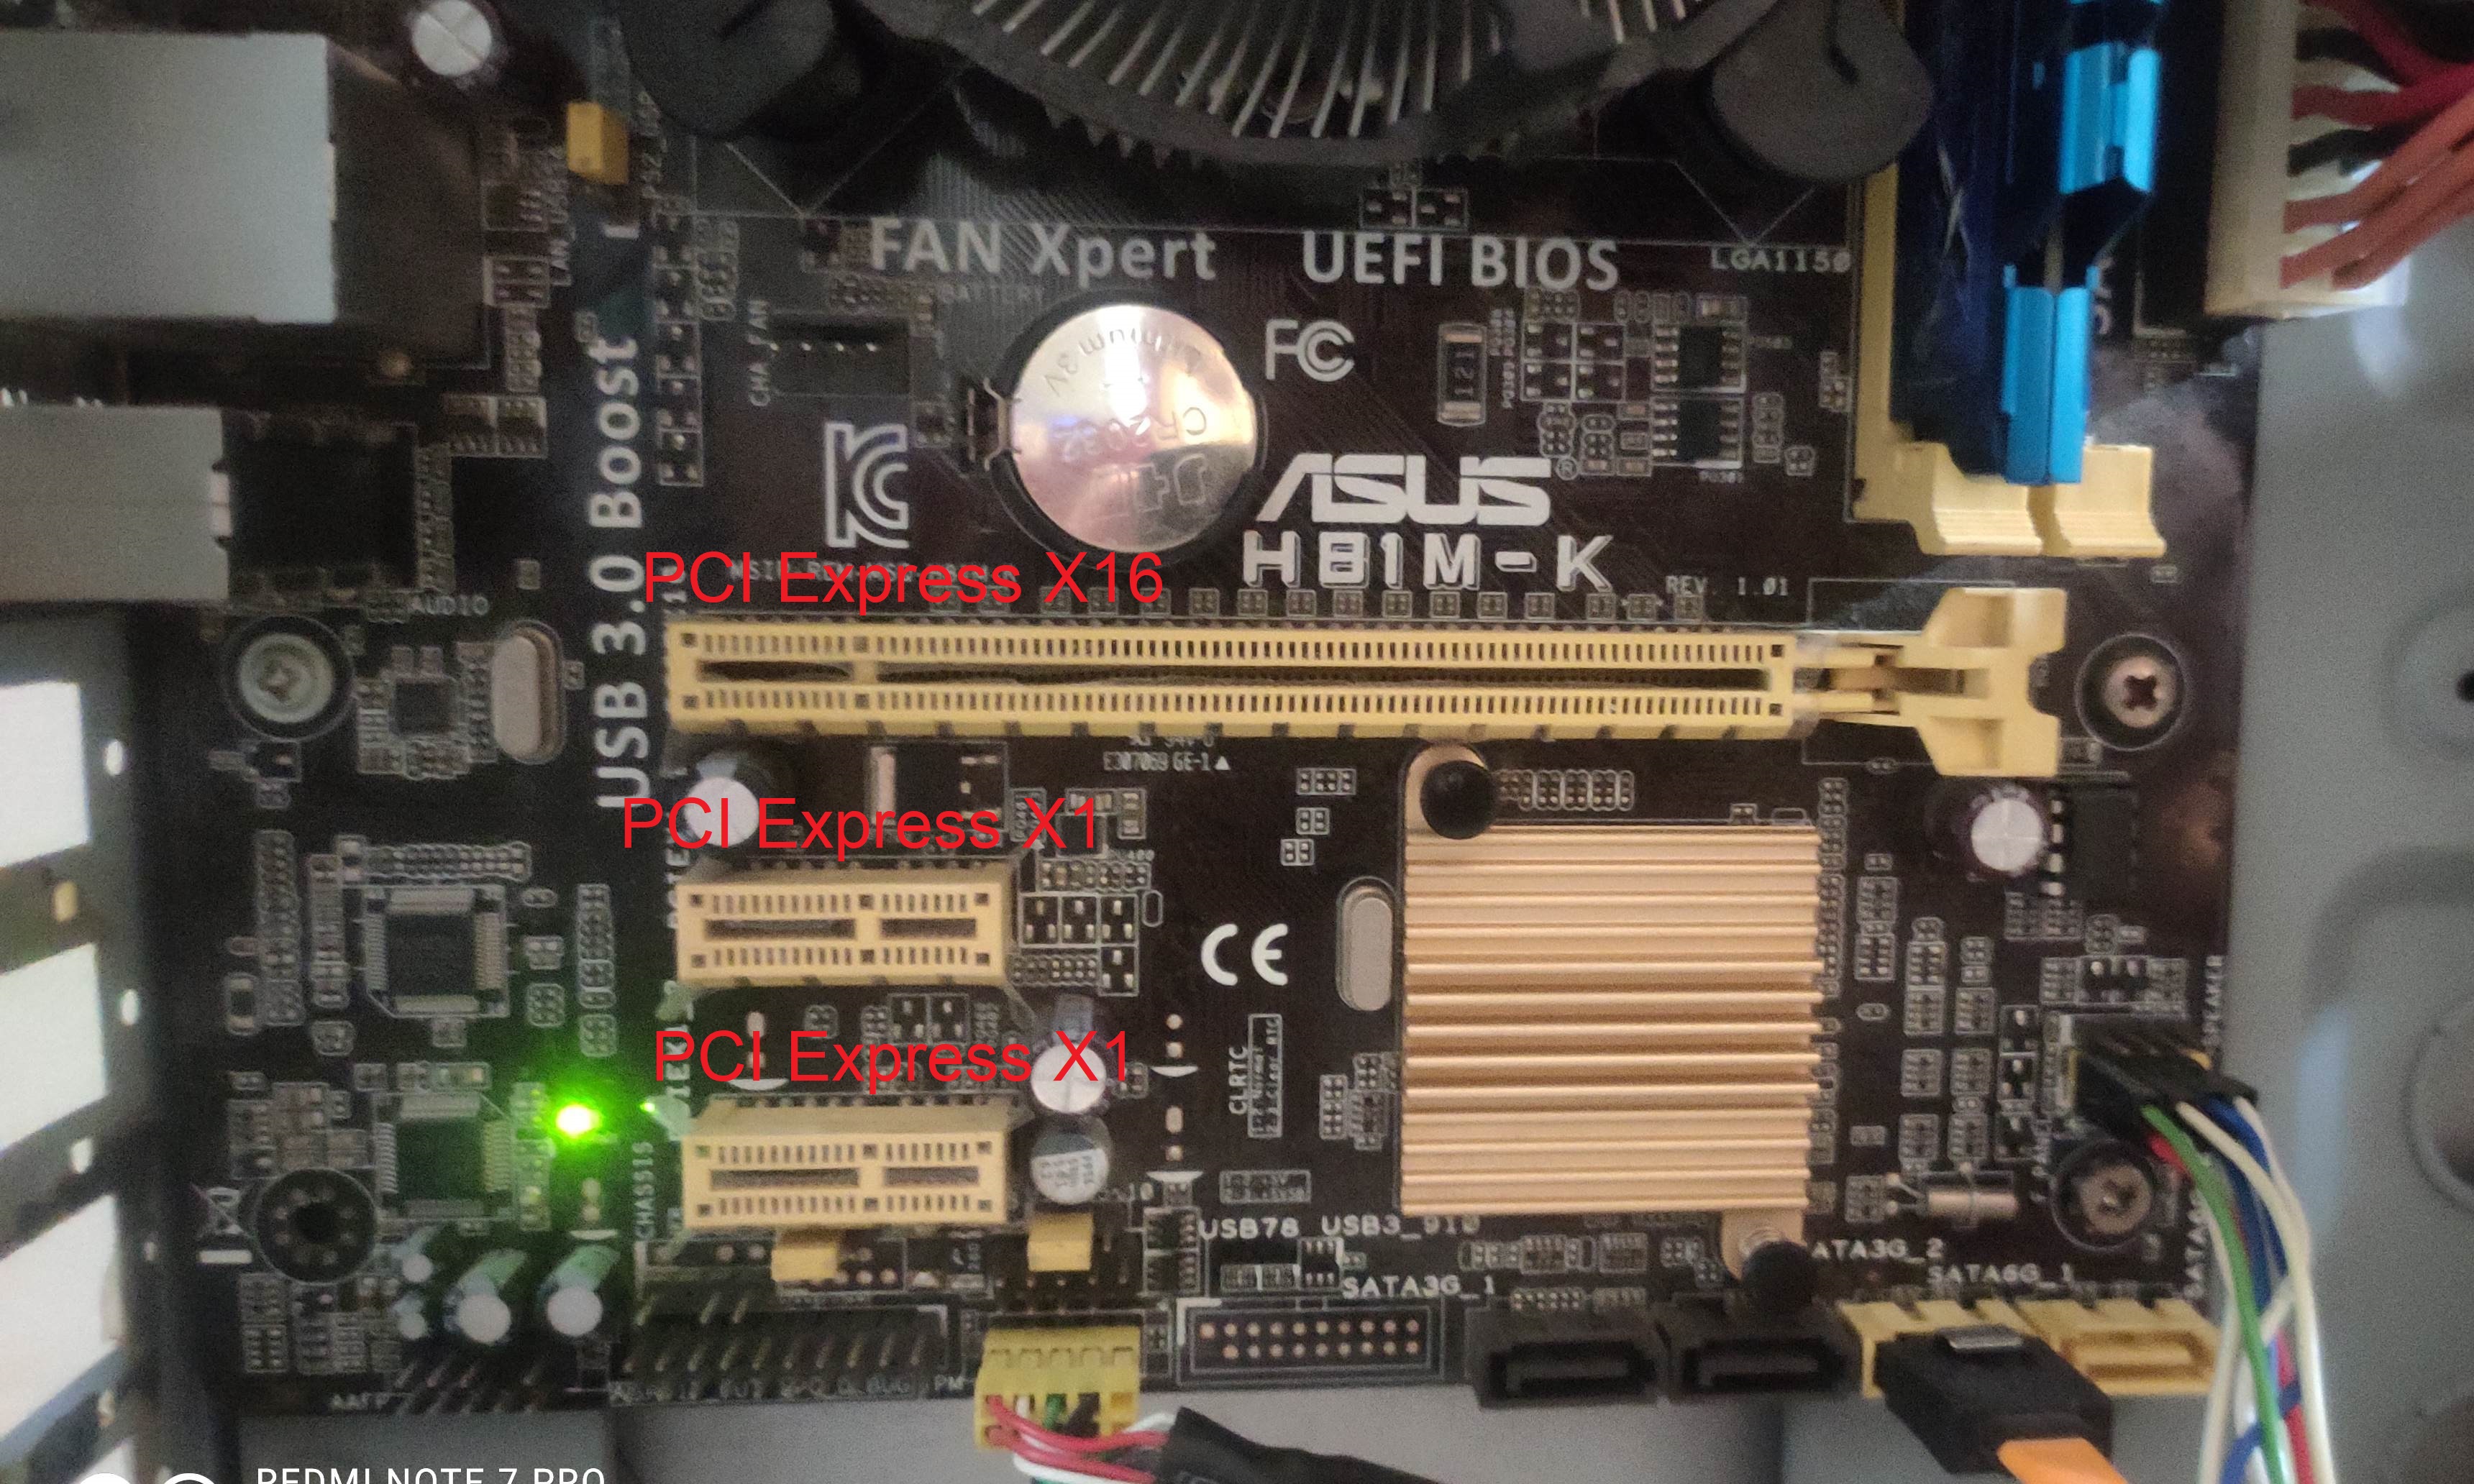
2. Locate the M.2 slot on your motherboard. It is usually labeled and positioned near the CPU.
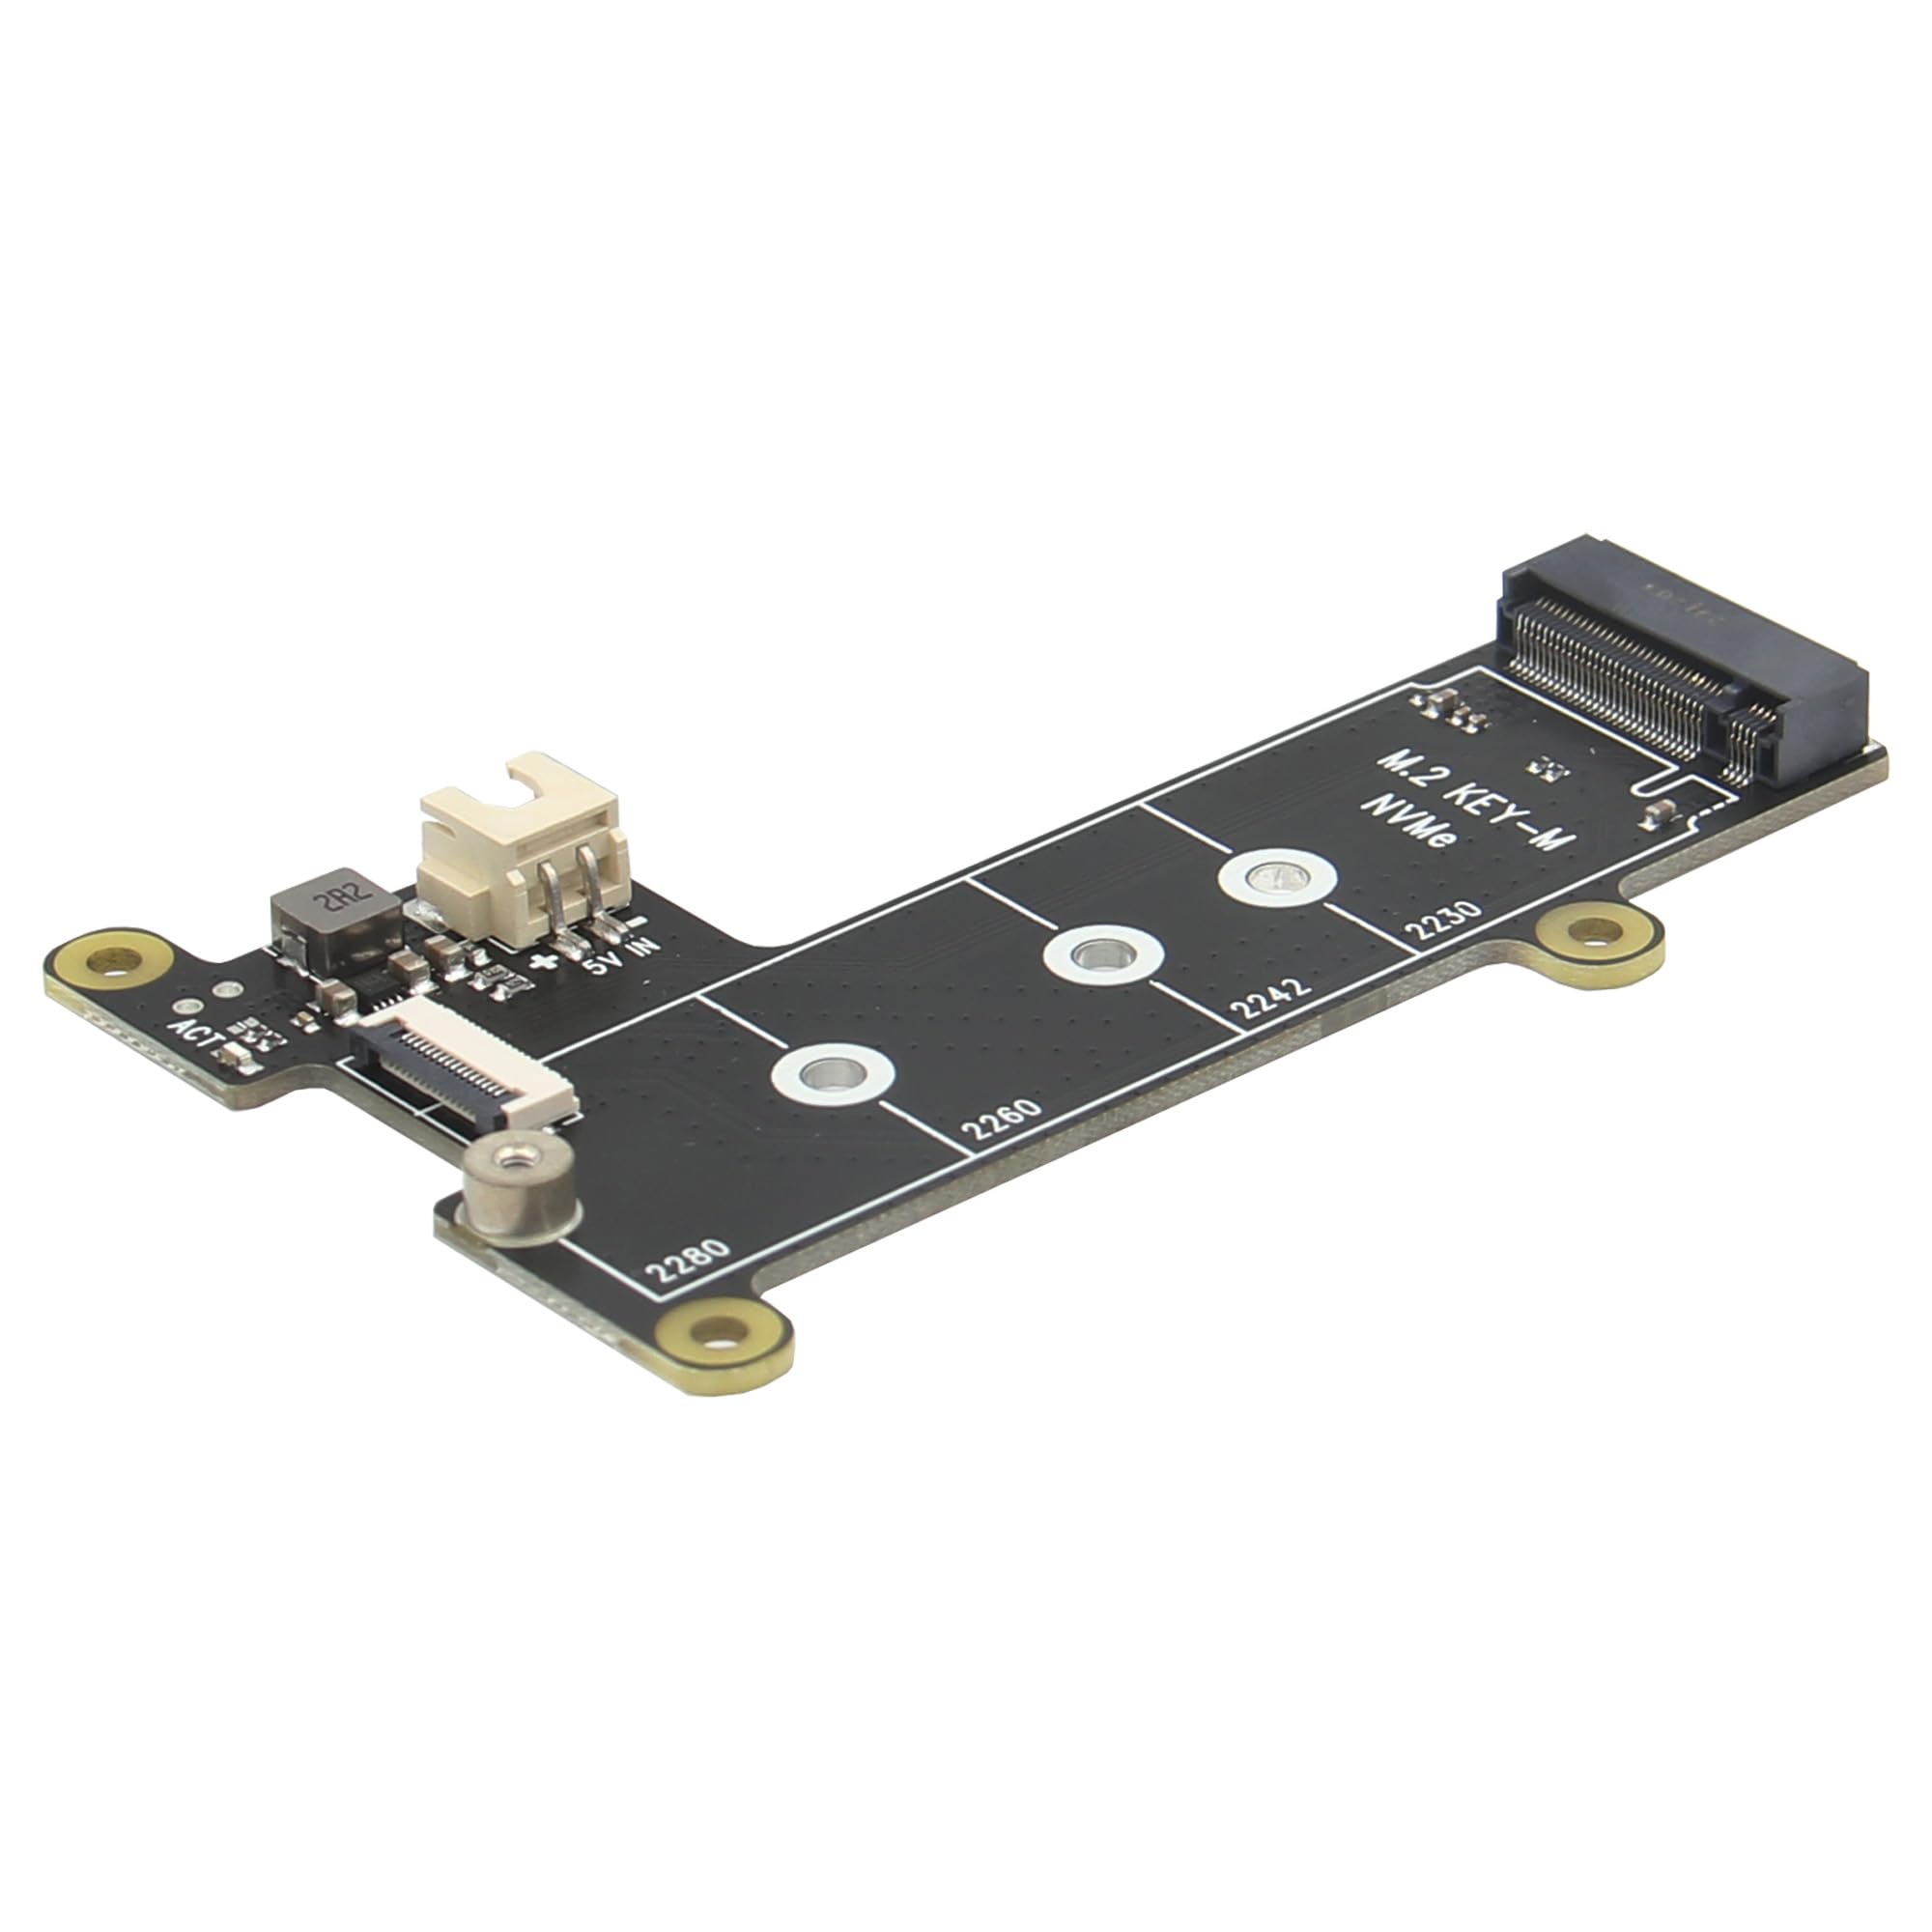
3. Insert the M.2 SSD into the slot. Ensure it is firmly seated and aligned with the connector.
4. Secure the M.2 SSD in place using a screw or latch, if necessary.
5. Close the case and power on your computer.
6. Enter the BIOS or UEFI settings by pressing the designated key during startup. This key varies depending on the manufacturer (common keys are F2, DEL, or ESC).
7. Navigate to the “Boot” or “Boot Priority” section in the BIOS/UEFI settings.
8. Locate the M.2 SSD in the list of boot devices.
9. Move the M.2 SSD to the top of the boot priority list by selecting it and using the appropriate key (usually + or -) to change its position.
10. Save the changes and exit the BIOS/UEFI settings.
11. Restart your computer and check if the M.2 drive is now recognized as the boot drive.
If the M.2 drive still doesn’t show up, it could be due to compatibility issues or a faulty drive. Consider updating your motherboard’s firmware, checking for driver updates, or trying the M.2 drive in a different system to narrow down the issue.
Data Recovery from Unrecognized M.2 SSD
If your M.2 SSD is not being recognized by your computer, there are a few troubleshooting steps you can try to recover your data.
First, ensure that the M.2 drive is properly connected to your motherboard. Check that the M.2 slot is clean and free from any debris.
If the drive is still not recognized, try restarting your computer to see if that resolves the issue.
If restarting doesn’t work, access your computer’s BIOS or UEFI settings and check if the M.2 slot is enabled. If it’s disabled, enable it and save the changes.
If the drive is still not showing up, try connecting it to a different M.2 slot on your motherboard, if available.
Updating your motherboard’s firmware and drivers may also help in resolving the issue. Check the manufacturer’s website for any available updates.
If none of these steps work, you can try connecting the M.2 drive to another computer to see if it is recognized there. If it is, you can backup your data from the M.2 drive to another storage device.
If the drive is still not recognized on any computer, it may be a hardware failure. In this case, you may need to contact a professional data recovery service to retrieve your data.
Seeking Professional SSD Repair Service
If you’re facing the issue of your M.2 drive not showing up, it’s important to seek professional SSD repair service. Here are some steps to troubleshoot the problem:
1. Check the physical connection: Ensure that the M.2 drive is properly connected to the motherboard. Use a screwdriver to secure any loose connections or adapters.
2. Verify power supply: Make sure the power supply unit is providing sufficient power to the M.2 drive. Check for any loose or faulty electrical connectors.
3. Check BIOS settings: Enter the BIOS menu and verify if the M.2 drive is detected. If not, try updating the BIOS firmware to ensure compatibility with the drive.
4. Update drivers: Install the latest drivers for your M.2 drive from the manufacturer’s website. This can help resolve any compatibility issues.
5. Check for bad sectors: Run a disk check utility to identify and repair any bad sectors on the M.2 drive. This can be done using the Logical Disk Manager in Microsoft Windows.
6. Format the drive: If the M.2 drive is detected but not showing up, it might need to be formatted. Use the Disk Management tool in Windows to format the drive and assign a drive letter.
If these troubleshooting steps don’t resolve the issue, it’s recommended to seek professional SSD repair service. They have the expertise and tools to diagnose and fix any hardware or software failures that may be causing the problem. Don’t hesitate to reach out for assistance to ensure your data is safe and your M.2 drive is functioning properly.
Final Recommendations and Troubleshooting Summary
- Check for compatibility issues:
- Ensure that the M.2 drive is compatible with your motherboard and system.
- Refer to the motherboard’s manual or manufacturer’s website for compatibility information.
- Verify physical connections:
- Make sure the M.2 drive is properly seated in the M.2 slot.
- Check if the M.2 slot is properly aligned and locked.
- Ensure that all necessary power and data cables are connected securely.
- Update BIOS and drivers:
- Visit the motherboard manufacturer’s website and download the latest BIOS version for your motherboard.
- Follow the instructions provided by the manufacturer to update the BIOS.
- Update the drivers for your motherboard chipset and storage controller.
- Refer to the manufacturer’s website for the latest driver downloads.
- Enable M.2 drive in BIOS:
- Restart your computer and enter the BIOS settings by pressing the designated key (e.g., Del, F2, F10) during startup.
- Navigate to the storage configuration or SATA settings section.
- Locate the M.2 drive option and ensure it is set to “Enabled” or “Auto”.
- Save the changes and exit the BIOS.
- Update firmware:
- Visit the M.2 drive manufacturer’s website and check for any firmware updates.
- Download the latest firmware version for your specific M.2 drive model.
- Follow the provided instructions to update the firmware.
- Check for drive recognition in Disk Management:
- Open Disk Management by pressing Win + X and selecting Disk Management from the menu.
- Look for the M.2 drive in the list of available drives.
- If the drive is listed, right-click on it and select Change Drive Letter and Paths.
- Assign a drive letter to the M.2 drive if it does not have one.
- Perform a clean installation of the operating system:
- If none of the previous steps resolve the issue, consider performing a clean installation of the operating system.
- Back up important data from your current system.
- Create a bootable installation media for your operating system.
- Reinstall the operating system on a fresh drive.
F.A.Q.
Why is my NVMe not detected in BIOS?
Your NVMe may not be detected in BIOS due to a possible issue with the SSD or its chip. To resolve this, it is advisable to reach out to the laptop manufacturer or the SSD manufacturer/vendor for assistance.
How do I enable my m 2 drive?
To enable your M.2 drive, restart your PC and enter the BIOS by pressing F2/F8/F11 or Del. In the Boot Menu, prioritize the M.2 SSD as the boot drive. Save the changes, restart your PC, and Windows will boot from the M.2 drive.
Why is NVMe not showing up on disk management?
NVMe may not be showing up on disk management due to reasons such as the NVMe SSD not being enabled, improper connection to the computer, or the need for an update on the NVMe SSD driver.
Why is my m 2 not showing up?
Your M.2 is not showing up because the BIOS settings may be incorrect. Make sure that the M.2 SSD is enabled in the BIOS and that the boot order is set correctly.
