Is your Windows 10 system experiencing frustrating lag? Here are some effective solutions to help you tackle this issue head-on.
Update Device Drivers
1. Open the Device Manager by pressing the Windows key + X and selecting “Device Manager” from the menu that appears.
2. In the Device Manager, expand the categories and locate the devices that you want to update the drivers for.
3. Right-click on the device and select “Update driver” from the context menu.
4. Choose the option to automatically search for updated driver software. Windows will then search online for the latest drivers for your device.
5. If Windows doesn’t find any updates, you can also visit the manufacturer’s website to manually download and install the latest drivers.
6. Repeat these steps for all the devices that you want to update the drivers for.
Updating device drivers can help resolve compatibility issues and improve system performance. Make sure to regularly check for driver updates to keep your system running smoothly.
Remember to restart your computer after installing the updated drivers to ensure that the changes take effect.
By keeping your drivers up to date, you can optimize your Windows 10 system and reduce lag, providing a better overall user experience.
Disable Startup Programs
- Identify and disable unnecessary startup programs – Open the Task Manager by pressing Ctrl + Shift + Esc, navigate to the Startup tab, and uncheck any programs that you don’t need to launch at startup.
- Use MSConfig – Press Win + R, type “msconfig” and hit Enter. In the System Configuration window, go to the Startup tab and uncheck the programs you want to disable.
- Disable startup programs from the Settings app – Go to Settings > Apps > Startup. Toggle off the programs you want to prevent from launching at startup.
- Manage startup programs using third-party software – Utilize software like CCleaner or Startup Delayer to easily disable or delay startup programs.
- Remove unnecessary entries from the Registry – Be cautious when editing the Registry, but you can remove unwanted startup entries by going to “HKEY_CURRENT_USER\Software\Microsoft\Windows\CurrentVersion\Run” or “HKEY_LOCAL_MACHINE\SOFTWARE\Microsoft\Windows\CurrentVersion\Run” and deleting the unwanted entries.
Change Power Settings
To improve system lag in Windows 10, one effective solution is to adjust the power settings. By optimizing the power settings, you can ensure that your computer is utilizing its resources efficiently and minimizing any unnecessary background processes.
To change the power settings in Windows 10, follow these steps:
1. Open the Start menu and search for “Power & sleep settings”. Click on the search result to open the Power & sleep settings page.
2. In the Power & sleep settings page, you will see two sections: “Screen” and “Sleep”. Click on the “Additional power settings” link located under the “Related settings” section on the right-hand side.
3. This will open the Power Options window. Here, you will see a list of different power plans. The one that is currently active will be highlighted. To change the power plan, click on the “Change plan settings” link next to the active power plan.
4. In the next window, you will have the option to adjust the power settings for both when your computer is plugged in and when it’s running on battery power. Click on the “Change advanced power settings” link.
5. A new window will open with a list of advanced power settings. Here, you can customize various aspects of your computer’s power usage. Look for options such as “Processor power management”, “Hard disk”, and “Wireless adapter settings”. Expand each option and make the necessary adjustments according to your preference.
6. Once you have made the desired changes, click on the “Apply” button and then click “OK” to save the new power settings.
By optimizing the power settings, you can ensure that your computer is running at its optimal performance level, reducing system lag and improving overall responsiveness.
Adjust Pagefile Size
To adjust the pagefile size in Windows 10 and improve system lag, follow these steps:
1. Open the Control Panel by pressing the Windows key + X and selecting “Control Panel” from the menu.
2. In the Control Panel, click on “System and Security” and then select “System.”
3. In the System window, click on “Advanced system settings” on the left-hand side.
4. In the System Properties dialog box, go to the “Advanced” tab and click on the “Settings” button under the “Performance” section.
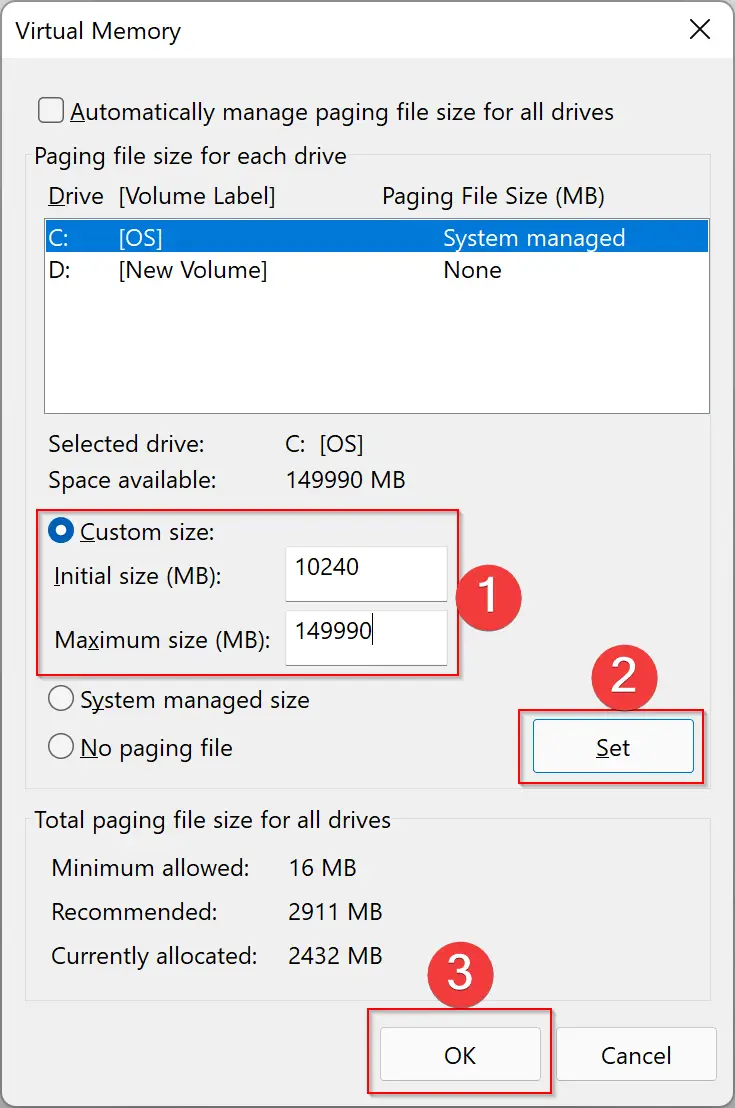
5. In the Performance Options dialog box, go to the “Advanced” tab and click on the “Change” button under the “Virtual memory” section.
6. Uncheck the box that says “Automatically manage paging file size for all drives.”
7. Select the drive where Windows is installed (usually the C: drive) and click on the “Custom size” radio button.
8. Enter the initial size and maximum size for the pagefile in megabytes. The recommended sizes are typically 1.5 times the amount of RAM installed on your computer.
9. Click on the “Set” button and then click “OK” to apply the changes.
10. Restart your computer for the changes to take effect.
By adjusting the pagefile size, you can optimize the virtual memory settings on your computer, which can help improve overall system performance and reduce lag.
Defragment Hard Drives
To improve system lag on Windows 10, one solution is to defragment your hard drives. Defragmentation is the process of organizing fragmented data on your hard drive, which can help improve the speed and performance of your computer.
To defragment your hard drives on Windows 10, follow these steps:
1. Open the “Start” menu and search for “Defragment and Optimize Drives.” Click on the search result to open the “Optimize Drives” window.
2. In the “Optimize Drives” window, you will see a list of all your hard drives. Select the drive you want to defragment.
3. Click on the “Optimize” button to start the defragmentation process. This may take some time, so be patient.
4. Once the defragmentation is complete, you can close the “Optimize Drives” window.
Defragmenting your hard drives can help improve the overall performance of your Windows 10 system by rearranging fragmented data and making it easier for your computer to access files. This can result in faster boot times, quicker file access, and smoother overall system performance.
If you’re experiencing lag while playing PC games or working with graphics-intensive applications, defragmenting your hard drives can help reduce stuttering and improve frame rates. By organizing the data on your hard drive, your computer can load game assets and render graphics more efficiently.
In addition to defragmentation, there are other steps you can take to optimize your Windows 10 system and reduce lag. These include closing unnecessary programs and background processes, updating device drivers, cleaning up temporary files, and ensuring your computer is free from malware or viruses.
By regularly defragmenting your hard drives and following these optimization steps, you can experience a smoother and more responsive Windows 10 system without the frustration of lag.
Install an External SSD
1. Purchase a compatible External SSD: Make sure to choose an External SSD that is compatible with your computer’s hardware and meets your storage needs.
2. Connect the External SSD to your computer: Use a USB cable to connect the External SSD to an available USB port on your computer.
3. Prepare the External SSD for installation: Before installing the SSD, it’s important to format it correctly. Open the “Disk Management” tool by right-clicking on the Start menu and selecting “Disk Management”. Locate your External SSD in the list of drives and right-click on it. Select “Format” and follow the on-screen instructions to format the SSD.
4. Clone your Windows 10 system to the External SSD: Use a disk cloning software to copy your entire Windows 10 system from your current hard disk drive to the External SSD. This will ensure that all your files, settings, and programs are transferred to the SSD.
5. Set the External SSD as the boot drive: After cloning your system, you need to set the External SSD as the boot drive. Restart your computer and enter the BIOS settings by pressing the designated key (usually F2 or Del) during the boot process. In the BIOS settings, navigate to the “Boot” tab and change the boot priority to prioritize the External SSD.
6. Test the performance improvement: Once you have successfully installed the External SSD and set it as the boot drive, restart your computer and observe the difference in performance. You should experience faster boot times, quicker program launches, and overall improved system responsiveness.
By installing an External SSD, you can eliminate system lag and enjoy a smoother Windows 10 experience. Make sure to follow the steps carefully and always back up your important files before making any changes to your system.
Upgrade RAM
To upgrade the RAM on your Windows 10 system and improve its performance, follow these steps:
1. Determine the RAM capacity: Check your computer’s specifications to find out the maximum amount of RAM it can support. This information can usually be found in the user manual or on the manufacturer’s website.
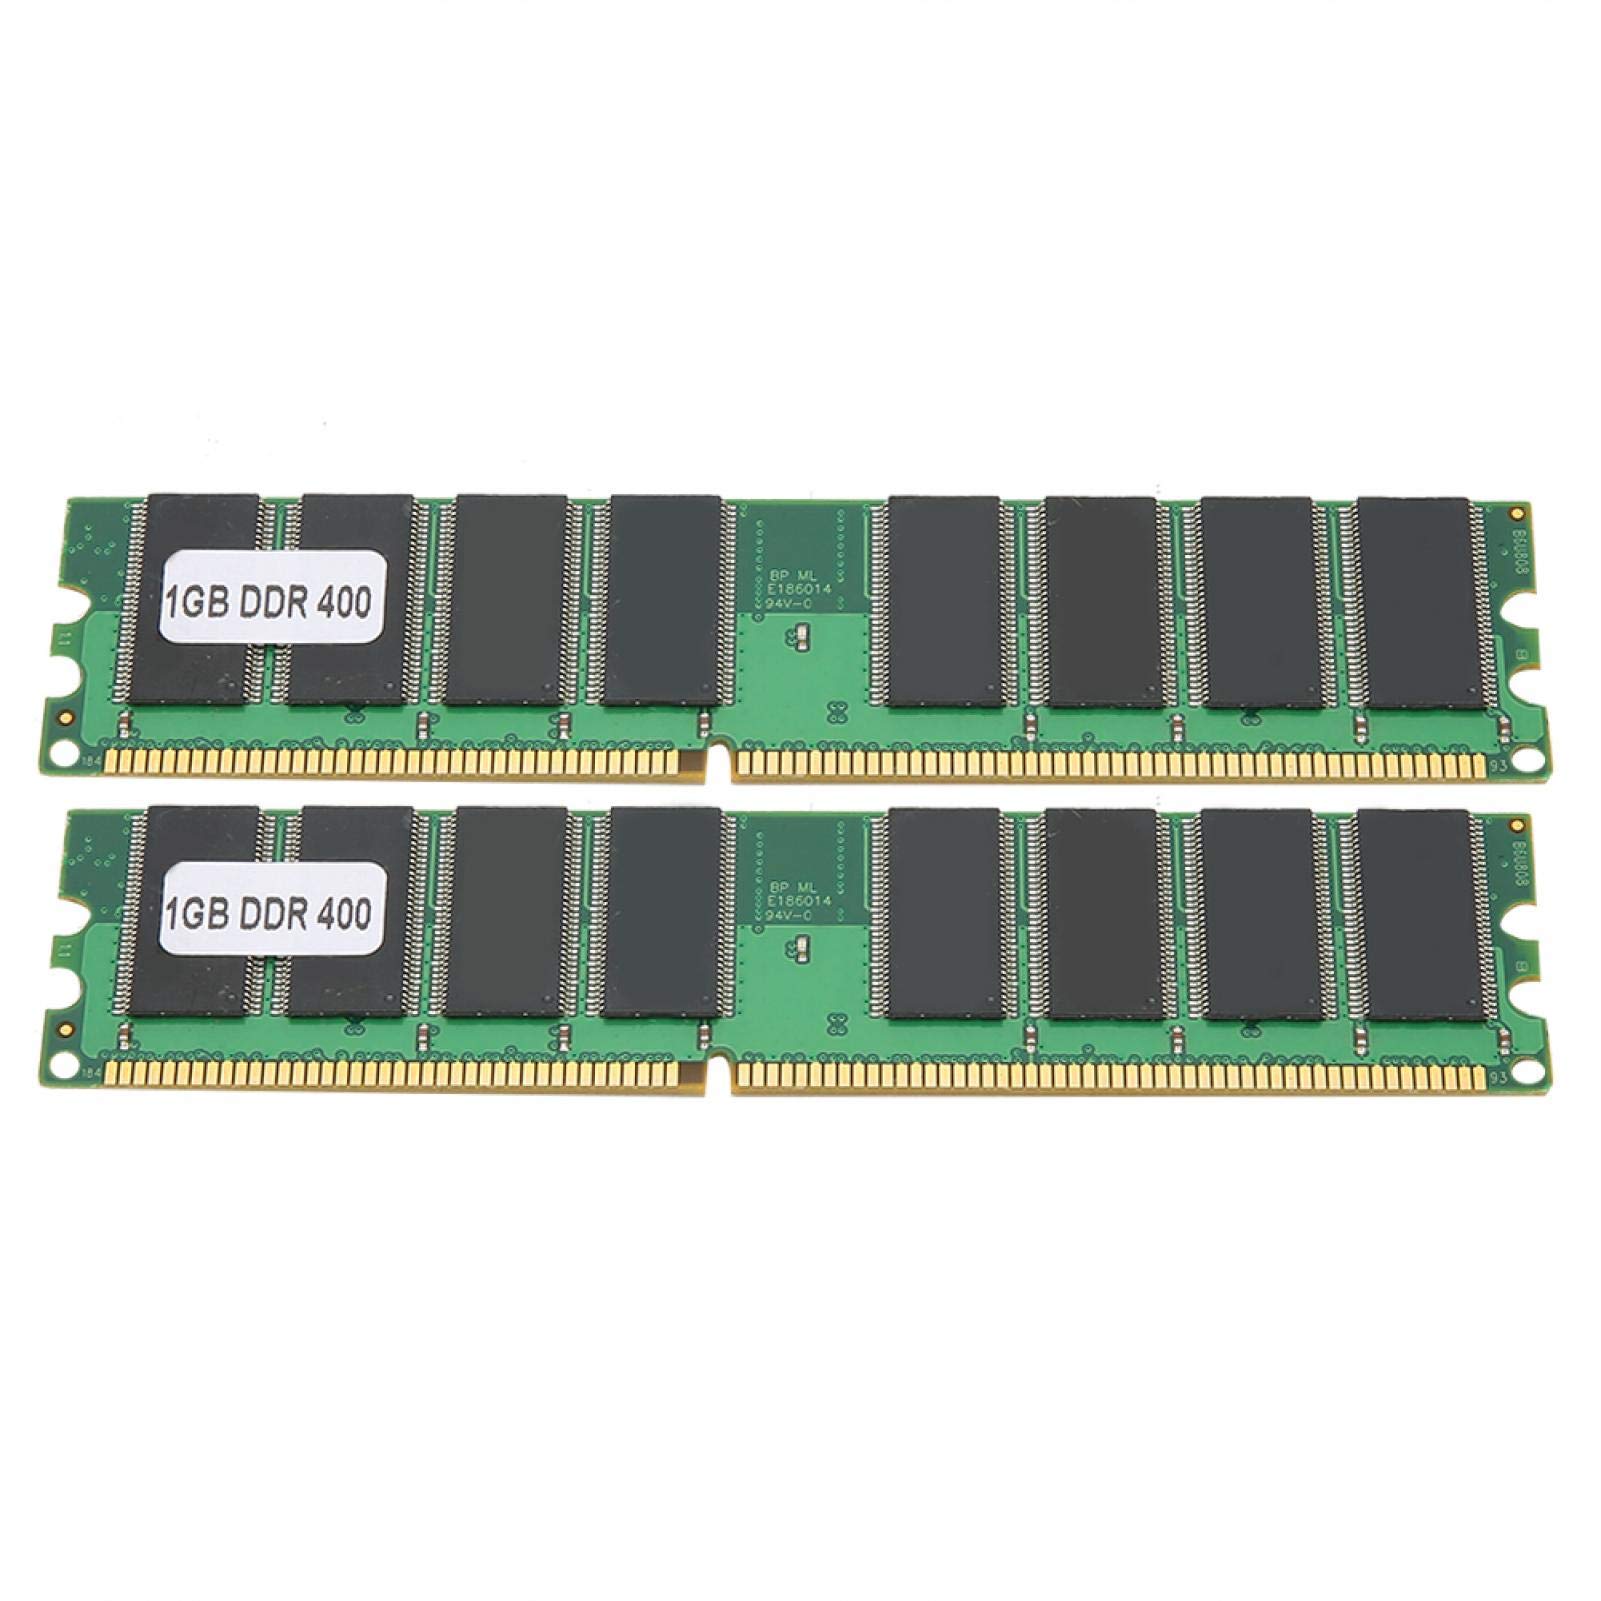
2. Purchase compatible RAM: Once you know the maximum capacity, purchase RAM modules that are compatible with your system. Make sure to buy the correct type (DDR3, DDR4, etc.) and check the speed and voltage requirements.
3. Shut down and unplug your computer: Before installing the new RAM, shut down your computer completely and unplug it from the power source to avoid any electrical damage.
4. Open your computer’s case: Depending on the type of computer you have (desktop or laptop), you may need to remove a panel or access a specific compartment to reach the RAM slots. Refer to your computer’s manual for instructions on how to open the case.
5. Locate the RAM slots: Look for the existing RAM modules inside your computer. They are usually long, rectangular-shaped slots on the motherboard. If all slots are already occupied, you may need to remove the existing RAM to make space for the new modules.
6. Install the new RAM modules: Carefully insert the new RAM modules into the empty slots, ensuring they are properly aligned with the notches on the slots. Apply gentle pressure until the modules click into place. Make sure they are securely seated.
7. Close the computer’s case: Once the new RAM is installed, close the computer’s case or reattach the panel, following the instructions provided in your computer’s manual.
8. Power on your computer: Plug in your computer and turn it on. Windows 10 should automatically detect the new RAM and adjust its settings accordingly.
9. Verify the RAM upgrade: To confirm that the RAM upgrade was successful, right-click on the taskbar and select “Task Manager” (or press Ctrl+Shift+Esc). In the Performance tab, you should see the new RAM capacity listed under “Physical Memory.”
By upgrading your RAM, you can significantly improve your computer’s performance and reduce system lag.
Remove Crapware
- Uninstall unnecessary programs: Remove any software or applications that you rarely use or no longer need.
- Disable startup programs: Prevent unnecessary programs from launching at startup and consuming system resources.
- Clean up temporary files: Use the built-in Disk Cleanup tool or a third-party software to delete temporary files and free up disk space.
- Update drivers: Ensure that all your hardware drivers are up to date to optimize system performance and stability.
- Disable visual effects: Turn off or reduce visual effects such as animations and transparency to improve system responsiveness.
- Scan for malware: Run a thorough scan with a reliable antivirus program to detect and remove any malicious software.
- Manage your browser extensions: Remove unnecessary or suspicious browser extensions that could be slowing down your browsing experience.
- Adjust power settings: Optimize your power settings to balance performance and energy consumption.
- Perform a disk defragmentation: Defragment your hard drive to arrange files more efficiently and improve overall system speed.
- Upgrade hardware: Consider upgrading your RAM, hard drive, or graphics card if your system meets the minimum requirements but still lags.
Optimize Disk Caching with ReadyBoost
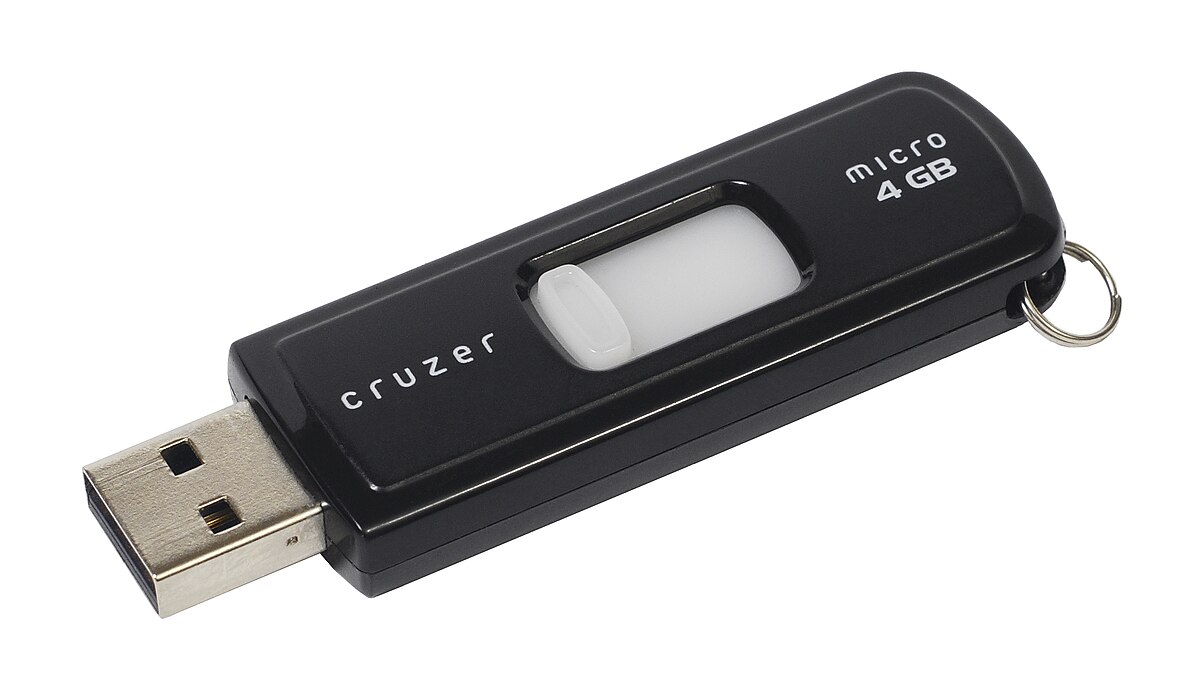
ReadyBoost is a feature in Windows 10 that can help improve system performance and reduce lag. By using a USB flash drive or memory card as additional cache, ReadyBoost can speed up disk access and enhance overall responsiveness.
To optimize disk caching with ReadyBoost, follow these steps:
1. Insert a USB flash drive or memory card into your computer.
2. Open File Explorer and right-click on the drive you inserted.
3. Select “Properties” from the context menu.
4. Go to the “ReadyBoost” tab.
5. Check the option that says “Use this device” and adjust the slider to allocate the desired amount of space for caching.
6. Click “Apply” and then “OK” to save the changes.
By enabling ReadyBoost, Windows will use the USB flash drive or memory card as a cache, storing frequently accessed data for faster retrieval. This can significantly improve system performance, particularly if you have a slower hard disk drive.
However, it’s important to note that ReadyBoost may not provide noticeable improvements if you already have a fast solid-state drive (SSD) installed. In such cases, the benefits of ReadyBoost might be minimal.
To monitor the impact of ReadyBoost on your system, you can use the Task Manager. Open Task Manager by pressing Ctrl + Shift + Esc and go to the “Performance” tab. Here, you can observe the disk activity and see if ReadyBoost is helping to reduce lag and enhance overall responsiveness.
Disable Windows Tips and Tricks
1. Open the Start menu and click on the Settings icon.
2. In the Settings window, click on the System option.
3. From the left sidebar, select the Notifications & actions tab.
4. Scroll down to the Notifications section and toggle off the option that says “Get tips, tricks, and suggestions as you use Windows.”
5. Close the Settings window.
Disabling Windows Tips and Tricks can help improve system performance by reducing unnecessary notifications and distractions. This can be especially helpful if you are experiencing lag or slow performance on your Windows 10 system.
By disabling these tips and tricks, you can free up CPU time and reduce the load on your system, allowing it to run more smoothly. This can be particularly beneficial if you use your computer for resource-intensive tasks such as gaming or graphic design.
In addition, disabling Windows Tips and Tricks can also help improve your overall productivity by reducing interruptions and allowing you to focus on your work without unnecessary distractions.
By taking control of your Windows 10 system and disabling features that you don’t need or want, you can optimize its performance and ensure that it runs smoothly and efficiently.
Stop OneDrive Syncing
1. Open the OneDrive settings by right-clicking on the OneDrive icon in the system tray and selecting “Settings.”
2. In the Settings tab, click on the “Account” tab.
3. Under the “Files On-Demand” section, uncheck the box that says “Save space and download files as you use them.”
4. Click “OK” to save the changes.
5. If you want to completely disable OneDrive syncing, go to the “Settings” tab again and click on the “Unlink OneDrive” button.
By stopping OneDrive syncing, you can reduce the strain on your computer’s resources, including the CPU, memory, and disk usage. This can help improve overall system performance and reduce lag.
Turn Off Search Indexing
![]()
1. Open the Start menu and type “Indexing Options” in the search bar.
2. Click on “Indexing Options” from the search results to open the Indexing Options window.
3. In the Indexing Options window, click on the “Modify” button.
4. Uncheck all the locations listed under “Indexed Locations” to disable search indexing for those locations.
5. Click on “OK” to save the changes and exit the Indexing Options window.
By turning off search indexing, you can reduce the CPU and disk usage on your computer, which can help improve overall system performance and reduce lag.
Remember, search indexing is responsible for creating and maintaining an index of files on your computer to make searching faster. However, if you don’t use the search feature frequently or prefer to sacrifice search speed for better system performance, disabling search indexing can be a viable solution.
It’s important to note that disabling search indexing may lead to slower search results when using the search feature on your computer. If you find that you still need to search for files frequently, consider using alternative methods such as third-party search tools or organizing your files in a more efficient manner.
Clean Hard Disk and Registry
- Step 1: Open File Explorer by pressing Windows Key + E.
- Step 2: Right-click on the C: drive (or the drive where Windows is installed) and select Properties.
- Step 3: In the General tab, click on the Disk Cleanup button.
- Step 4: Wait for the Disk Cleanup utility to analyze the drive. Once done, it will show a list of files to delete.
- Step 5: Check the boxes next to the types of files you want to delete, such as Temporary files and Recycle Bin.
- Step 6: Click on the OK button to start the cleanup process.
- Step 7: After the cleanup is complete, click on the Clean up system files button to remove additional system files.
- Step 8: Repeat steps 4-7 for other drives if needed.
- Step 9: Open the Start menu and type regedit to open the Registry Editor.
- Step 10: In the Registry Editor, navigate to HKEY_LOCAL_MACHINE\SOFTWARE\Microsoft\Windows\CurrentVersion\Run.
- Step 11: Delete any unwanted or unnecessary entries in the Run folder. Be cautious not to delete important system entries.
- Step 12: Navigate to HKEY_CURRENT_USER\Software\Microsoft\Windows\CurrentVersion\Run and repeat step 11.
- Step 13: Close the Registry Editor.
Disable Visual Effects
1. Open the Start menu and search for “System Properties.” Click on the corresponding result.
2. In the System Properties window, click on the “Advanced” tab.
3. Under the Performance section, click on the “Settings” button.
4. In the Performance Options window, select the “Adjust for best performance” option to disable all visual effects.
5. Alternatively, you can choose the “Custom” option and individually disable specific visual effects that you don’t need.
6. Click “Apply” and then “OK” to save the changes and close the windows.
Disabling visual effects can help reduce the strain on your computer’s resources, especially the CPU and graphics card. By removing unnecessary animations and visual enhancements, you can improve overall system performance and reduce lag.
It’s important to note that disabling visual effects may make your Windows 10 interface appear less visually appealing. However, if system lag is a concern, it’s a trade-off worth considering.
Frequently Asked Questions
How do I fix lag on Windows 10?
To fix lag on Windows 10, you can start by identifying and removing resource-intensive applications. Additionally, optimizing your web browser and internet connections, defragmenting the hard drive, scanning for harmful software and malware, and updating old and insufficient hardware can also help improve performance.
Why is my computer suddenly lagging Windows 10?
Your computer may be suddenly lagging on Windows 10 due to outdated drivers. Updating your drivers can help reduce computer lag caused by hardware or software issues.
How do I clean up Windows 10 to make it run faster?
To make Windows 10 run faster, you can disable startup programs in Task Manager and clean up your hard drive using the Disk Cleanup tool.
Why is my system performance so slow in Windows 10?
Your system performance in Windows 10 may be slow. To improve it, start by closing unnecessary apps, browser tabs, etc. If that doesn’t work, try restarting your PC and only opening the necessary apps, programs, and browser windows.
