Having no network access can be frustrating, especially when you rely on it for your daily tasks. In this article, I will provide troubleshooting tips to help you resolve this issue efficiently.
Restart Your Router or Modem
Restarting your router or modem can often resolve network access issues. Here’s how to do it:
1. Locate your router or modem and find the power cord.
2. Unplug the power cord from the back of the device.
3. Wait for 30 seconds to a minute before plugging it back in.
4. Plug the power cord back into the device.
5. Wait for the router or modem to fully boot up, which may take a few minutes.
6. Once it’s fully booted, try to connect to the network again.
Restarting your router or modem can help resolve various network issues, including connectivity problems, slow speeds, and intermittent connections. It allows the device to refresh its settings and establish a new connection with your internet service provider.
If you’re still experiencing network access issues after restarting your router or modem, it may be worth troubleshooting other potential causes such as checking your Wi-Fi settings, ensuring your device is connected to the correct network, or contacting your internet service provider for further assistance.
Check Your Hardware and Cables
1. Ensure that all cables connecting your hardware components are securely plugged in. Check for any loose or disconnected cables that may be causing the network issue.
2. Verify that your router or modem is powered on and functioning properly. Check the power indicator lights on your devices to ensure they are lit up and not displaying any error codes.
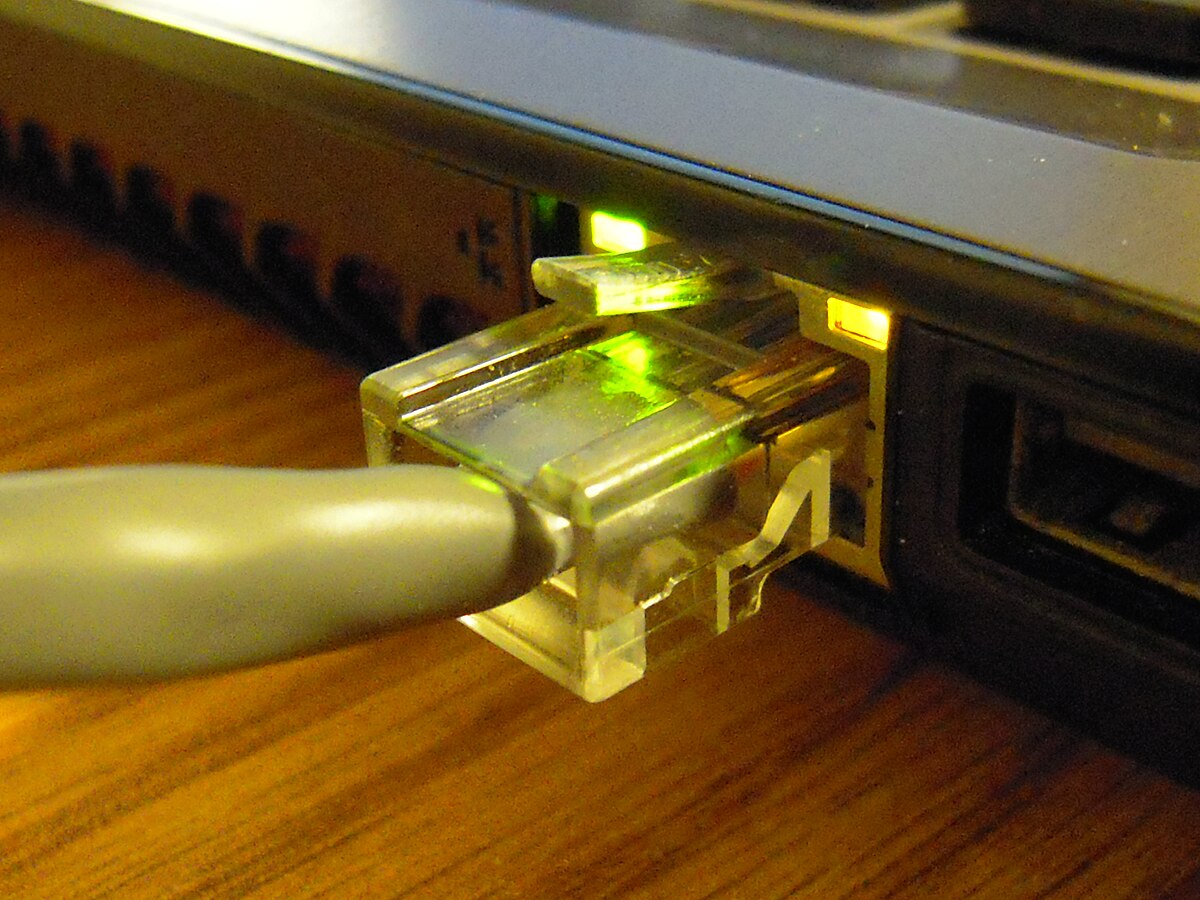
3. Inspect the Ethernet cable connecting your computer to the router. Look for any signs of damage or wear, such as frayed ends or bent pins. If necessary, try using a different Ethernet cable to see if the issue is resolved.
4. Restart your computer and any other devices connected to the network. Sometimes a simple reboot can fix connectivity problems.
5. Check your Wi-Fi settings if you are using a wireless connection. Make sure your device is connected to the correct network and that the Wi-Fi signal is strong enough. Consider moving closer to the router or using a Wi-Fi extender if the signal is weak.
6. Inspect your network adapter settings. Go to your computer’s network settings and ensure that the network adapter is enabled and properly configured.
7. Scan for hardware issues using your computer’s built-in troubleshooting tools. Both Windows and macOS have diagnostic tools that can help identify and resolve hardware-related network problems.
Remember, physical obstructions such as walls, furniture, or appliances can also interfere with your network signal. Try repositioning your router for better coverage.
By checking your hardware and cables, you can quickly identify and resolve any connectivity issues, ensuring that you have uninterrupted network access.
Test Your Internet on Different Devices
1. Start by booting up the device you want to test. This can be a Windows 10 computer, a MacOS laptop, a tablet, or any other device with internet access.
2. Connect the device to your router or gateway using a cable or via wireless connection.
3. Open a web browser and type in a URL to access a website. Ideally, choose a site that requires a secure connection, such as HTTPS.
4. Wait for the page to load and check the speed of the internet connection. You can use online tools or built-in network diagnostics to measure the speed.
5. Repeat the process on different devices to compare the results. Make sure to test devices that use different operating systems (such as Windows and MacOS) and different types of hardware (such as laptops and tablets).
6. If you encounter any issues with the internet connection, consider checking for electromagnetic interference from devices like cordless telephones, microwaves, or baby monitors. Move these devices away from the router or switch to a different radio frequency (2.4 GHz or 5GHz) to reduce interference.
7. Additionally, check the network settings on each device to ensure they are properly configured. Make sure the device is connected to the correct network and that the IP address and DNS settings are correct.
By testing your internet on different devices, you can pinpoint any issues that may be specific to certain devices or operating systems, allowing you to troubleshoot and resolve any network access problems.
Run Your Computer’s Internet Troubleshooter
To troubleshoot no network access on your computer, try running the internet troubleshooter. Here’s how:
1. On Windows 10, click on the Start menu and type “troubleshoot” in the search bar. Select “Troubleshoot settings” from the results.
2. Scroll down and click on “Network troubleshooter”. This will open the troubleshooter tool.
3. Follow the on-screen instructions to diagnose and fix any network issues. The troubleshooter will automatically detect and resolve common problems.
4. If you’re using a Mac computer, go to the Apple menu and select “System Preferences”. Click on “Network” and then click on the “Assist me” button. Choose “Diagnostics” and follow the prompts to run the network diagnostics tool.
By running the internet troubleshooter, you can quickly identify and resolve any network connectivity issues on your computer.
Reposition Your Router for Better Signal
To improve your Wi-Fi signal, try repositioning your router. This can help eliminate any obstructions that may be blocking the signal and causing no network access. Here’s how:
1. Find a central location: Place your router in a central location in your home or office. This will help distribute the signal evenly throughout the space.
2. Elevate the router: Position the router at a higher elevation, such as on a shelf or table. This can help improve the signal reach and reduce interference from objects on the ground.
3. Avoid obstructions: Keep your router away from walls, furniture, and other obstructions that can block the signal. This includes concrete, metal, and thick walls.
4. Minimize interference: Keep the router away from devices that operate on the same frequency, such as cordless phones, baby monitors, and microwave ovens. These can interfere with your Wi-Fi signal.
5. Adjust antenna position: If your router has adjustable antennas, experiment with different positions. Try pointing them in different directions to find the optimal signal strength.
6. Update firmware: Ensure that your router’s firmware is up to date. Manufacturers often release updates that can improve performance and stability.
Check for Internet Service Provider Outages
Check for Internet Service Provider (ISP) Outages
If you are experiencing a network connectivity issue, it’s important to check if there is an ISP outage in your area. This can save you time and frustration by ruling out any problems on your end. Here’s how you can check for ISP outages:
1. Visit your ISP’s website or customer support page. Look for any announcements or status updates regarding outages. They may provide information about affected areas and estimated restoration times.
2. Use online outage tracking tools. There are various websites and apps that allow you to check for ISP outages in your area. Simply enter your location or ISP name to see if there are any reported issues.
3. Check social media. ISPs often use social media platforms like Twitter to communicate with their customers. Look for any recent tweets or posts regarding outages. You can also search for hashtags related to your ISP or location to see if others are experiencing similar issues.
4. Contact your ISP’s customer support. If you can’t find any information online, reach out to your ISP directly. They will be able to provide you with the most accurate and up-to-date information about any outages in your area.
Update Your Network Adapter Drivers
1. First, identify the manufacturer and model of your network adapter. This information can usually be found in the device manager on your computer.
2. Once you have this information, visit the manufacturer’s website and navigate to the support or downloads section.
3. Search for the latest driver for your specific network adapter model and operating system.
4. Download the driver file to your computer. Make sure to save it in a location where you can easily find it later.
5. Next, open the device manager on your computer. This can usually be done by right-clicking on the start menu and selecting “Device Manager.”
6. Locate the network adapters category and expand it.
7. Right-click on your network adapter and select “Update driver.”
8. Choose the option to manually select the driver file you downloaded earlier.
9. Navigate to the location where you saved the driver file and select it.
10. Follow the on-screen instructions to complete the driver update process.
11. Once the update is finished, restart your computer to apply the changes.
Updating your network adapter drivers can help resolve issues with no network access and improve the overall performance of your network connection.
Turn Off Antivirus Software Temporarily
To temporarily turn off your antivirus software, follow these steps:
1. Locate the antivirus software icon in the taskbar or system tray on your computer.
2. Right-click on the icon and select “Disable” or “Turn Off” from the context menu.
3. A confirmation prompt may appear, asking if you are sure you want to disable the antivirus software. Click “Yes” or “OK” to proceed.
4. If prompted, enter the administrator password or provide confirmation to disable the software.
5. Once the antivirus software is disabled, you can try connecting to the network again to see if the issue is resolved.
Remember to re-enable your antivirus software once you have finished troubleshooting or when you are done with tasks that require internet access. Keeping your antivirus software enabled is essential for protecting your computer from potential threats.
Please note that turning off your antivirus software should only be done temporarily and for troubleshooting purposes. It is not recommended to leave your antivirus software disabled for an extended period as it leaves your computer vulnerable to malware and other security risks.
If turning off your antivirus software does not resolve the network access issue, you may need to explore other troubleshooting steps or seek further assistance.
Reset Your Equipment to Factory Settings
Resetting your equipment to factory settings is a helpful step in troubleshooting no network access issues. This process can help resolve any configuration or software-related problems that may be causing the connectivity problem.
To reset your equipment to factory settings, follow these steps:
1. Locate the reset button on your device. This button is usually found on the back or bottom of the device.
2. Press and hold the reset button for about 10 seconds using a small, pointed object such as a paperclip or pen tip. This will initiate the reset process.
3. After releasing the reset button, wait for the device to reboot. This may take a few minutes.
Note: Resetting your equipment to factory settings will erase any personalized settings or configurations you have made. Make sure to have any necessary information, such as network passwords, before proceeding with the reset.
4. Once the device has finished rebooting, it will be restored to its original factory settings. You can now set up your device again from scratch, including configuring your network settings.
Remember to consult your device’s user manual or manufacturer’s website for specific instructions on resetting your particular model.
By resetting your equipment to factory settings, you can eliminate any potential software issues that may be causing the no network access problem. This process can help you get your network up and running again quickly and efficiently.
Ensure Your Network Adapter is Enabled
1. Go to your computer’s Control Panel.
2. Click on “Network and Sharing Center” or “Network Connections”.
3. Look for your network adapter in the list of connections. It may be labeled as “Ethernet” or “Wi-Fi”.
4. Right-click on the network adapter and select “Enable” from the dropdown menu.
5. If the adapter is already enabled, you will see the option to “Disable” instead.
6. After enabling the adapter, check if you now have network access.
If you are still experiencing issues, try the following troubleshooting steps:
1. Restart your computer and try enabling the network adapter again.
2. Ensure that the adapter is securely connected to your computer and the network device (e.g., router, modem).
3. Check for any physical damage to the adapter or cables.
4. Disable any firewall or antivirus software temporarily to see if it is blocking network access.
5. If you are using a wireless adapter, make sure your computer is within range of the router.
6. Check if other devices on the network are able to connect. If not, there may be an issue with the network itself.
Flush the DNS Cache
1. Press the Windows key and type “Command Prompt” in the search bar. Right-click on “Command Prompt” and select “Run as administrator”.
2. In the Command Prompt window, type “ipconfig /flushdns” and press Enter. This will flush the DNS cache on your computer.
3. Wait for a few seconds until the process is completed. You should see a message confirming that the DNS cache has been successfully flushed.
4. Close the Command Prompt window and restart your computer.
Flushing the DNS cache can help resolve network connectivity issues by clearing any outdated or incorrect DNS entries. By doing so, your computer will retrieve the latest DNS information when accessing websites or other network resources.
If you continue to experience network access issues after flushing the DNS cache, you may need to troubleshoot other aspects of your network configuration or contact your internet service provider for further assistance.
Secure Your Wi-Fi Network

1. Change the default network name (SSID) and password of your Wi-Fi router. This prevents unauthorized users from easily accessing your network. Log in to your router’s settings and look for the option to change the network name and password.
2. Enable Wi-Fi encryption. The most secure option is WPA2-PSK (AES). Go to your router’s settings and select the encryption option that best suits your needs.
3. Disable remote management. This prevents outsiders from accessing your router’s settings from outside your network. Check your router’s settings and disable the remote management feature if it is enabled.
4. Enable MAC address filtering. This allows you to specify which devices are allowed to connect to your network. Access your router’s settings and look for the MAC address filtering option.
5. Keep your router’s firmware up to date. Manufacturers often release firmware updates to fix security vulnerabilities. Check for firmware updates regularly on the manufacturer’s website or in your router’s settings.
6. Position your router properly. Place it away from windows, microwave ovens, and cordless telephones to minimize interference. Choose a central location in your home or office to ensure a strong and secure signal.
Perform a Network Reset
Performing a network reset can help troubleshoot issues with no network access. Here’s how:
1. Start by restarting your computer or device. This can often resolve temporary network glitches.
2. Check your Wi-Fi or Ethernet connection. Ensure that the cables are securely connected and the Wi-Fi is enabled. If using Wi-Fi, make sure you are within range of the router.
3. If you’re using a Windows computer, open the Network Troubleshooter. Go to the Start menu, search for “Network Troubleshooter,” and follow the on-screen instructions to diagnose and fix network issues.
4. For Mac users, go to the System Preferences and select “Network.” Click on the Wi-Fi or Ethernet connection, then click the minus (-) button to remove it. Restart your Mac and add the connection back again.
5. If the above steps don’t work, try resetting your network settings. On Windows, open the Command Prompt and type “netsh int ip reset” and press Enter. For Mac, open the Terminal and type “sudo /usr/sbin/networksetup -setv6off Wi-Fi” and press Enter. Restart your device after executing these commands.
Reset Your Computer’s Network Settings
To reset your computer’s network settings, follow these steps:
1. First, ensure that all your network cables are securely connected and that your router is turned on.
2. On your computer, navigate to the network settings. In Windows, this can be done by going to the Control Panel and selecting “Network and Internet” followed by “Network and Sharing Center.”
3. Once in the network settings, locate the option to reset your network. In Windows, this can usually be found under the “Change adapter settings” section.
4. Right-click on your network connection and select “Properties.”
5. In the properties window, locate the “Internet Protocol Version 4 (TCP/IPv4)” or “Internet Protocol Version 6 (TCP/IPv6)” option, depending on your network setup.
6. Highlight the option and click on the “Properties” button.
7. In the next window, select the option to “Obtain an IP address automatically” and “Obtain DNS server address automatically.”
8. Click “OK” to save the changes.
9. Restart your computer for the changes to take effect.
FAQ
How do I fix no network access?
To fix no network access, you can try the following steps:
– Test your internet connection on another device.
– Move closer to the wireless router.
– Run a troubleshooter tool to identify and fix any network issues.
– Reset your network settings.
– Perform a virus scan to check for any malware that may be affecting your network.
– Disconnect your devices from Wi-Fi and reconnect them.
– Temporarily pause your antivirus software to see if it is causing any interference.
Why does my phone say no network access?
Your phone may say “no network access” due to various reasons such as settings glitches, tower service issues, or billing problems. To resolve this issue, a quick and reliable solution is to toggle Airplane Mode on and off on your Android device and then restart it.
Why is my internet connected but no internet?
Your internet may be connected but not working due to various reasons. To resolve this issue, you can try resetting your router by unplugging it, waiting for a minute, and then plugging it back in. Another solution is to disconnect from your Wi-Fi network and reconnect again. Updating your network drivers may also help.
Why do I not have a network connection?
I do not have a network connection because there may be physical connectivity issues such as a loose or unplugged network cable, modem, or router. Additionally, if I am on a wireless network, my computer’s wireless network interface card might be turned off.
